Dialer is a fully functional app that pairs with a user's phone to handle calls and manage contacts on the car screen.
Built into Android Automotive OS, Dialer provides Bluetooth calling with minimal driver distraction.
This guide explains the overall look and user experience of Dialer.
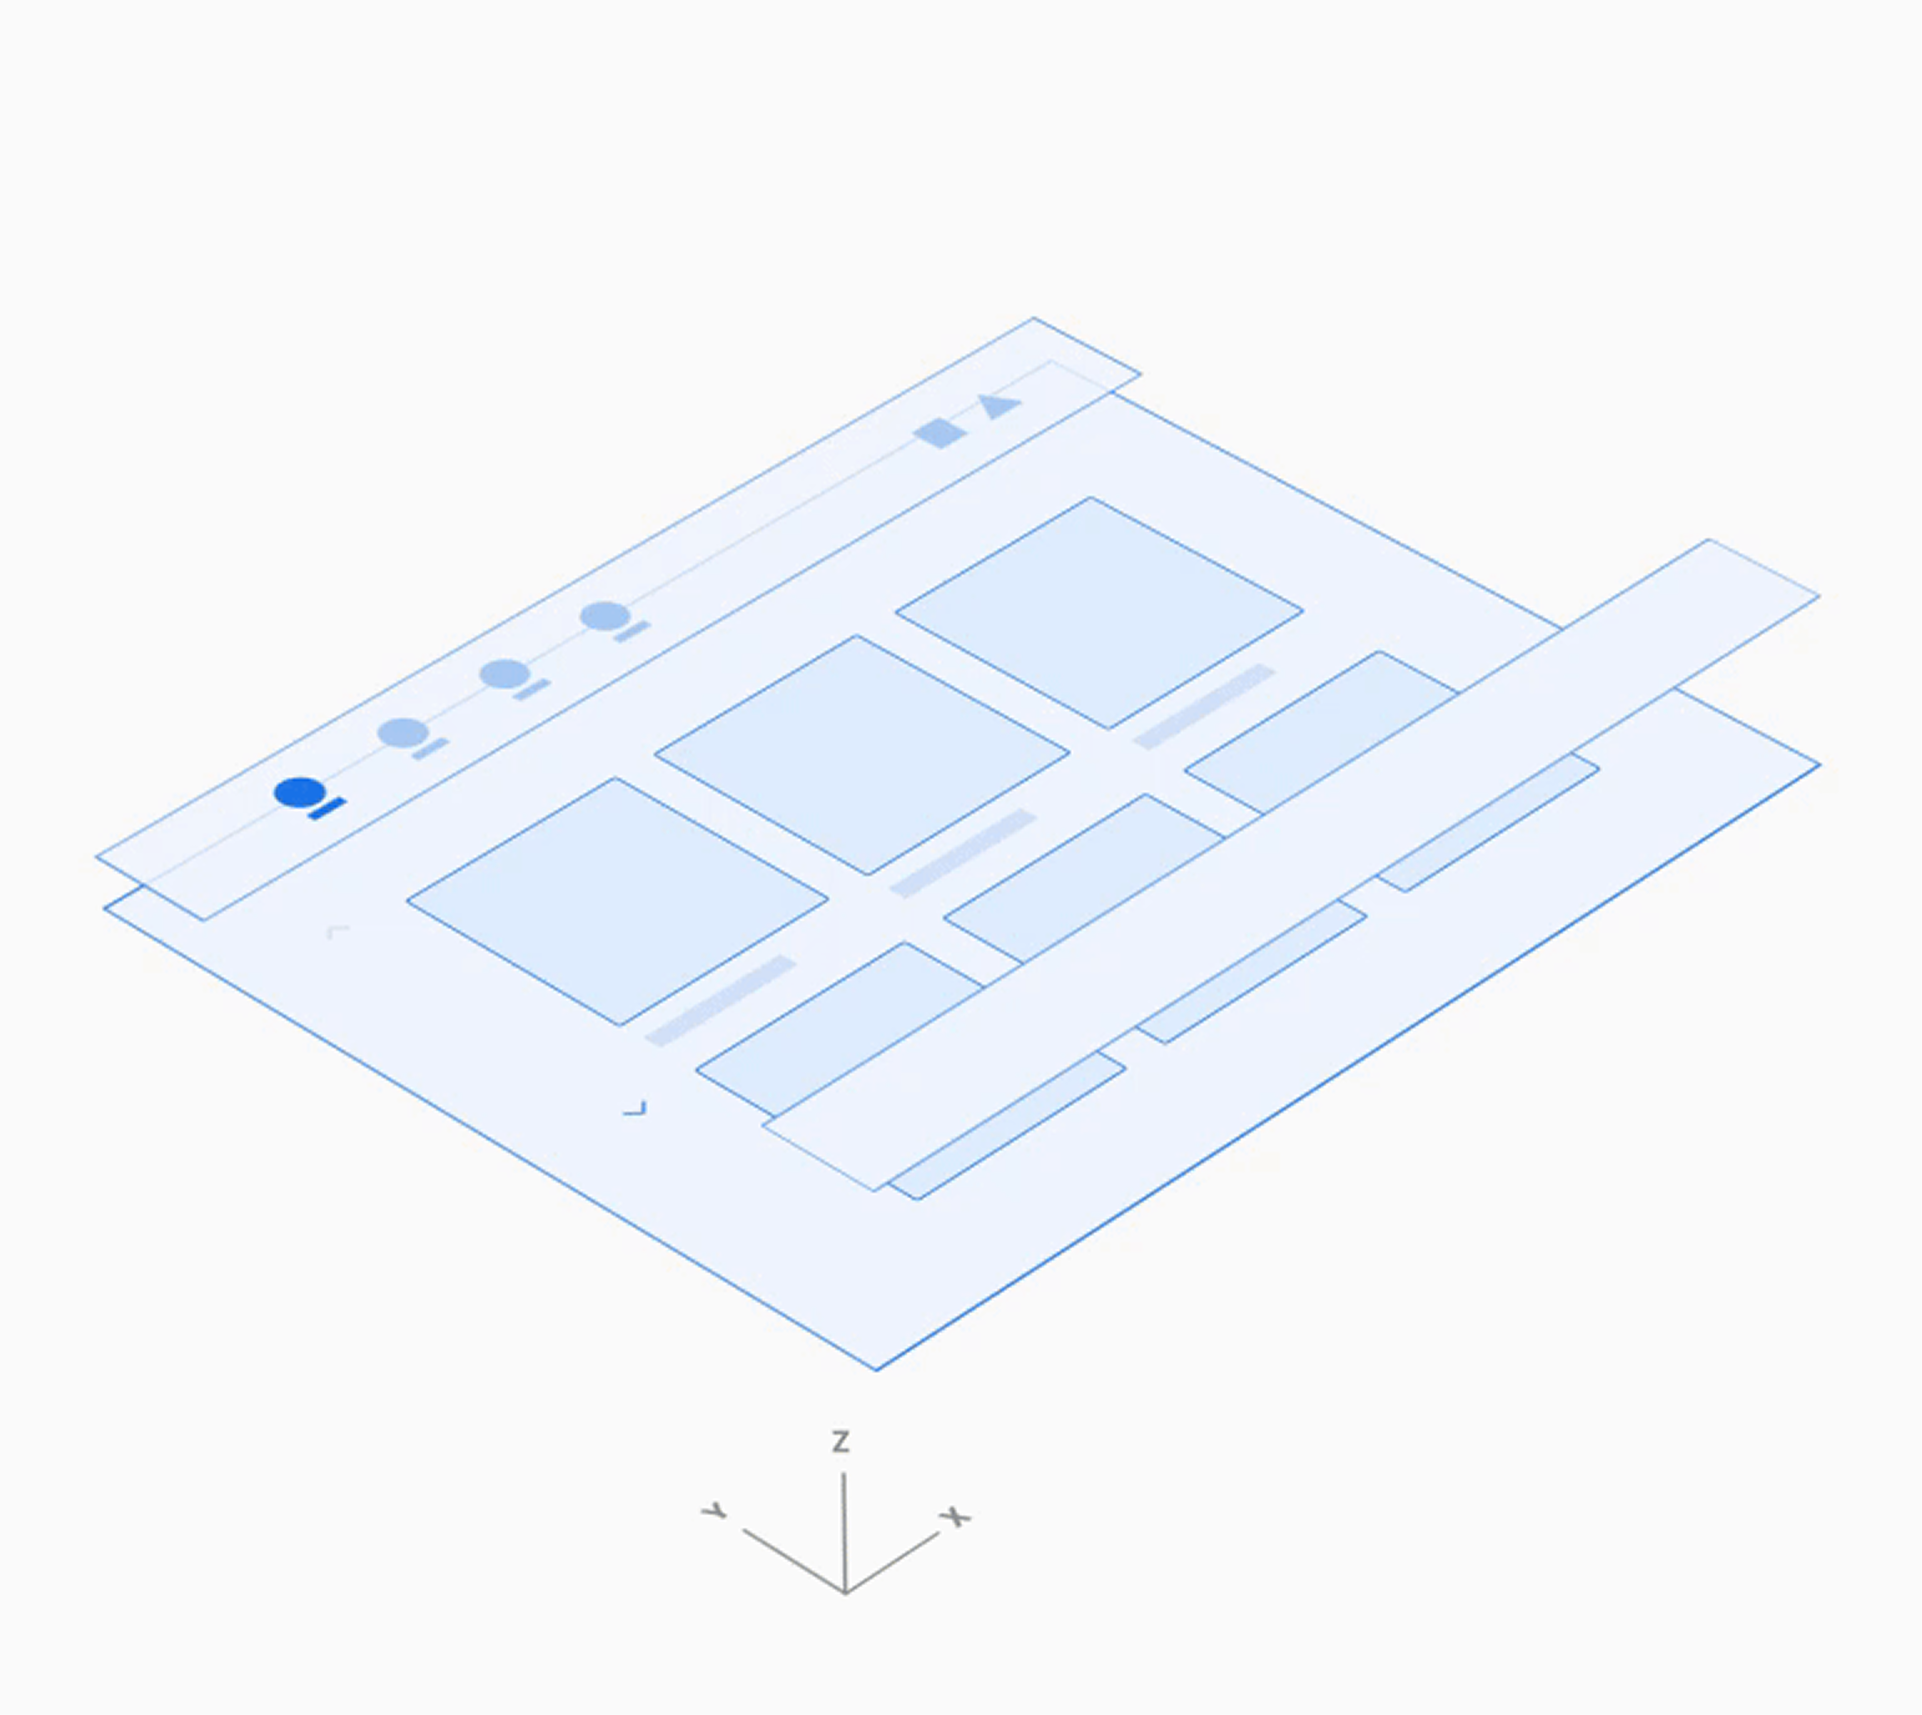
Spatial model
This section describes the main elements of the Dialer, what they do, and the architecture that holds them together.
Anatomy
The Dialer UI includes four main types of views and recurring elements, such as the app bar for primary navigation. Here's a breakdown of each view, what's included, and when it appears.
| View type | Elements included | Displayed when |
|---|---|---|
| Browsable contacts (Recents, Contacts, Favorites, and detail views) |
|
The user is browsing contact and call information or placing a call to a contact |
| Dialpad |
|
The user is entering a phone number to place a call |
| In-call |
|
A call is in progress |
| App control (Search and Settings) |
|
The user is searching for a contact or adjusting app settings |
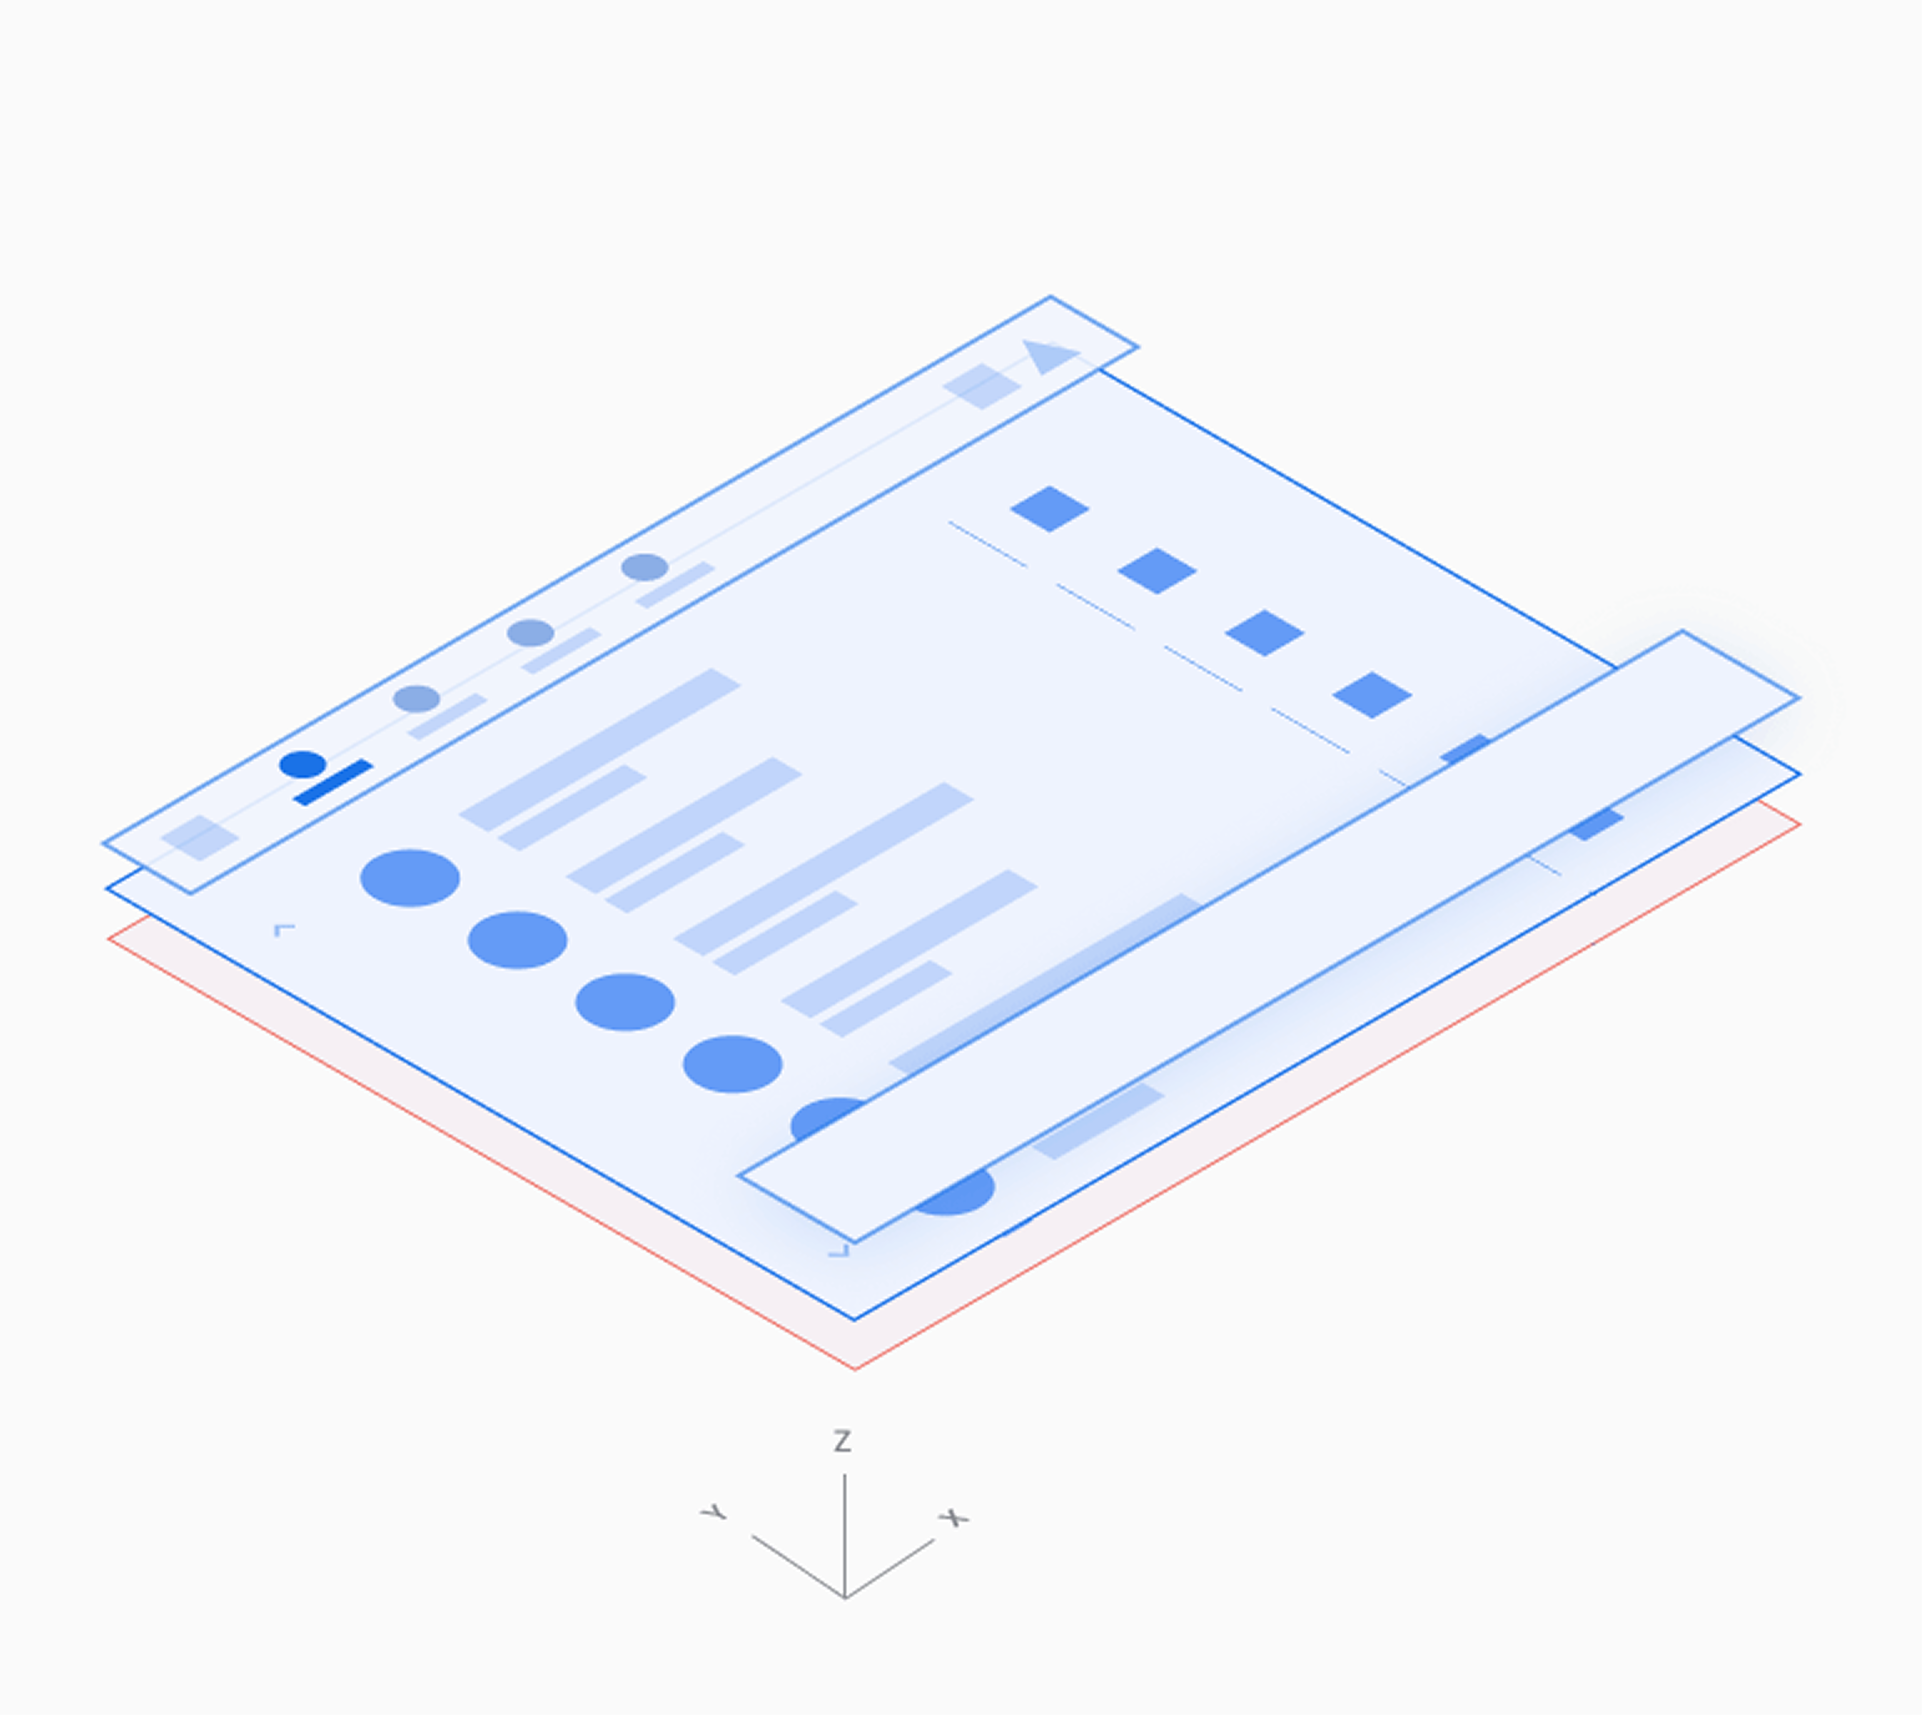
Browsable contact views
2. Browsable contact space.
This is the default arrangement of the app bar and contact space. Depending on screen dimensions, primary navigation and app controls might be stacked, rather than kept in a single horizontal bar.
Dialpad and in-call views
|
2. Control bar. |
App-control views (Search and Settings)
2. Search overlay |
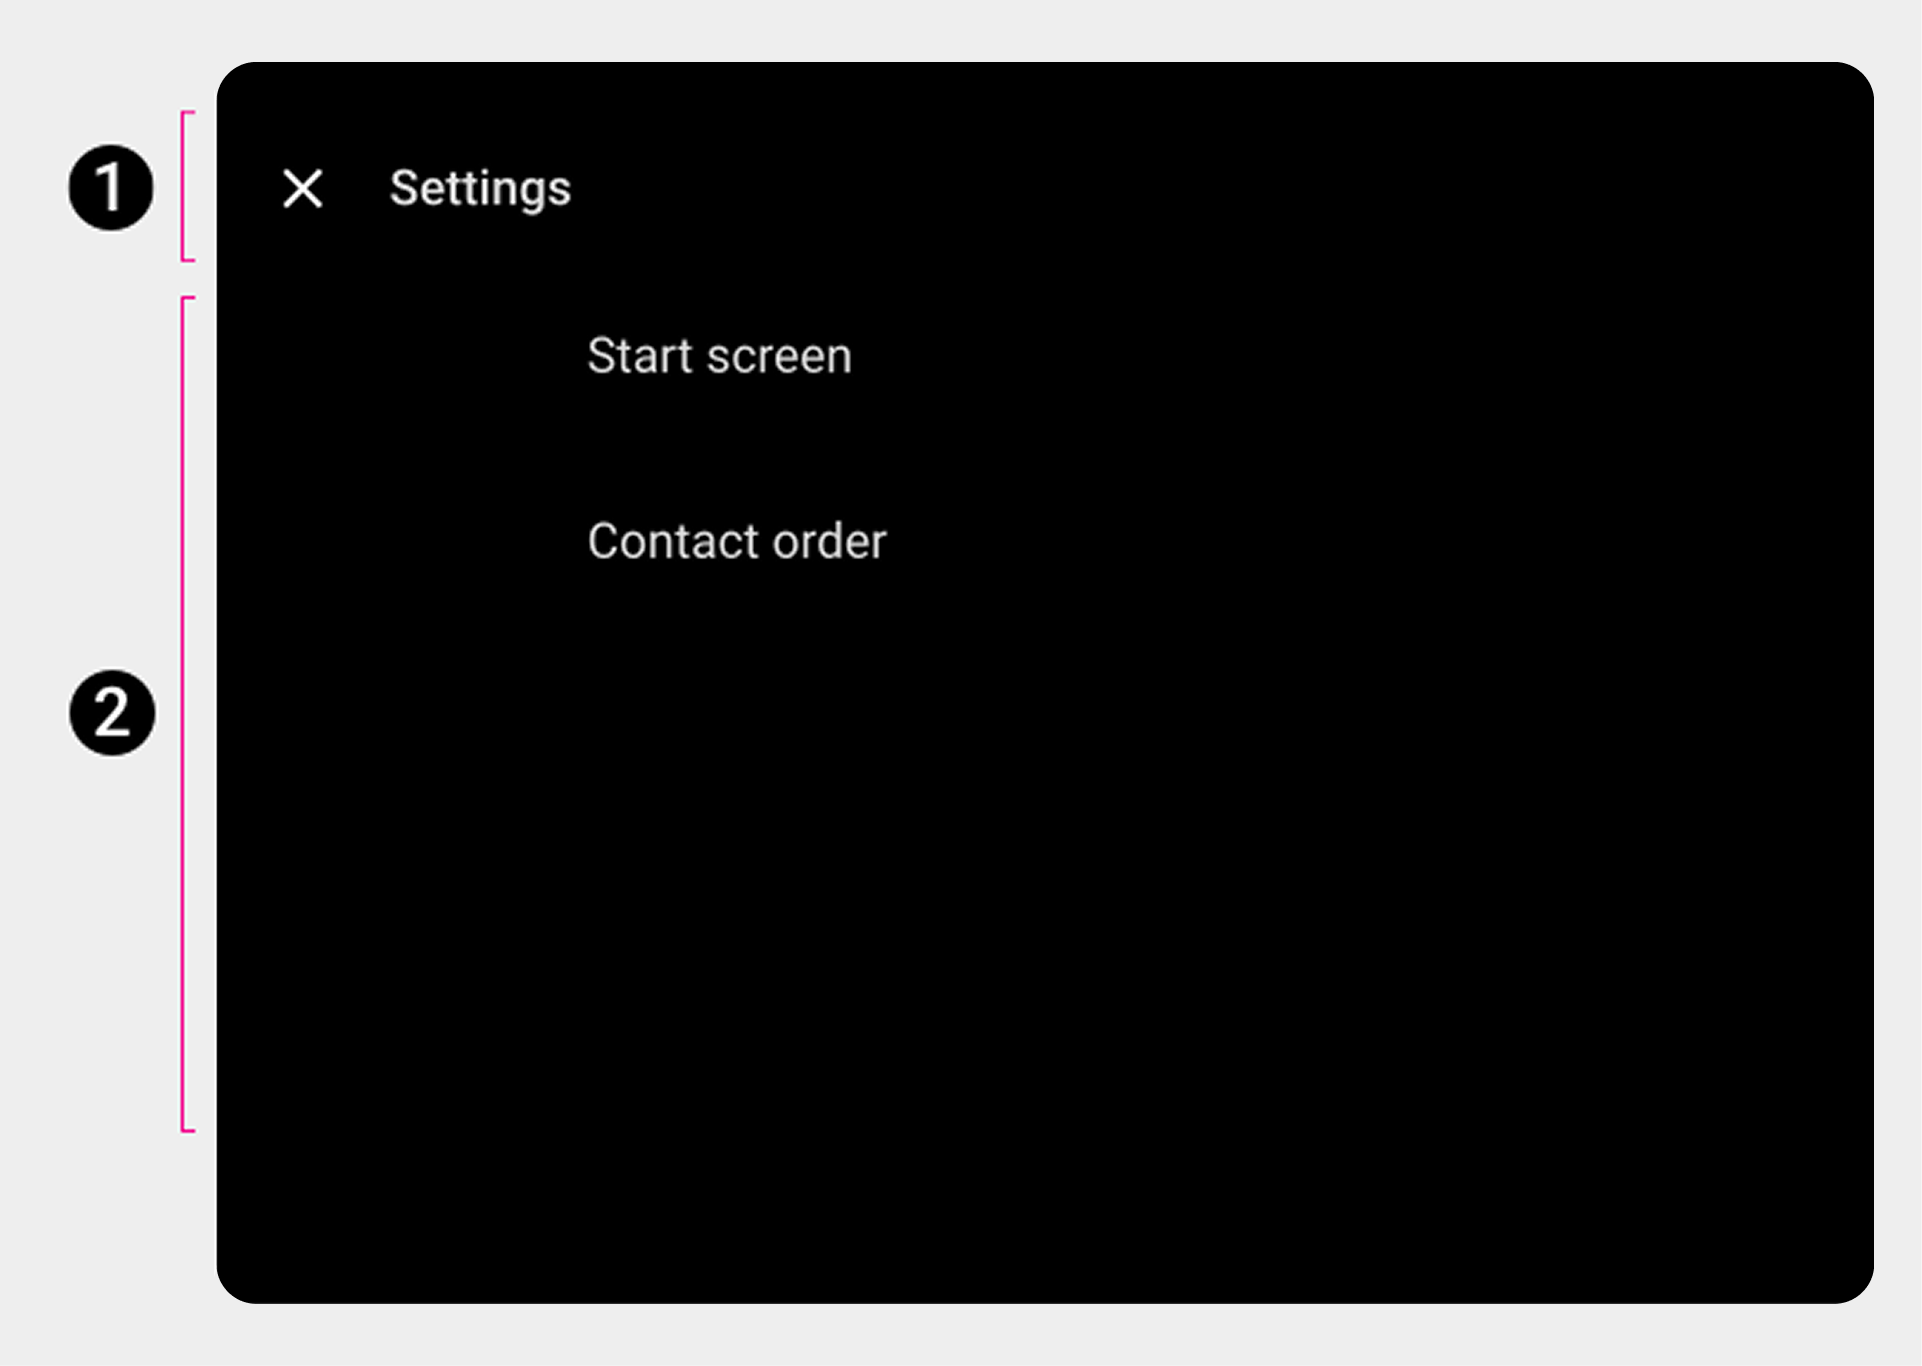
2. Settings overlay. |
Primary navigation (app bar)
The primary app bar navigation consists of exposed tabs:
|

|
App controls
App controls on the right side of the app bar provide access to in-app search and settings functions (represented by the magnifying-glass and gear icons, respectively).
|
|
Browsable content space
In the browsable contact space, users can scroll vertically through contacts and navigate through z-space into individual contact details, down one level of hierarchy.
Because navigating through multiple levels increases the driver's cognitive load, in Dialer there are only two levels of contact: the primary level and contact details.
|
|
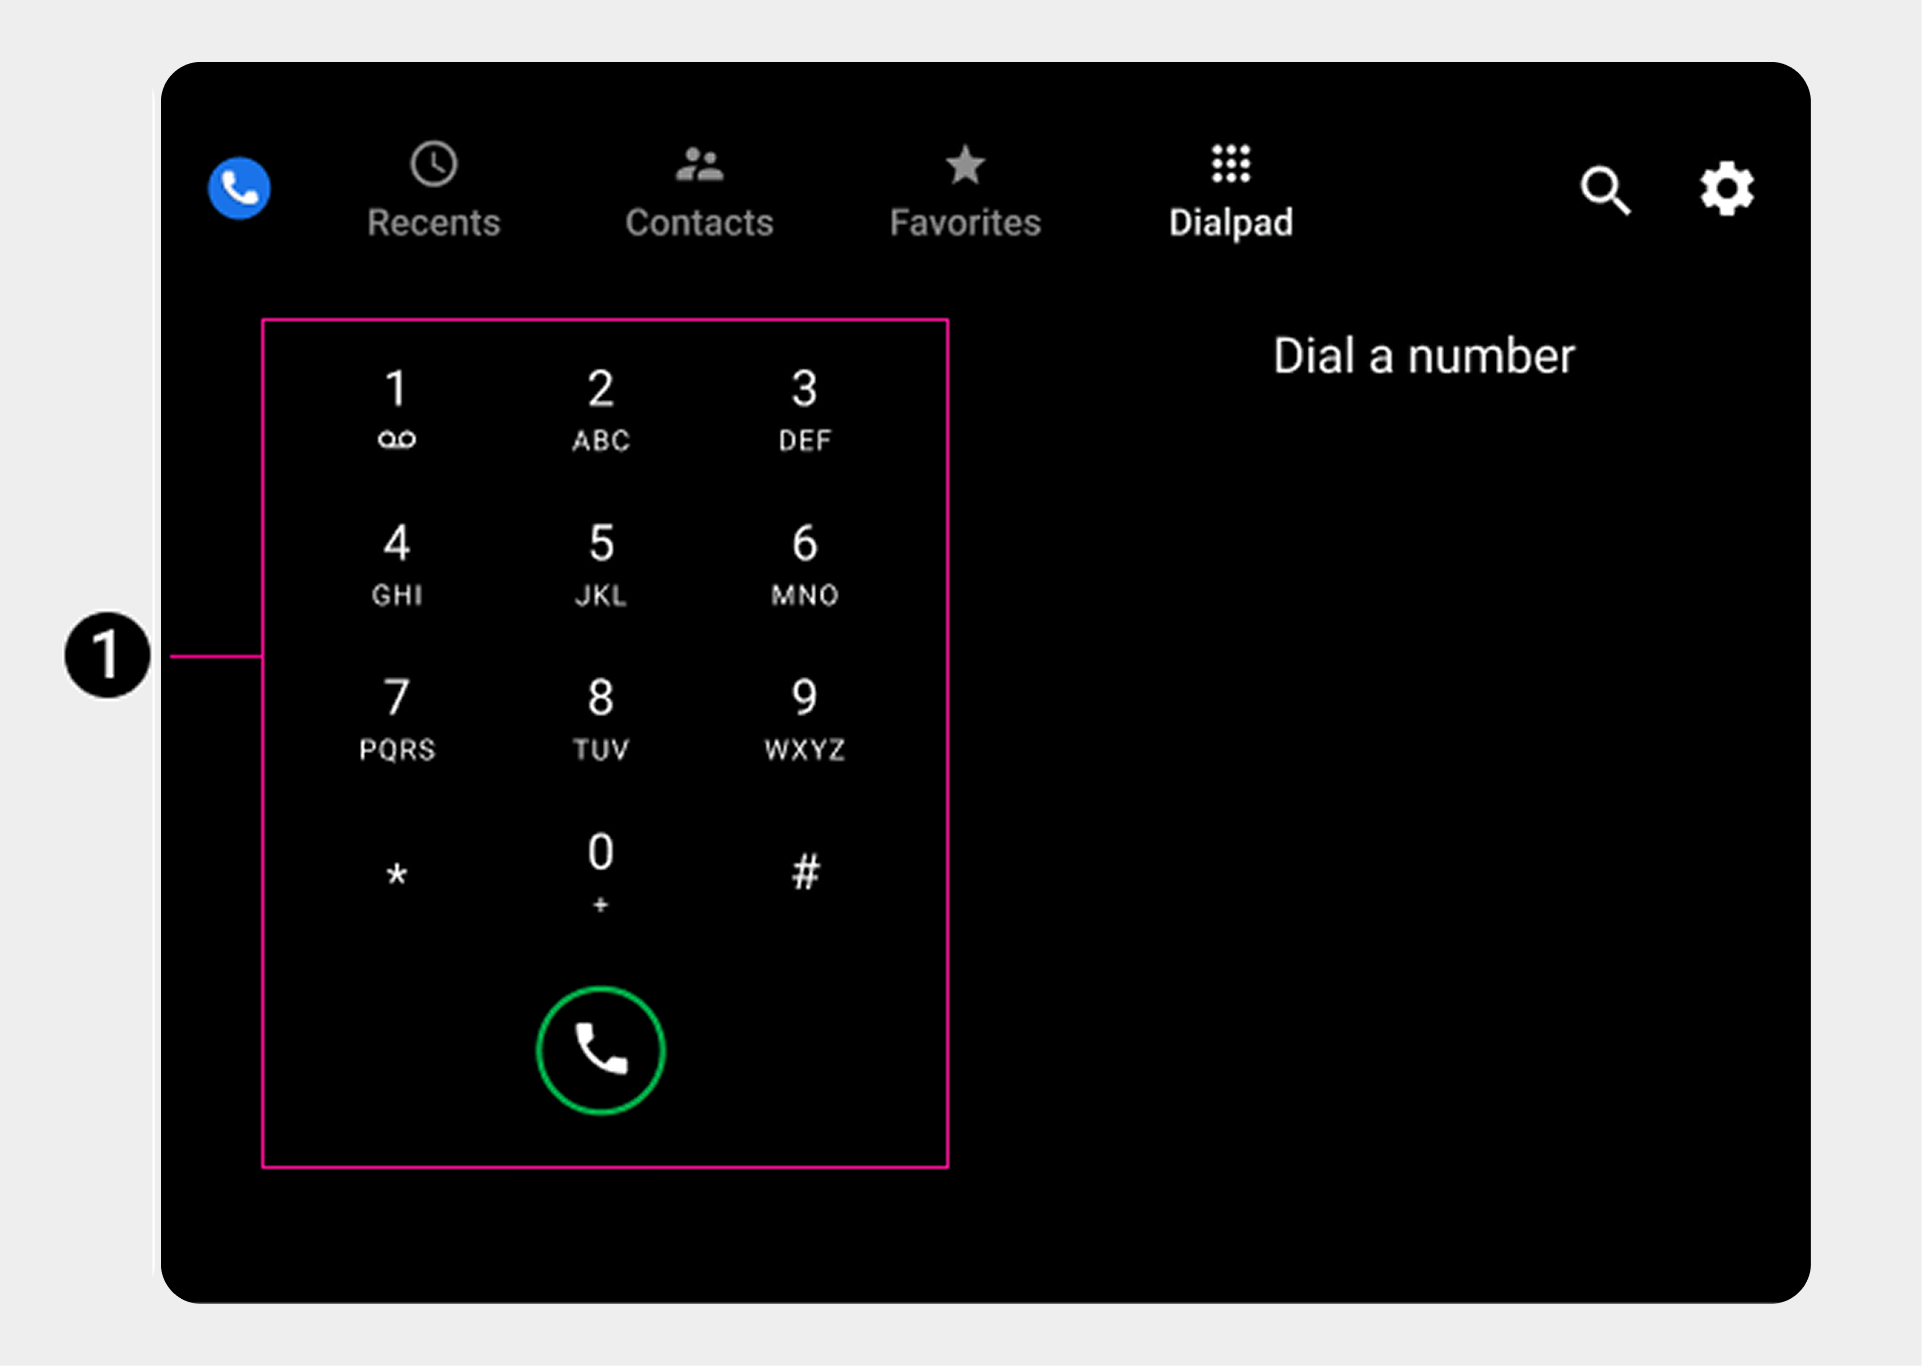
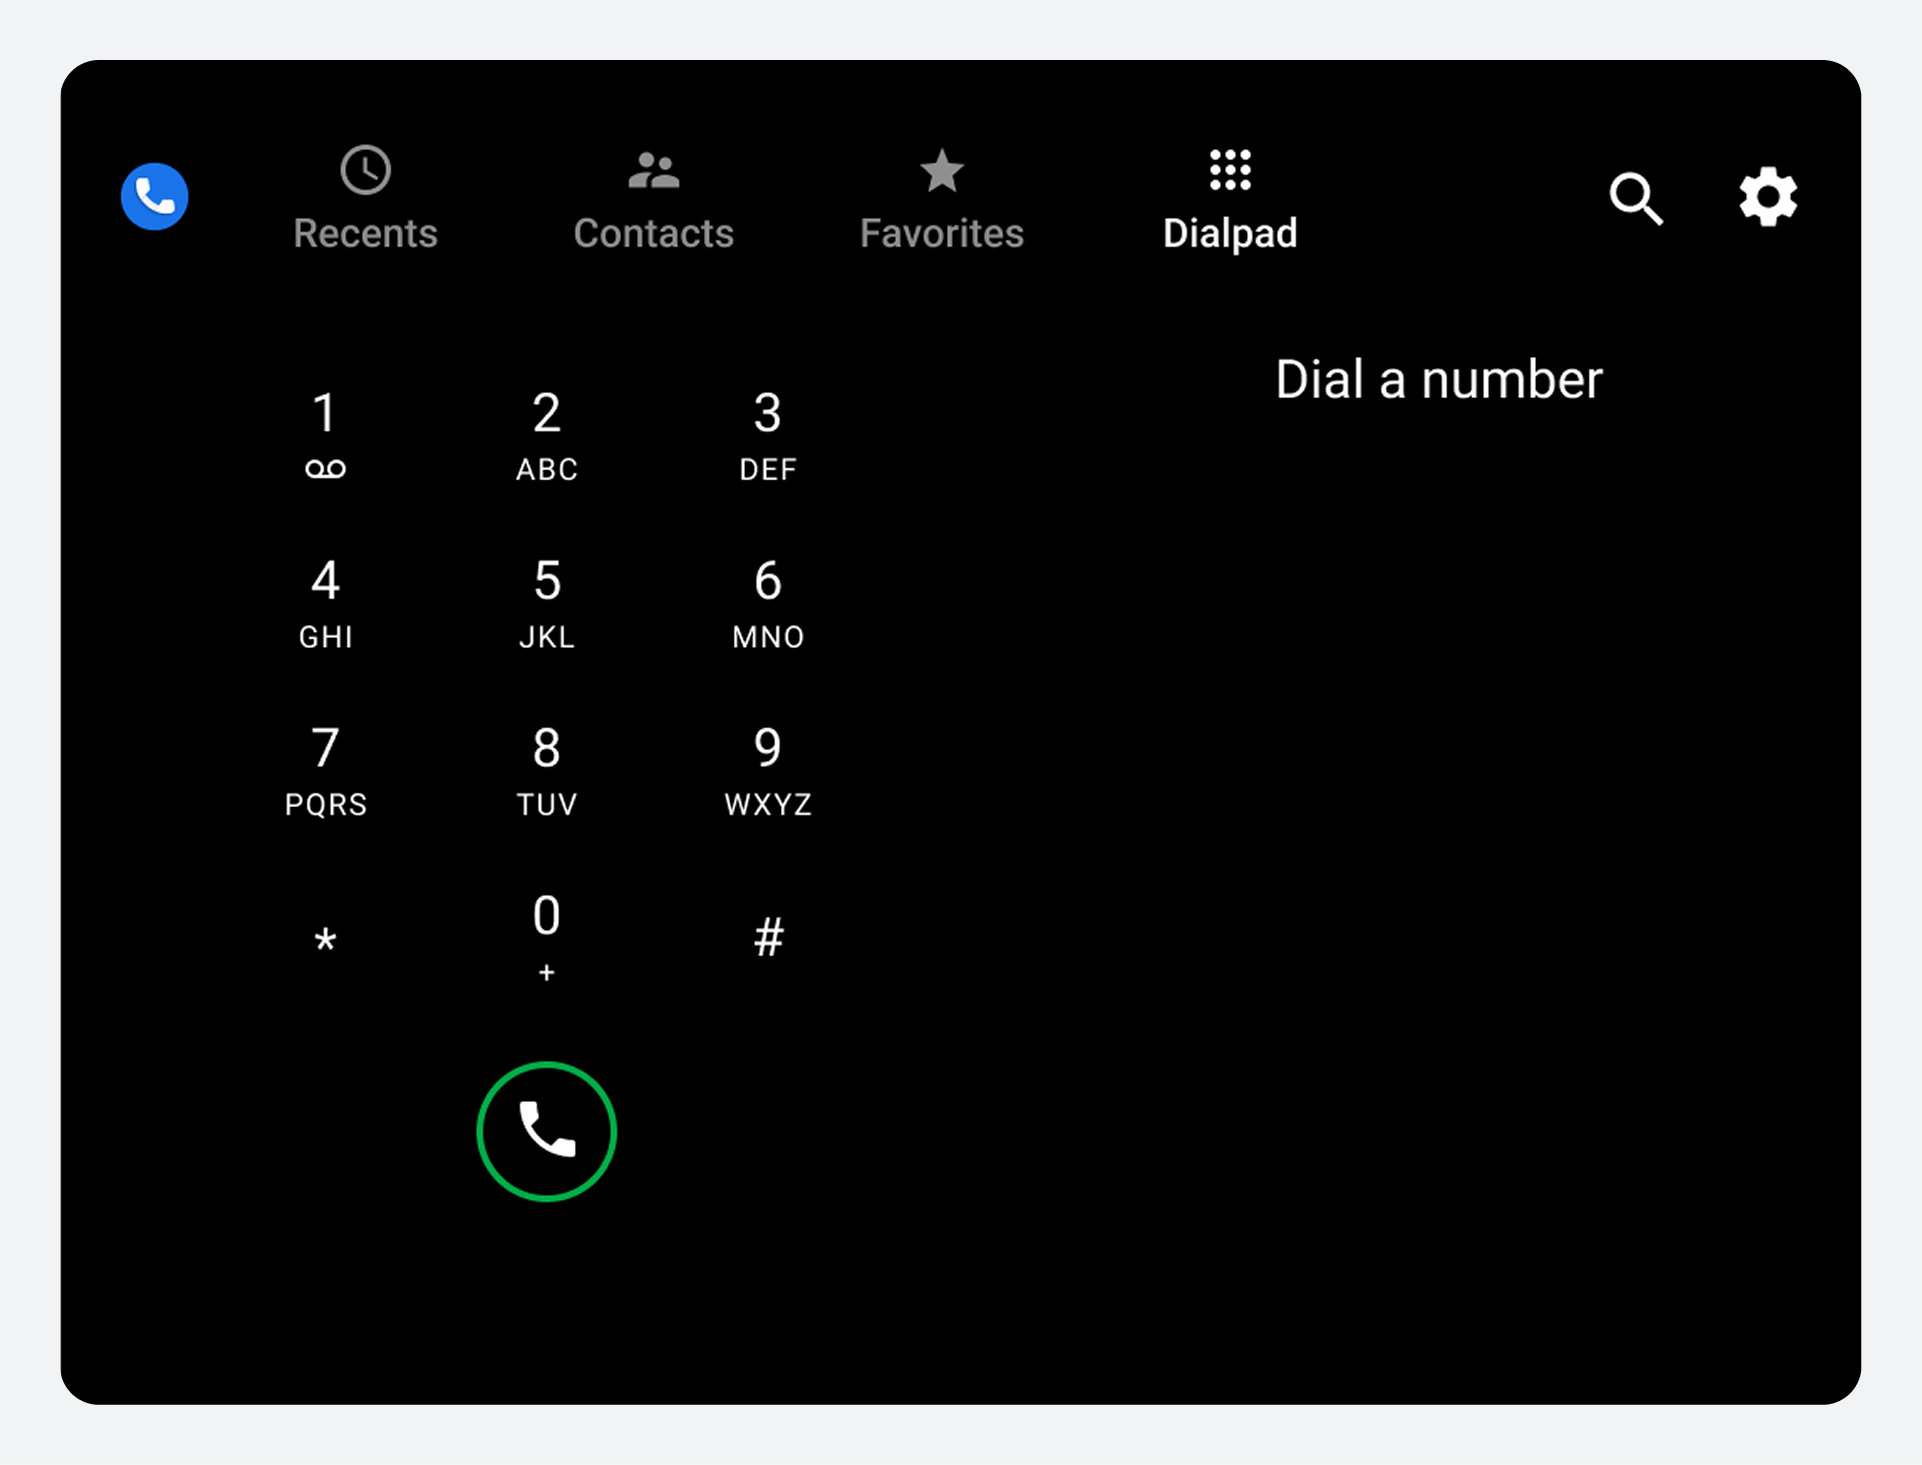
Dialpad
Users can select the Dialpad tab to display a dialpad for placing a call. If a partially entered number uniquely corresponds to a phone number in contacts, the match is displayed and the user can place a call without having to enter the full number.
|
|
Navigate the app
Users navigate to the main views and activities in Dialer using the app bar at the top of the screen.
App bar elements
| App-bar tab or control | What it lets users do |
|---|---|
| Recents | Review and return recent phone calls |
| Contacts | Browse contacts and place calls |
| Favorites | Access favorite contacts quickly and call them |
| Dialpad | Enter phone numbers to place calls |
| Search (magnifying glass icon) | Search for a specific contact |
| Settings (gear icon) | Choose preferred start screen and contact order (first or last name) |
When a user selects a tab, the destination reflects the user's previous interaction with that view. For example, if a list of contacts was previously scrolled during the app session, the scroll position is retained when the user returns to that tab.
In the Recents and Contacts views, users can navigate to a lower-level detail view for each contact, as described in Navigate contact details. In detail view, the app bar is replaced by an app view for each contact, as described in Navigate contact details. In detail view, the app bar is replaced by an app header with a back button for returning to the top-level view.
Browse and search contacts
Users can browse an alphabetical list in the Contacts view and navigate to details about each contact, or use the Search control to find someone.
Other views that show contacts include Favorites (after the user has added favorites) and Recents (after the user has a call history). Users can start a search or place a call from any of these views, or from the Dialpad view.
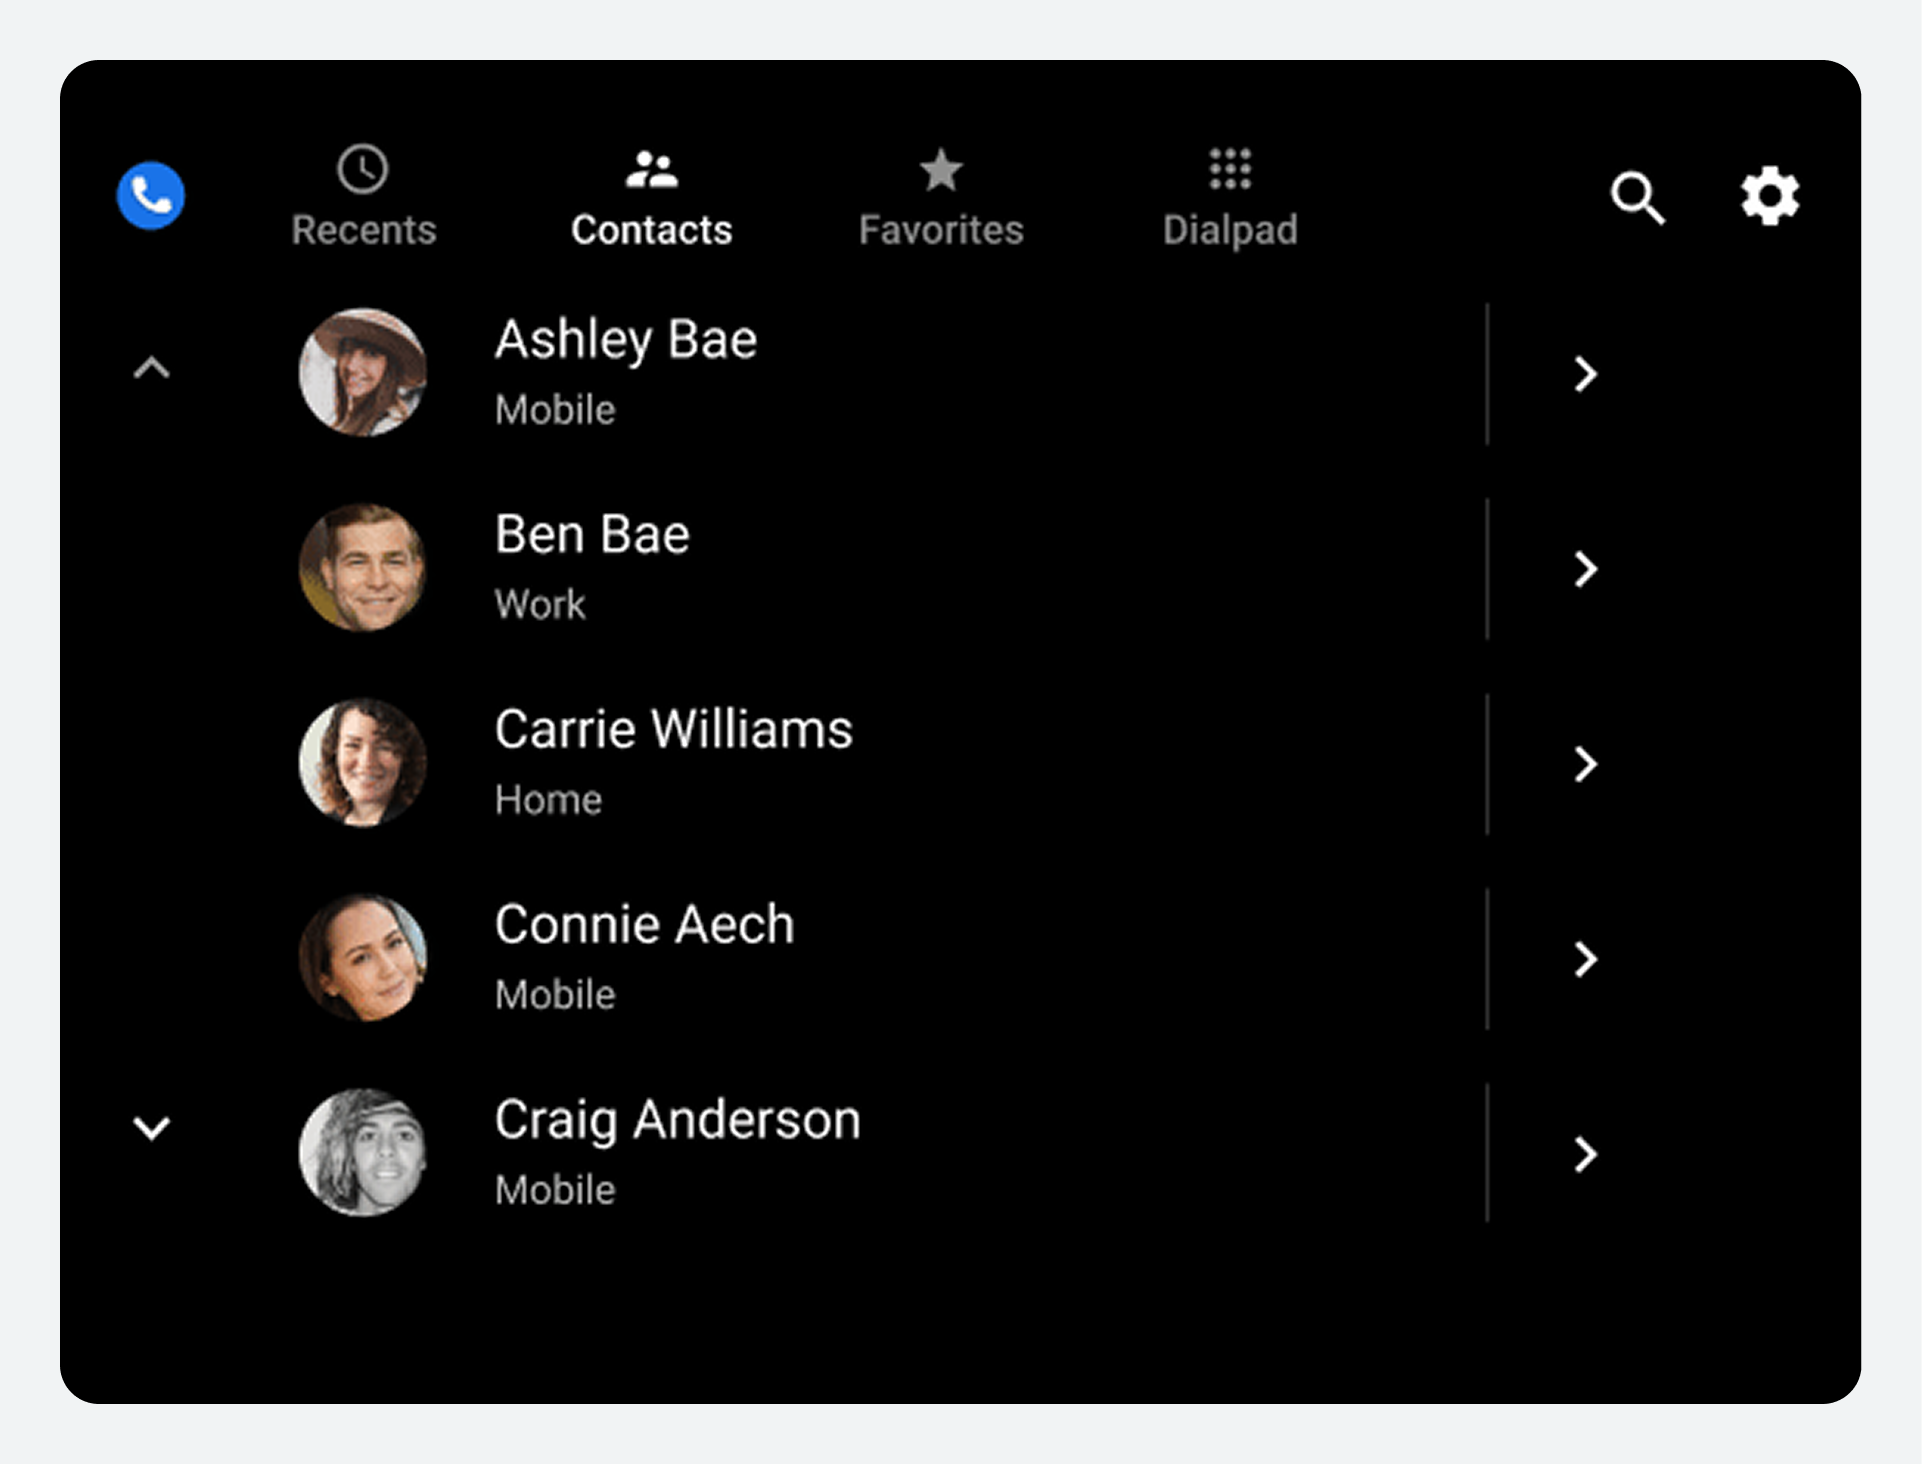
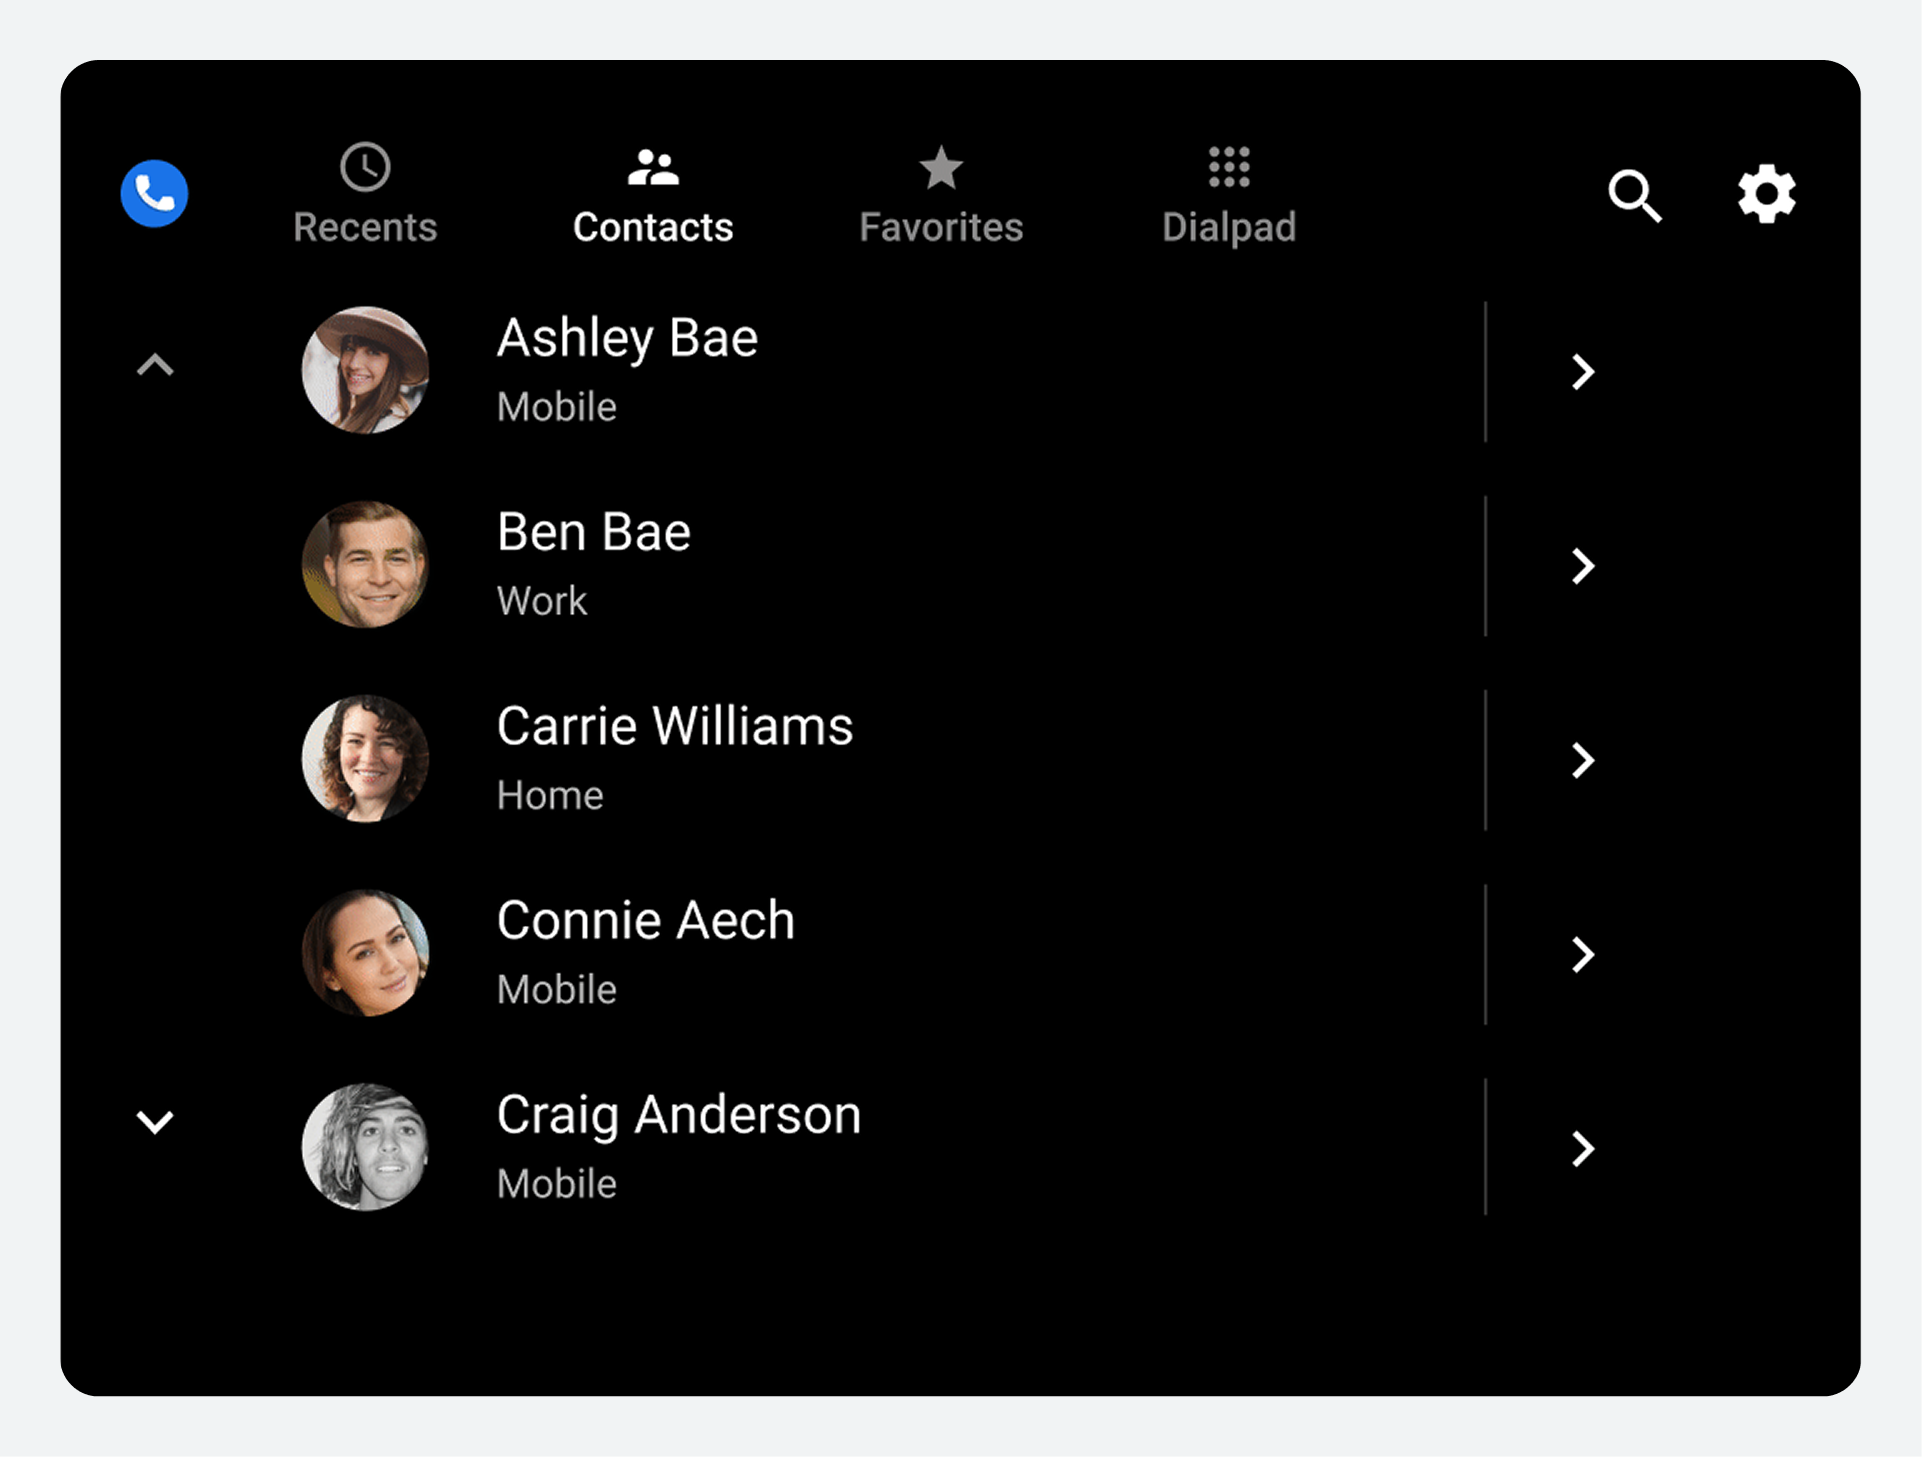
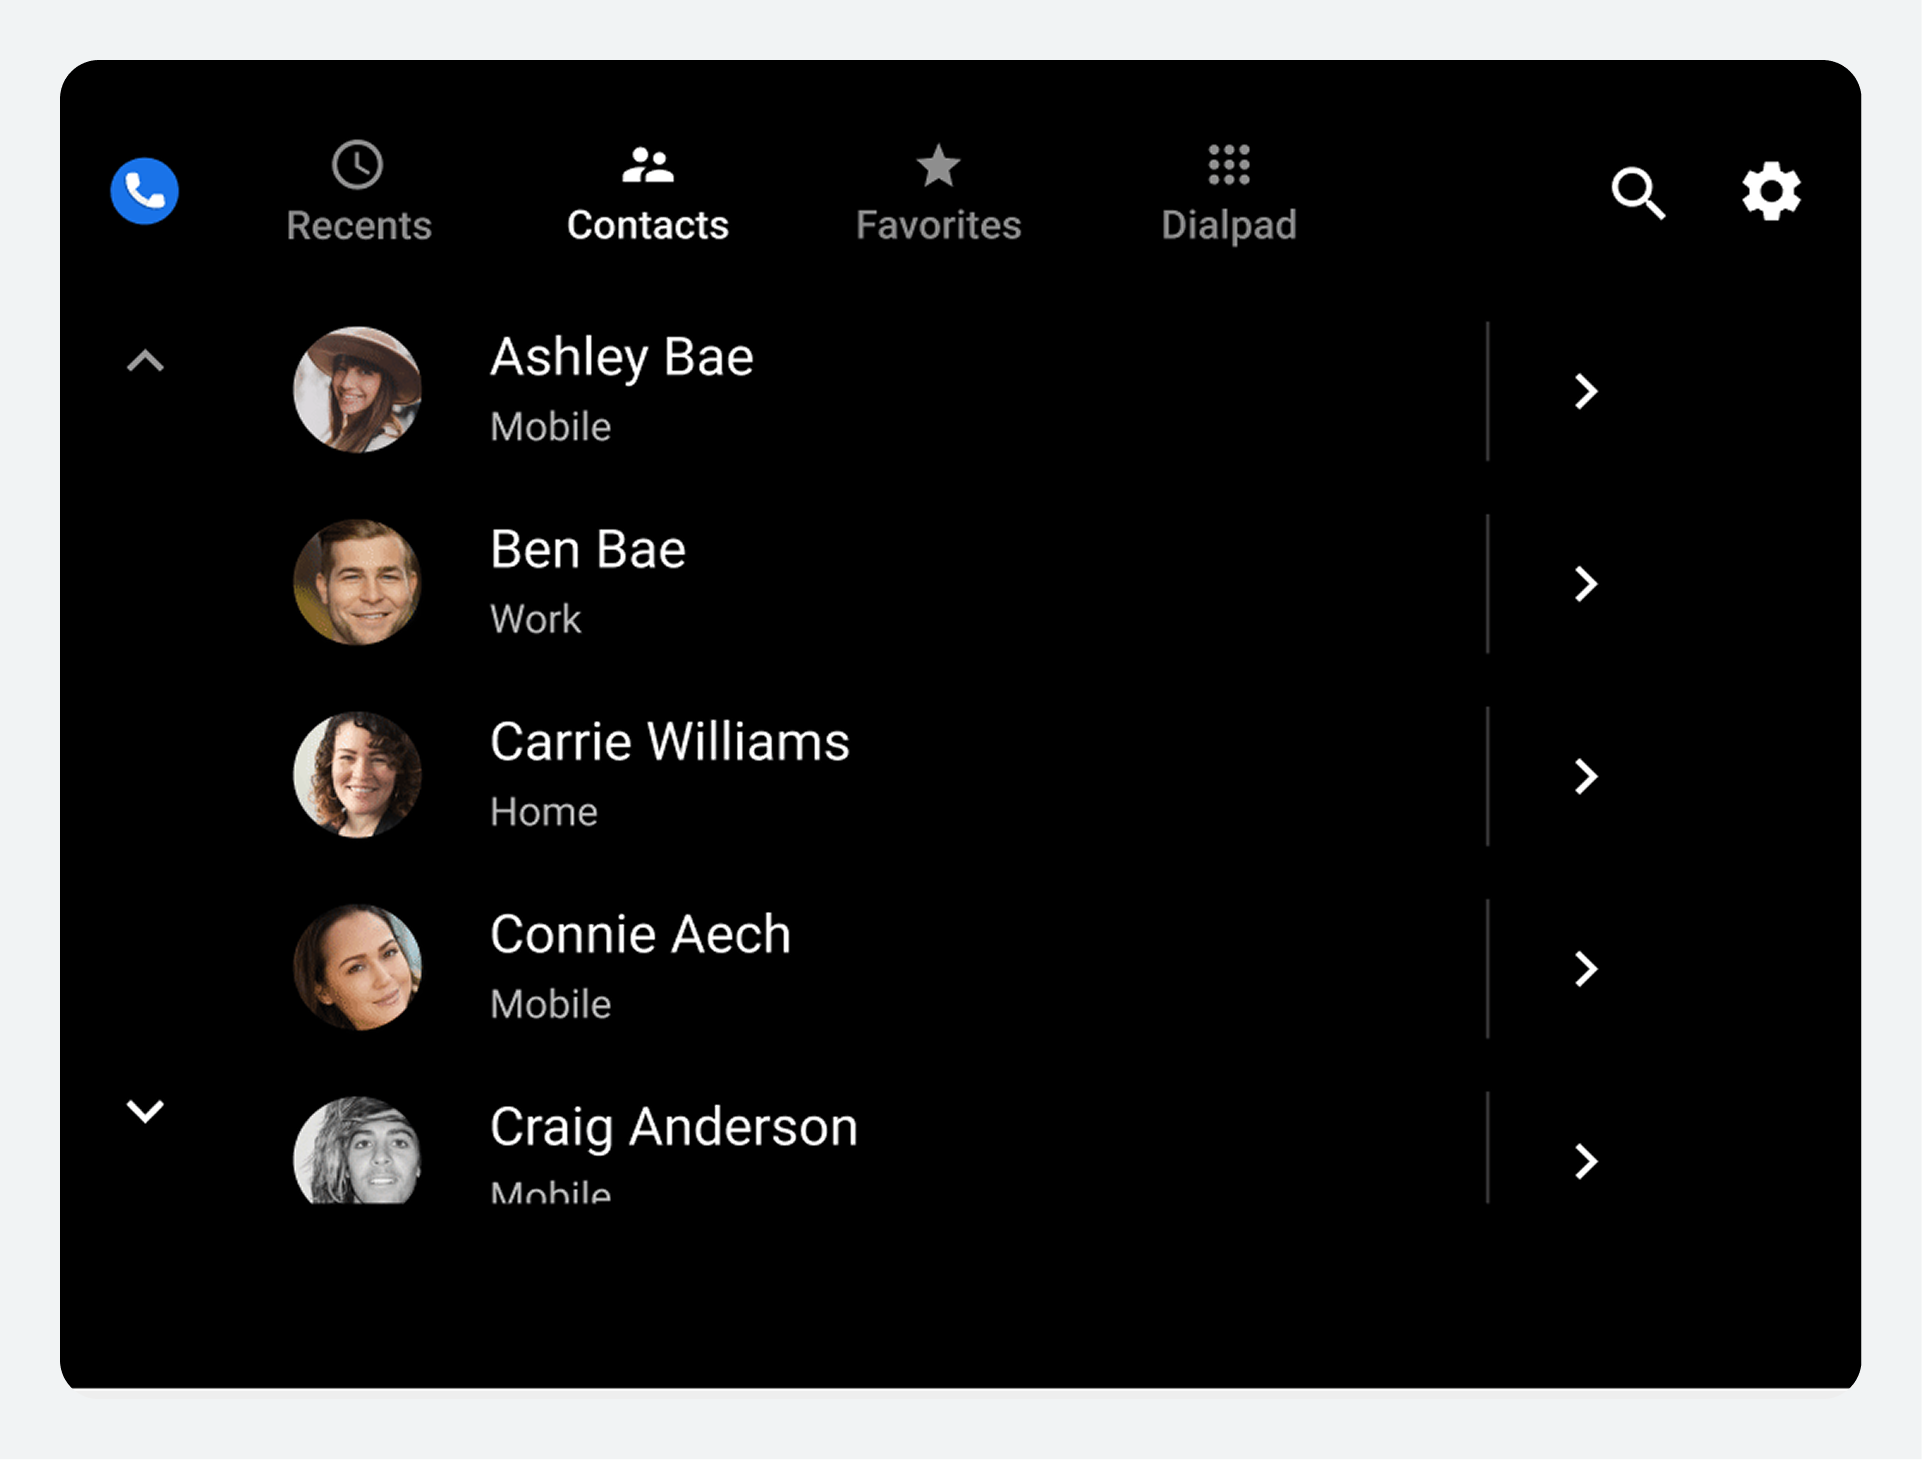
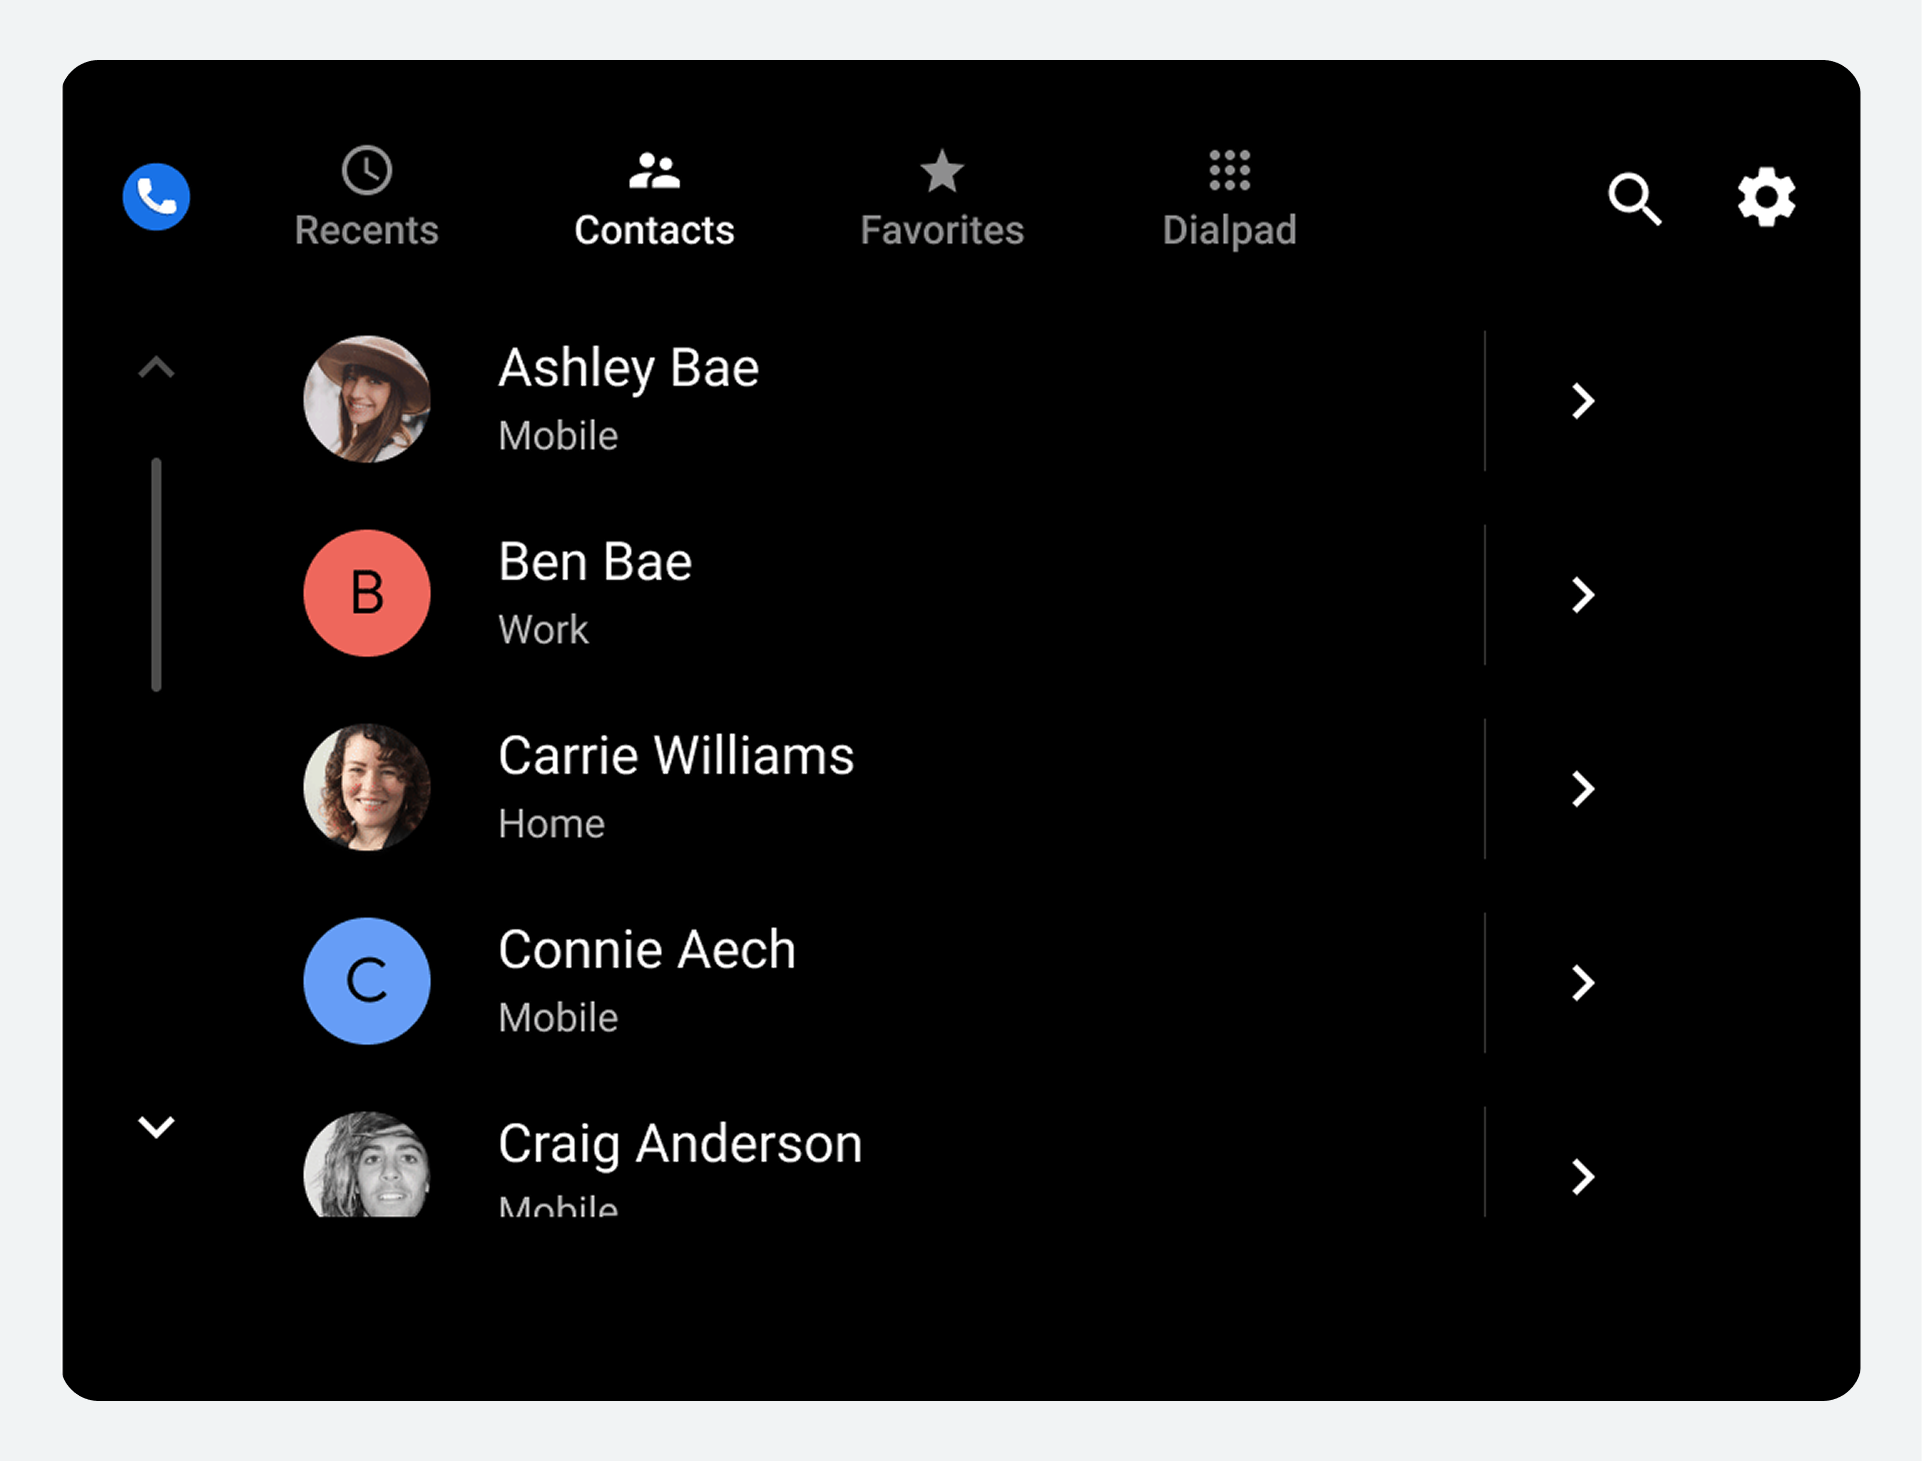
Browse the Contacts list
Users can scroll vertically through the top-level Contacts list to browse their contacts, which are imported from their phones. Favorites and preferred phone numbers aren't imported; users specify these within Dialer.
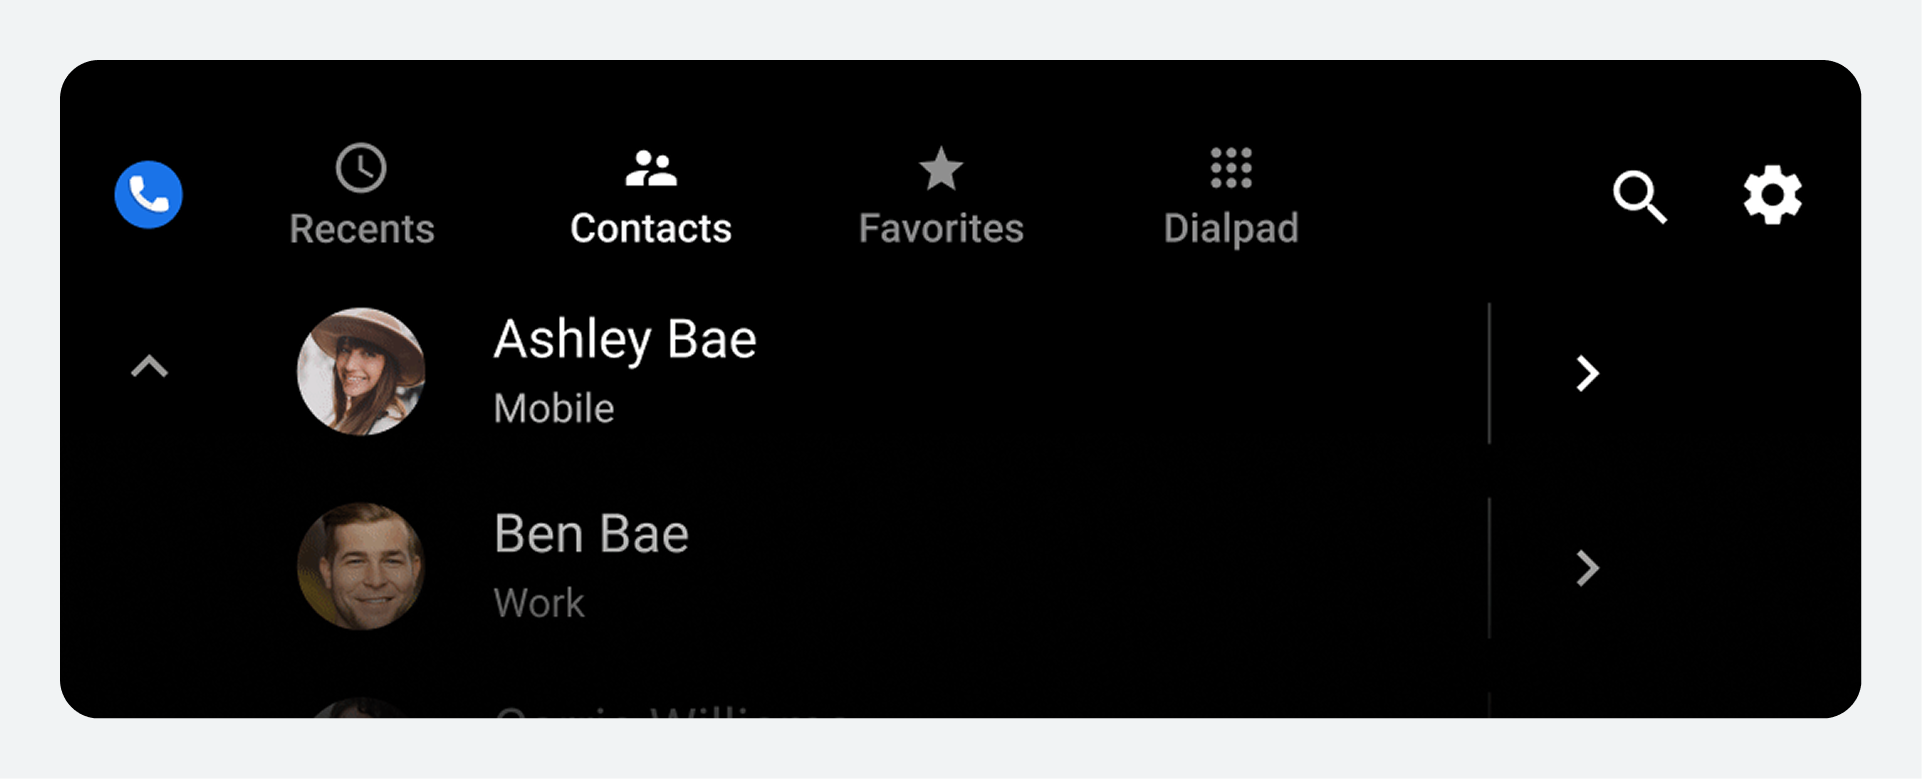
Each list item displays information about the contact and allows for two possible actions: calling the contact or viewing contact details.
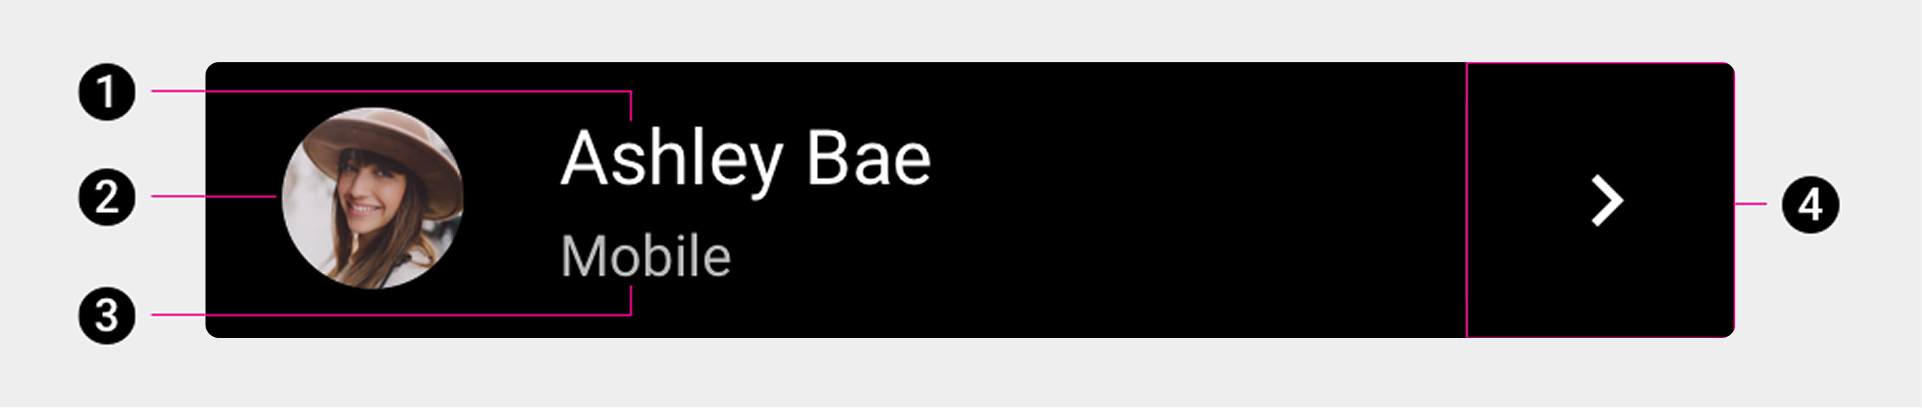
1. Name of contact
2. Avatar
3. Contact's preferred phone number type
4. Contact details icon.
Users can select any of the first three elements (or the area near them) to place a call to a contact's preferred number, or they can select the contact detail icon to navigate to a more detailed view of the contact.
Navigate contact details
When users browse the Contacts view, they can select a contact detail icon to see a more detailed view of a contact.
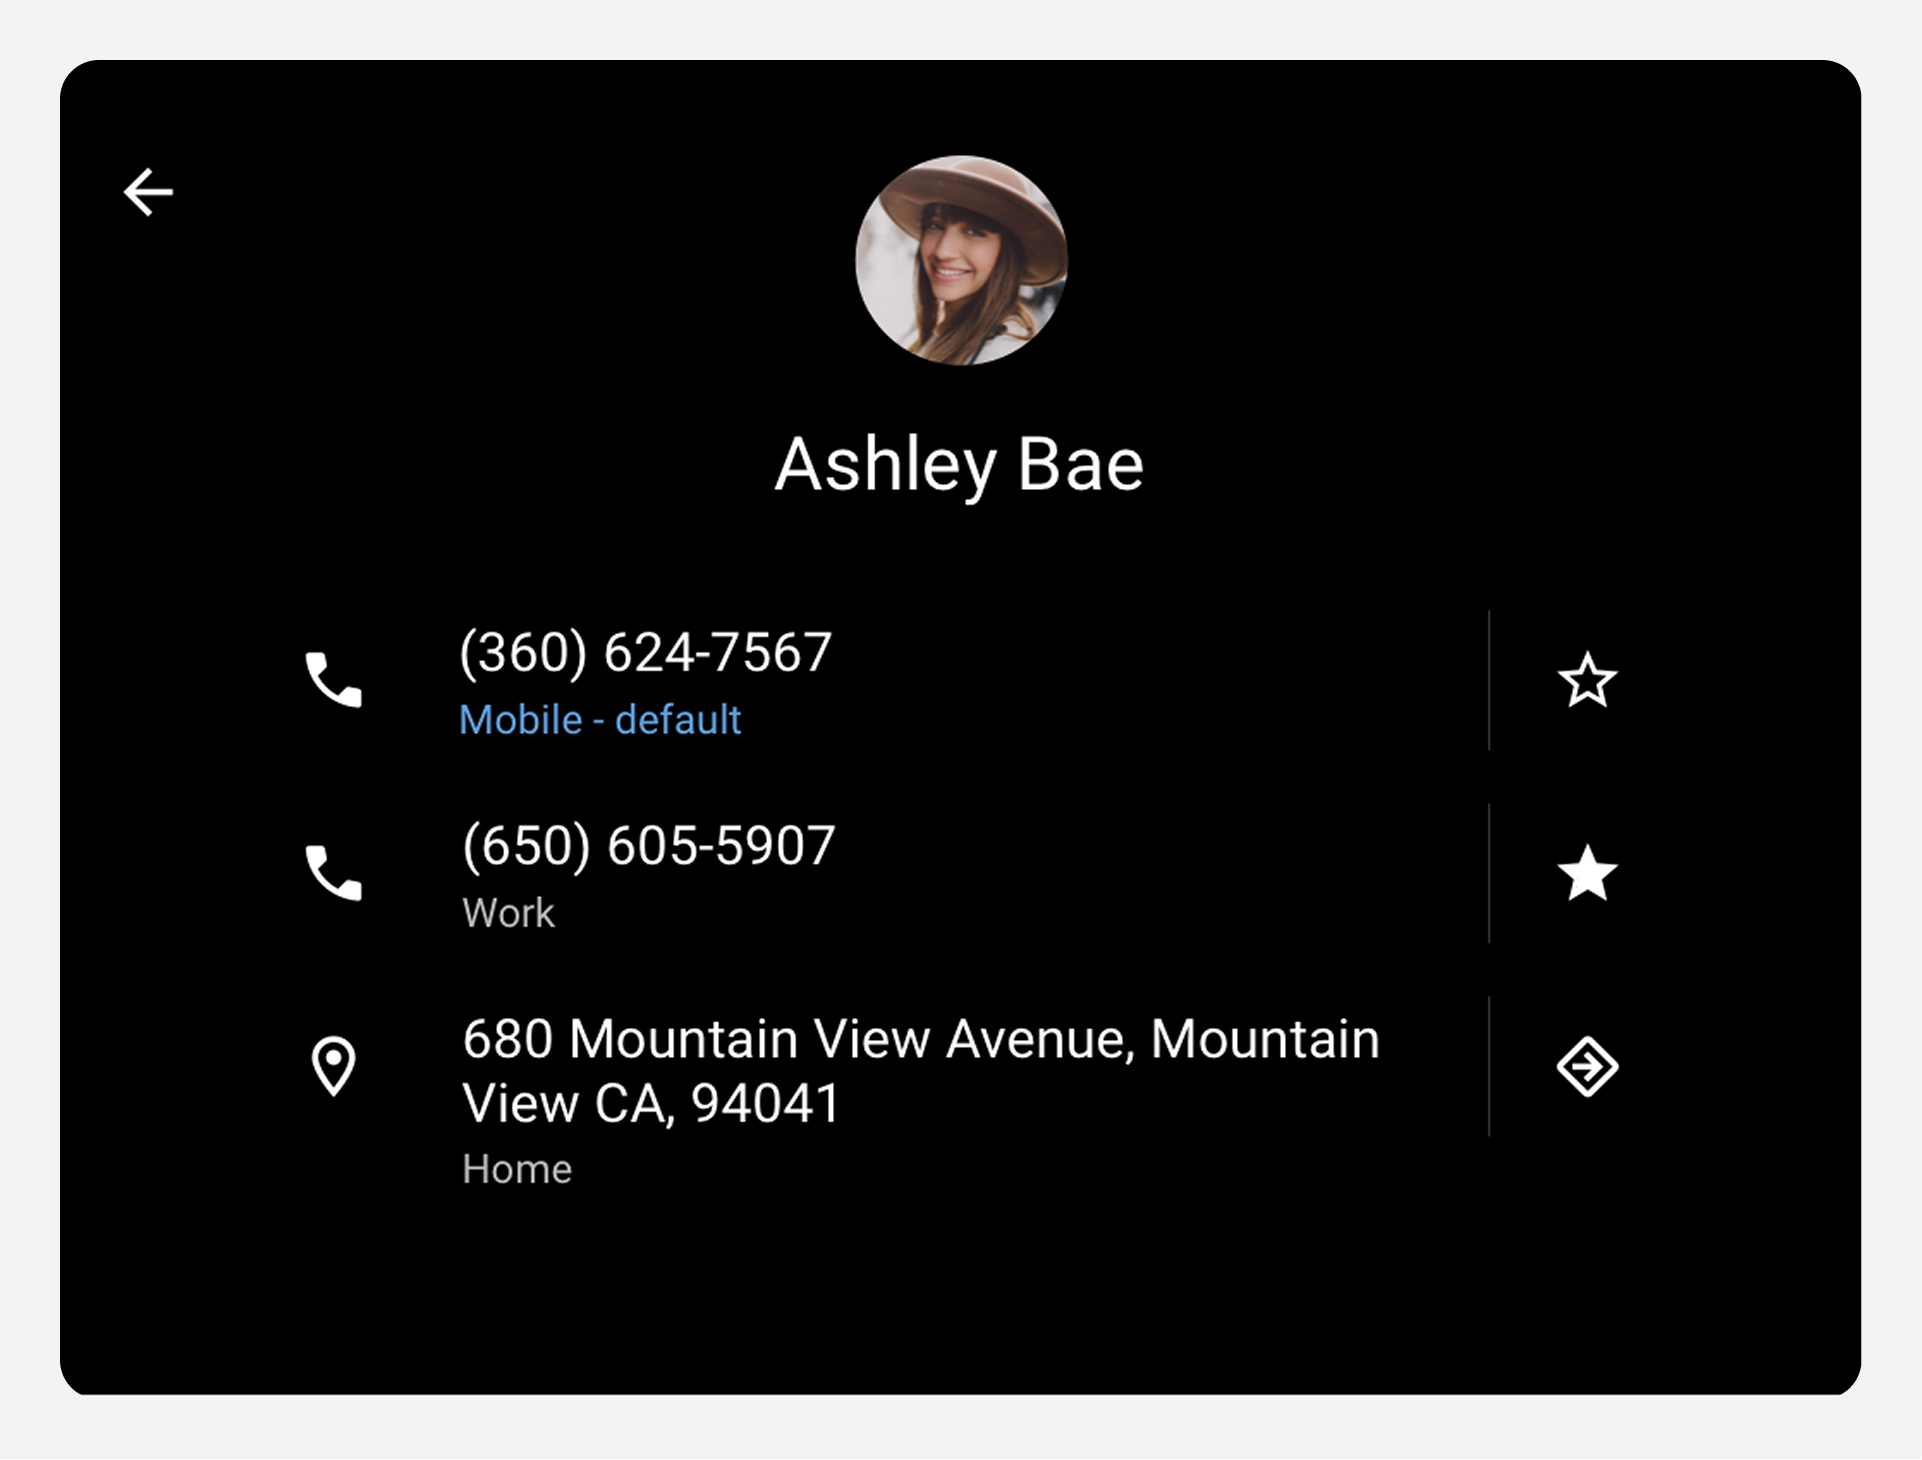
In the detail view, users can:
- Place a call
- Add a favorite
- View the route to the contact's address in Google Maps (by selecting the address)
- Navigate to a contact's address (by selecting the navigation icon)
- Return to the top-level list of contacts (by using the back arrow)
Car makers can decide whether to use Google Maps or their own navigation system to navigate to a contact's address.
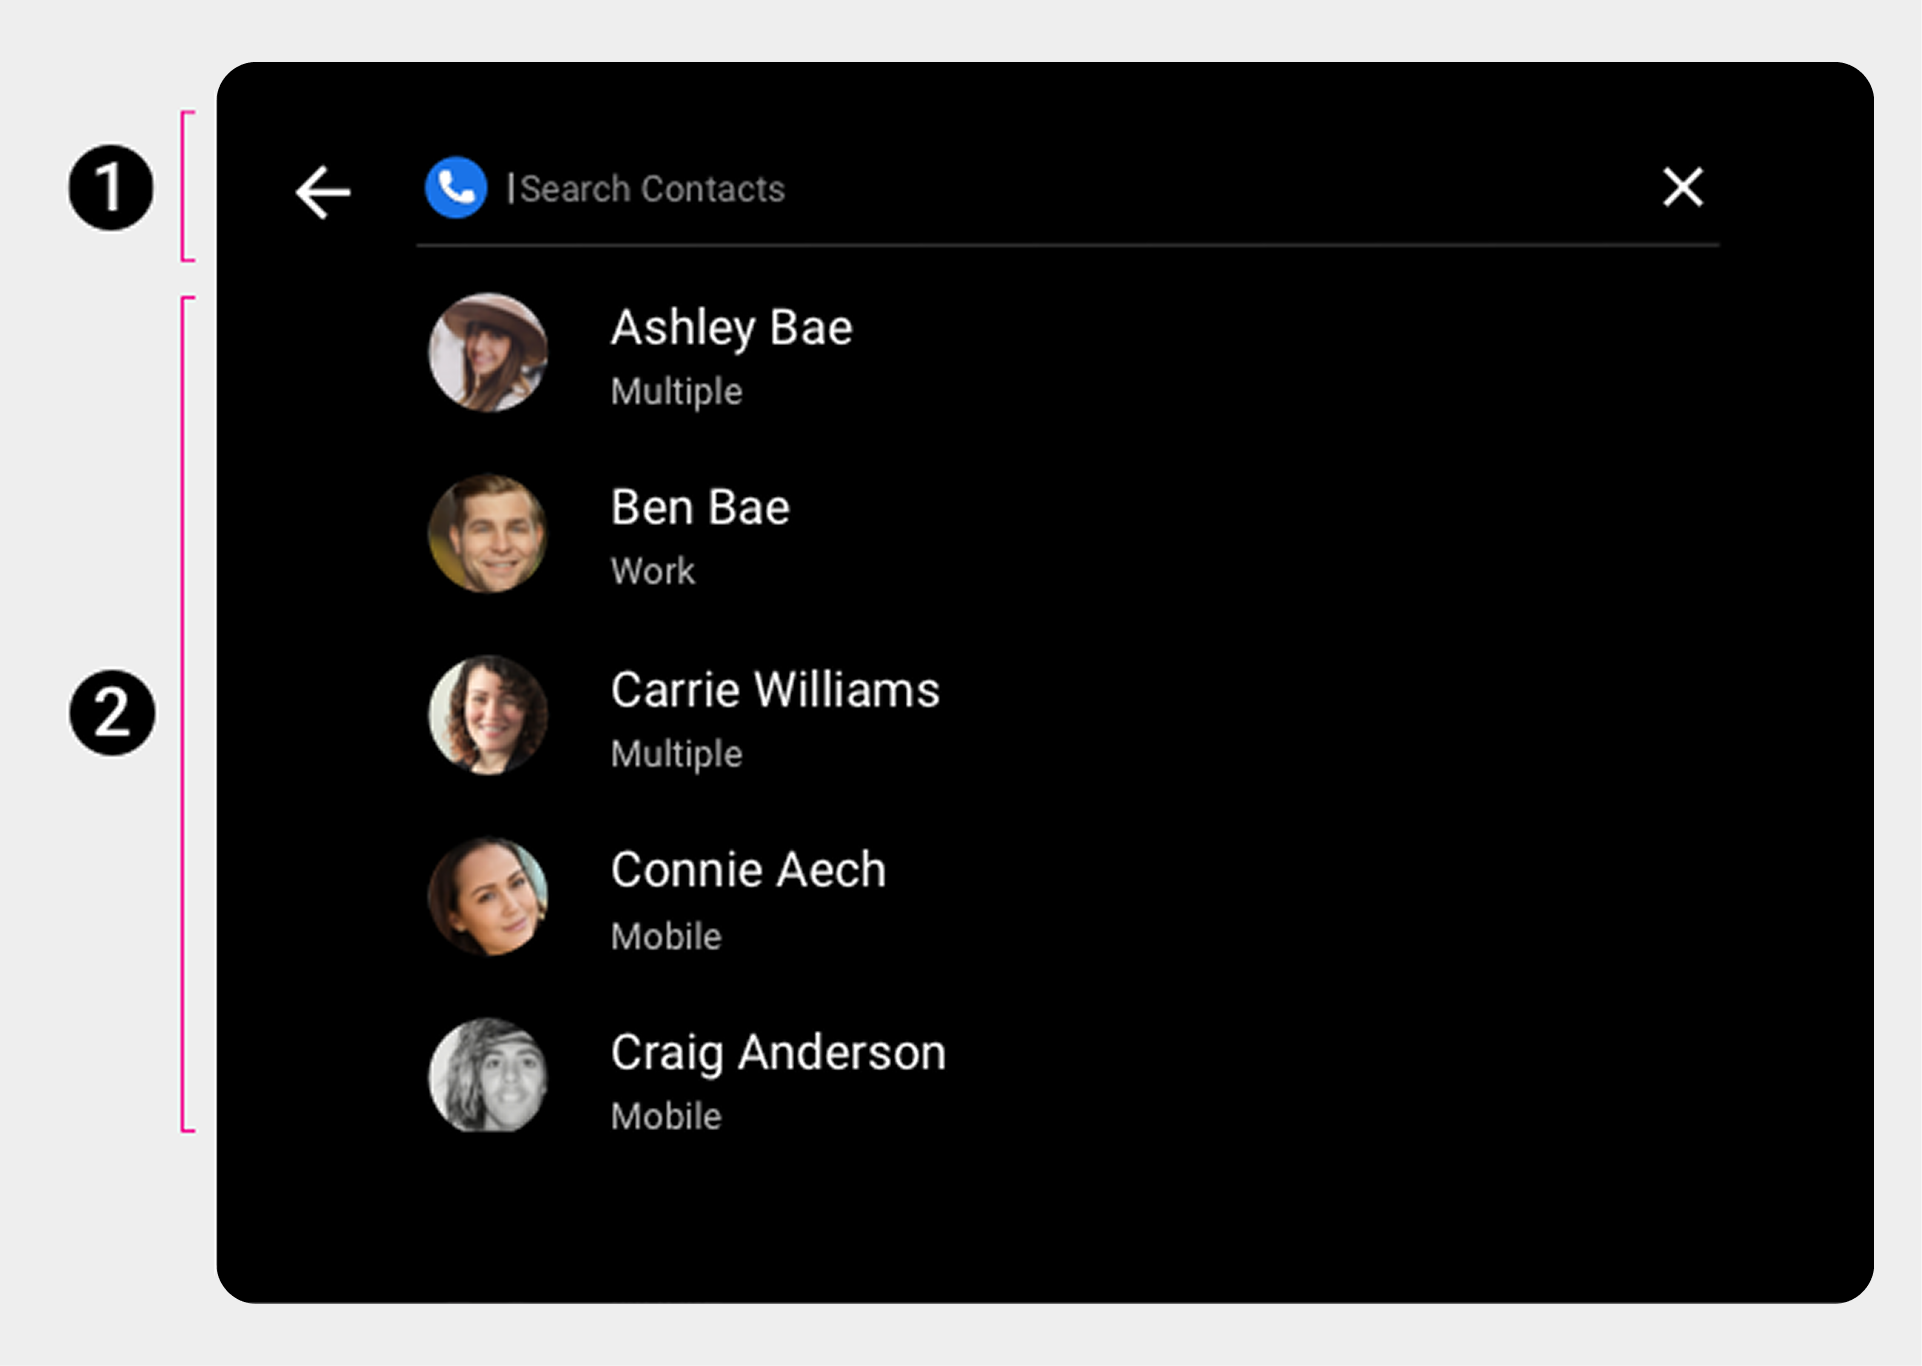
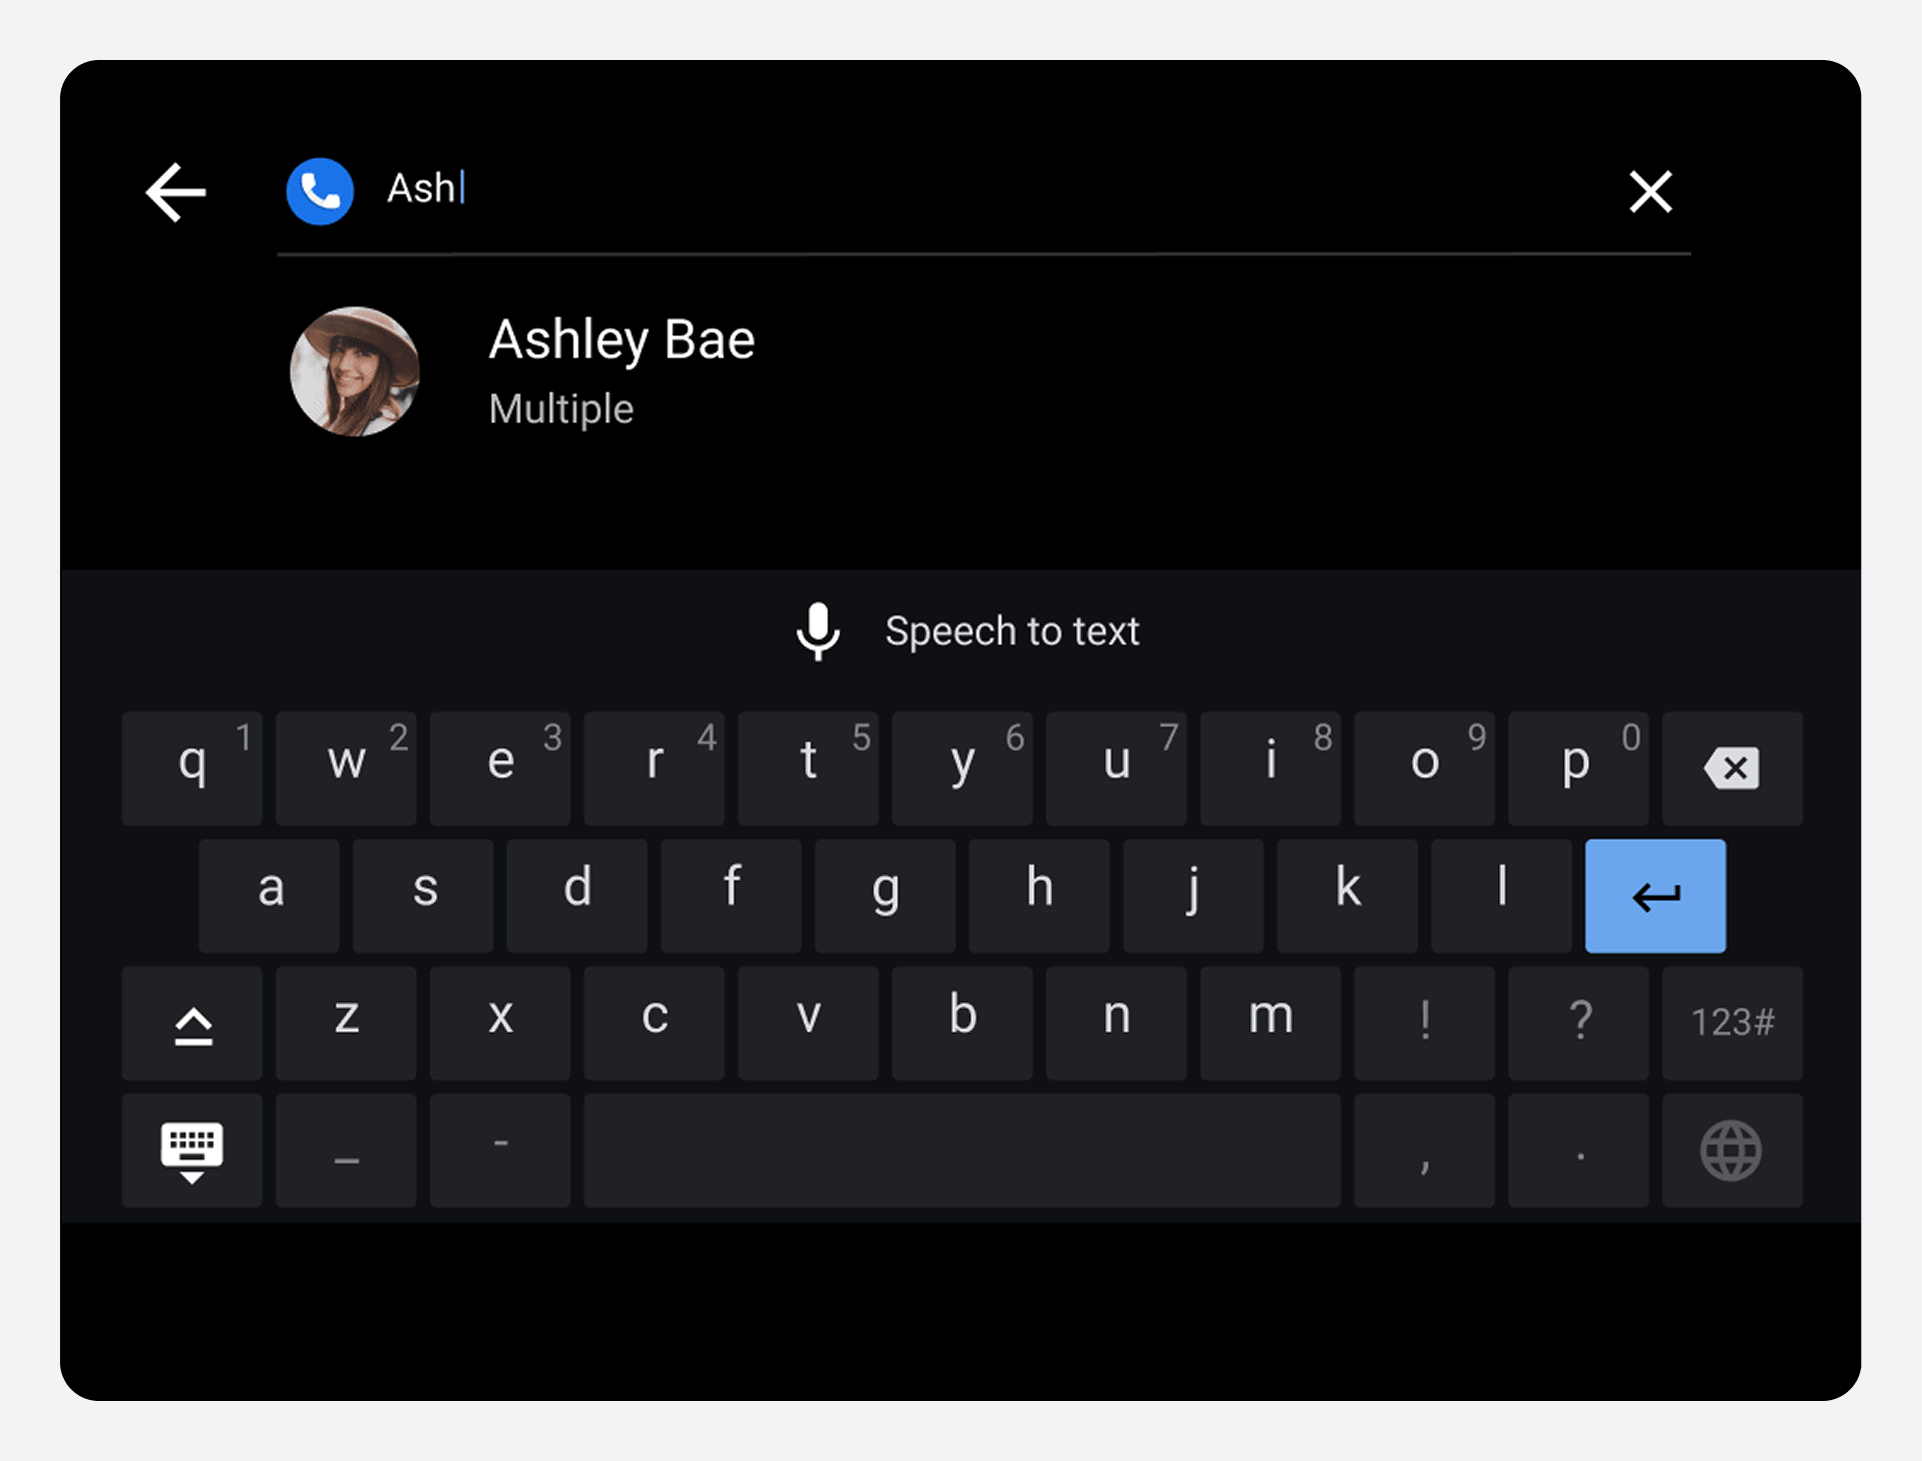
Search for contacts
Another way users can find a specific contact, whether or not they are in the Contacts view, is to select the Search control (magnifying glass icon) on the app bar.
How the user can specify search criteria depends on whether the car is parked or moving:
- When parked: Users enter search criteria on the keyboard touchscreen.
- When moving: Users must enter search criteria using speech-to-text.
As the user enters search criteria, the search string appears in the search bar. Dialer uses the search criteria to filter the contact list in real time as the user types. It displays only those contacts that continue to match the user's search criteria.
When the user finds and selects a contact, Dialer displays the contact detail view. There, the user can select from the contact's available numbers to place a call.
Add favorites
Users can designate important or frequently accessed contacts as favorites in Dialer.
After doing so, they can select the Favorites tab to quickly access and call favorite contacts. Users can add new favorites either from the Favorites view or from the detail view of a contact card.
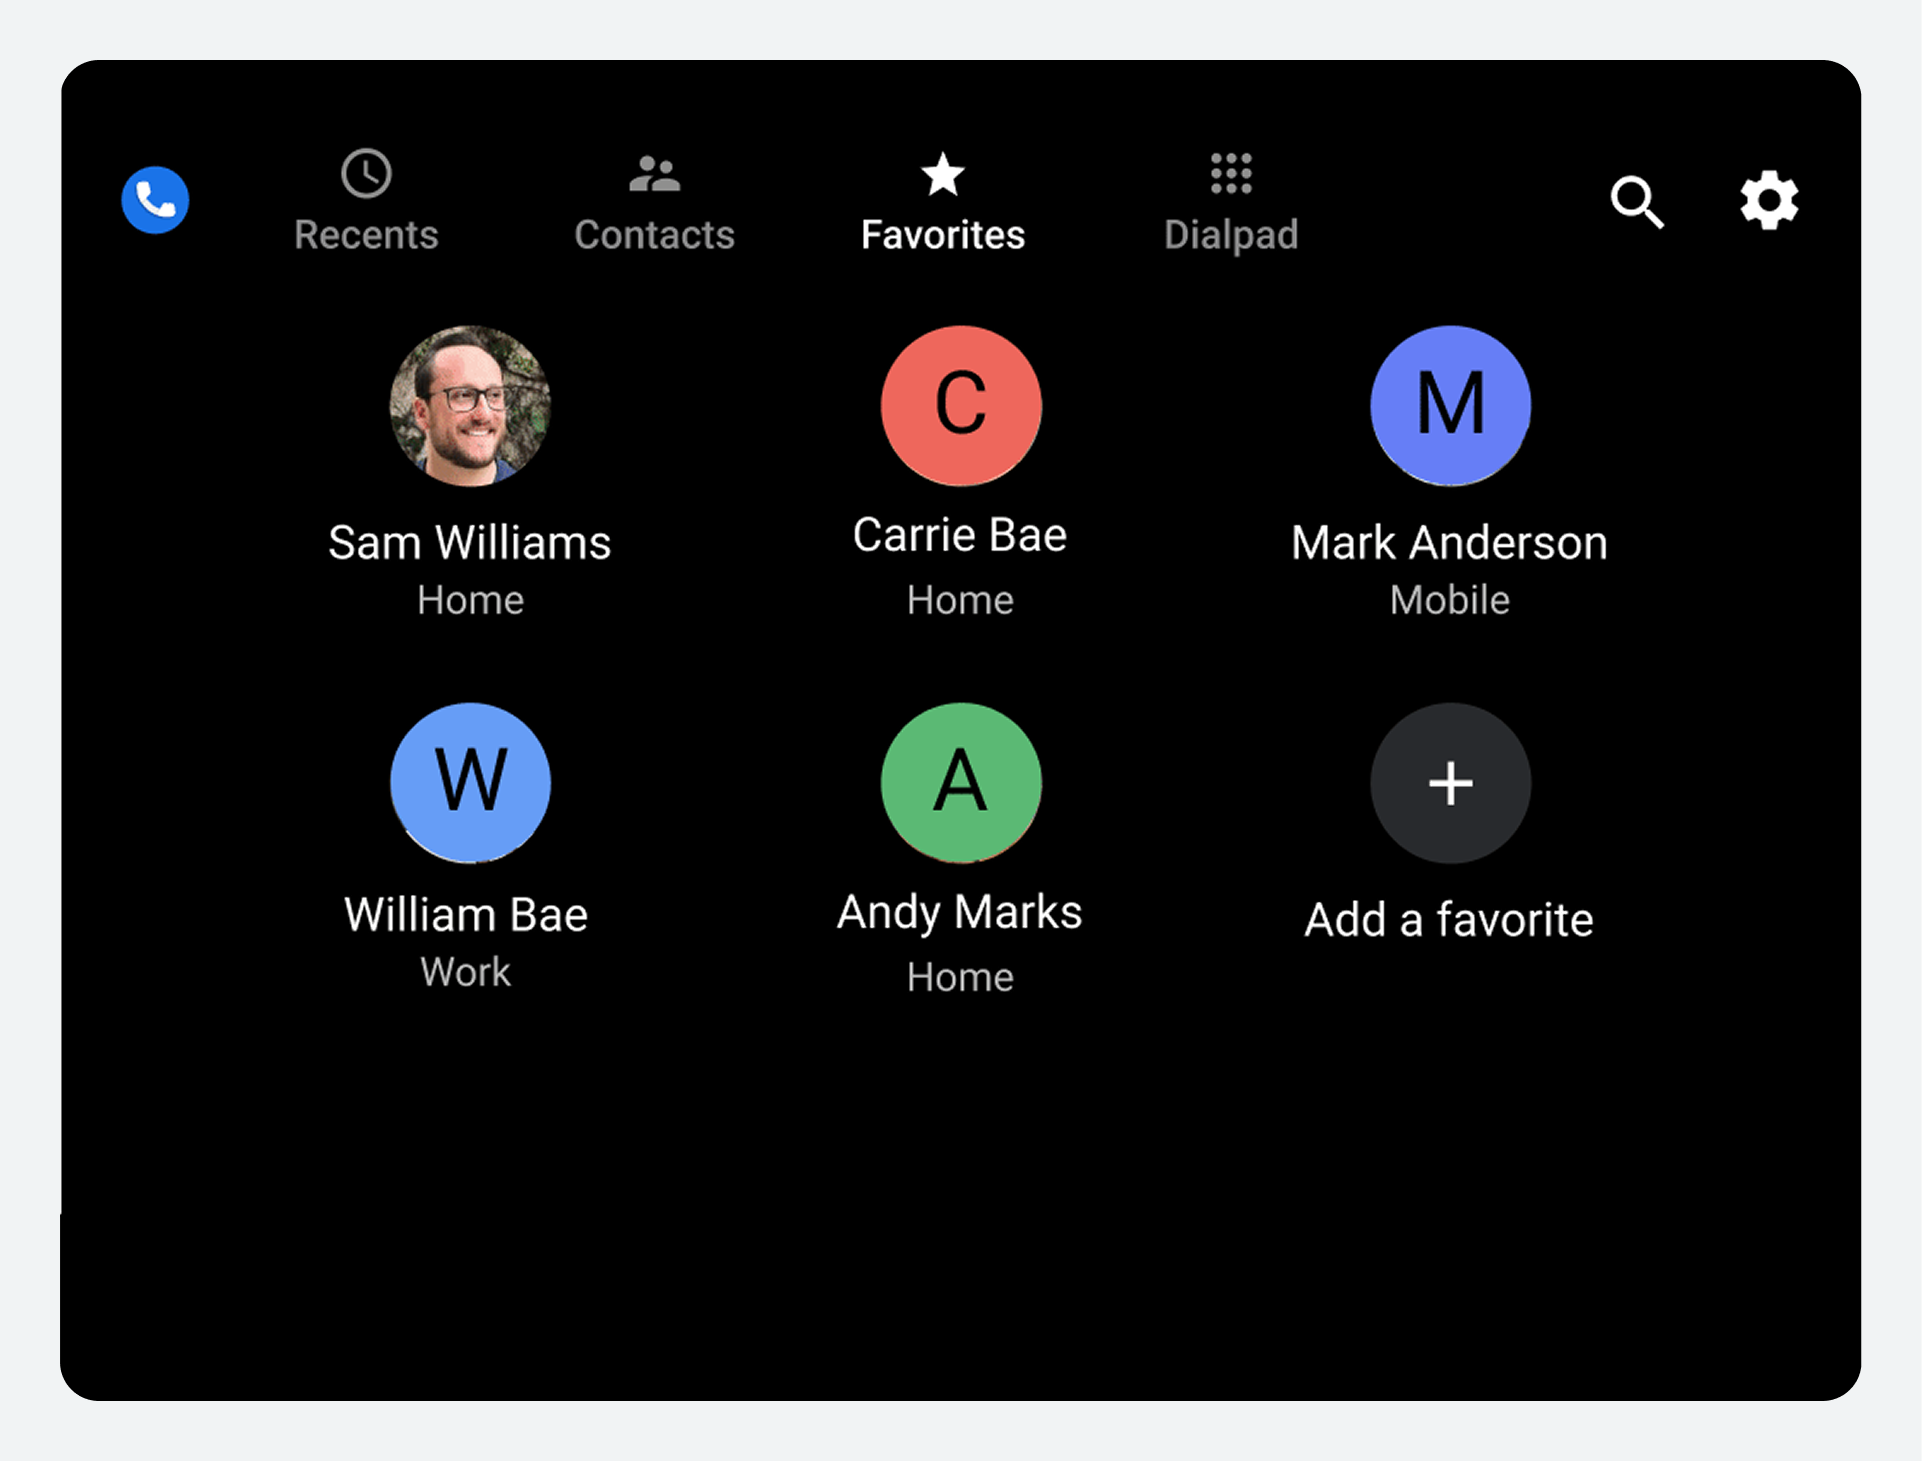
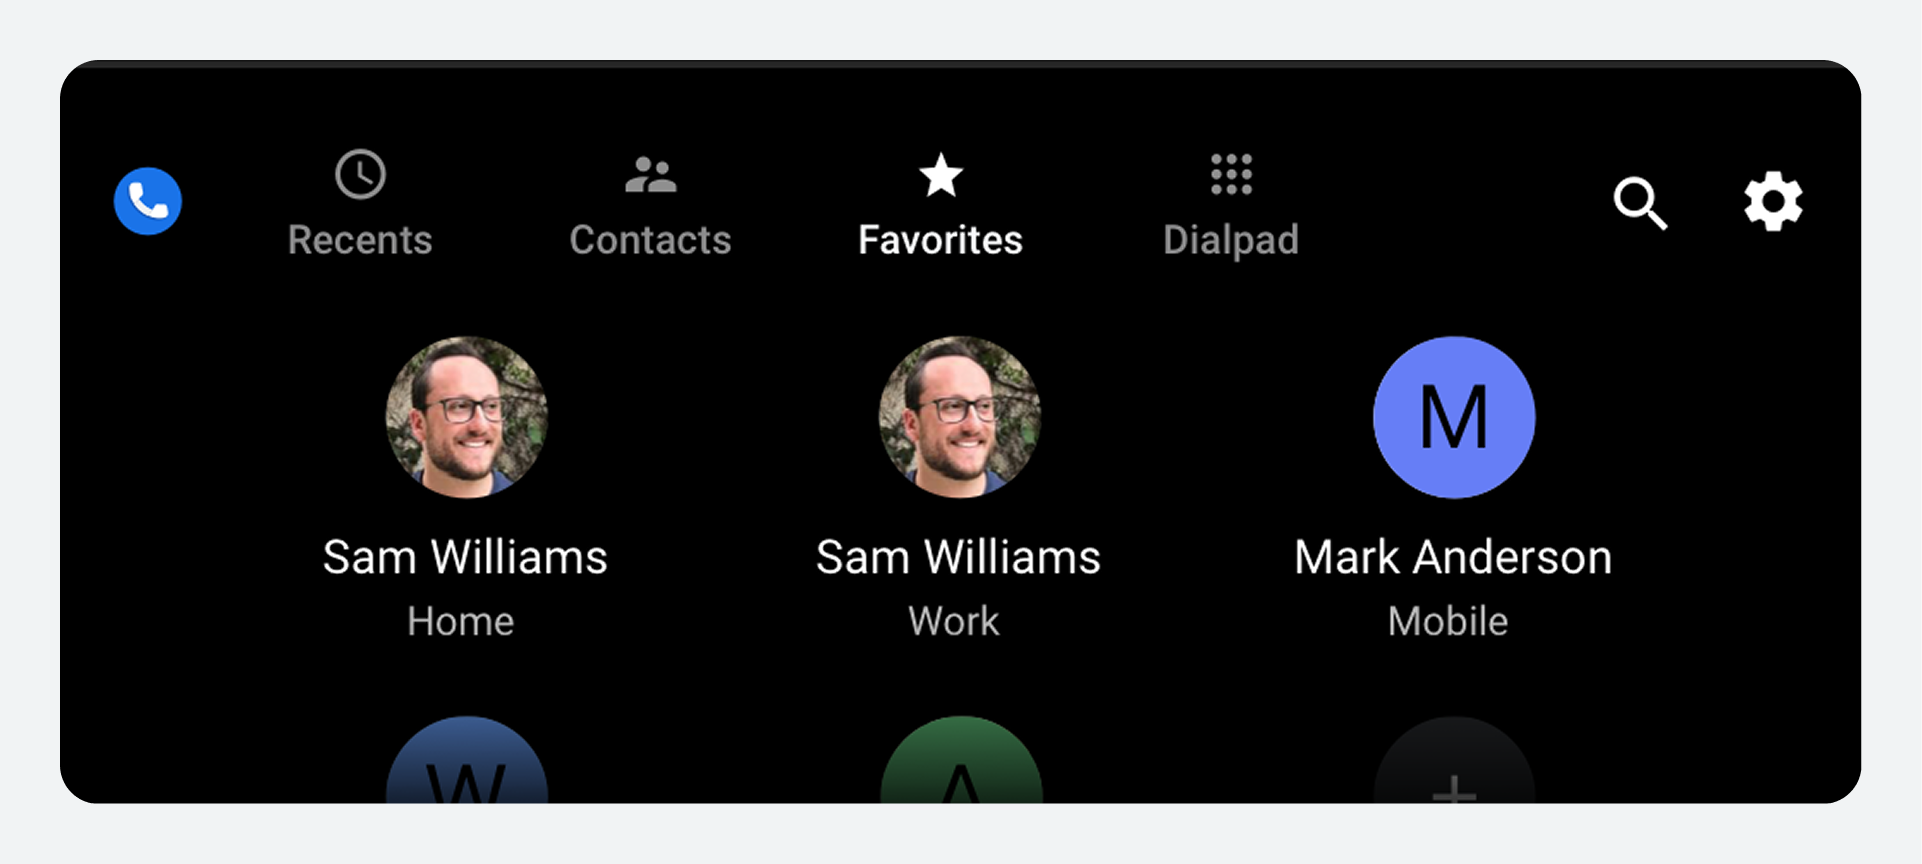
View and call favorites
When users designate some contacts as favorites, they can:
- Select the Favorites tab to see a grid view of their favorite contacts
- Select a favorite from the grid to place a call to that person
Each favorite is associated with only one phone number, so selecting a favorite from the grid immediately places a call to that number.

Add favorites in the Favorites view
In the Favorites view, users can add a new favorite contact with the following steps:
- Select the Add a favorite button.
- Identify the contact to be added.
- Choose a phone number or numbers.
1. Select Add a favorite
When a user selects the Add a favorite button, Dialer displays a scrollable list of contacts and a search bar.
2. Identify a contact to add
After selecting Add a favorite, users can search for a contact in either of two ways:
- Scroll through the list to select a contact.
- Use the Search contacts option.
Selecting Search contacts brings up a keyboard that operates either by touch or by voice, depending on whether the car is parked or moving. In voice mode, users can say the letters or words they are searching for instead of typing them.
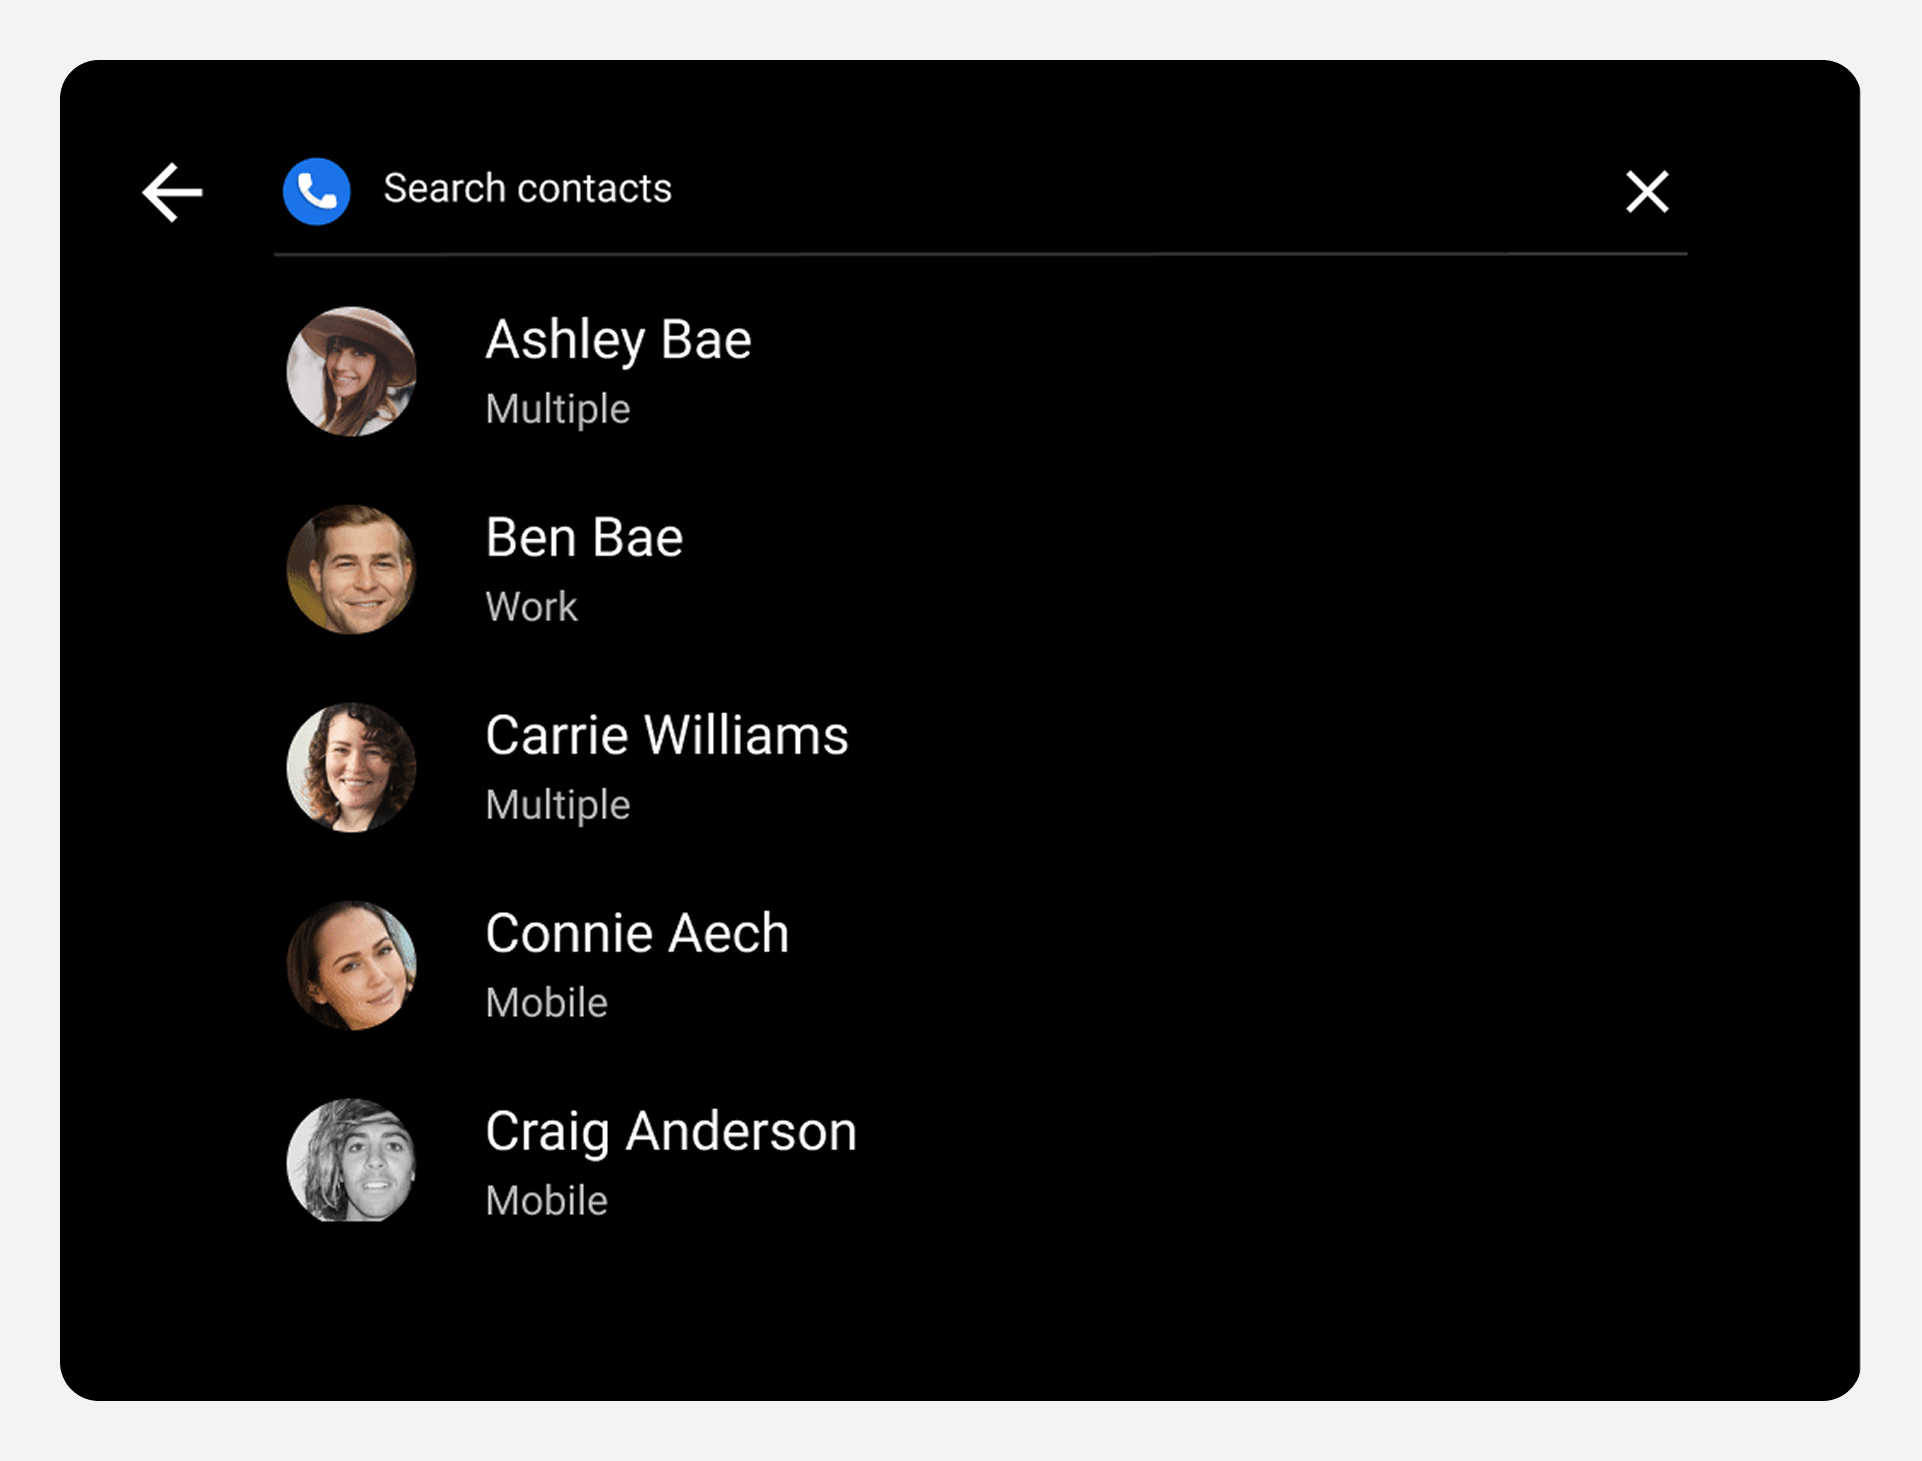
Dialer uses the search criteria the user has typed or spoken to filter the contact list, showing only those contacts that match. The user can then select the contact to be added as a favorite.
3. Choose phone numbers
When the user selects a contact to add as a favorite, a dialog displays the phone number or numbers for that contact. The user can then select one or more contact numbers from the dialog.
If the user selects multiple phone numbers, each number is added as a separate favorite.
Add favorites in contact details
Users can also add favorites from the contact detail view of a contact. They do so using the toggle next to each phone number.
Place calls
Users can place calls from various views within Dialer.
They can place calls from:
- One of the top-level contact views (Recents, Contacts, or Favorites)
- A contact's detail view
- The Dialpad
Users can also select the Search control on the app bar to find a contact and place a call. Outside of Dialer, users can also place calls from missed-call notifications in the Notification Center. To learn more, see How the Notification Center works.
Place calls from a top-level contact view
In any of the top-level lists or grids (Recents, Contacts, or Favorites), a user can select a contact's avatar, the contact name, or the area near these items to place a call to the contact's preferred number. When placing a call and throughout the call, Dialer displays the in-call status screen, which shows call status and provides options for managing the call.
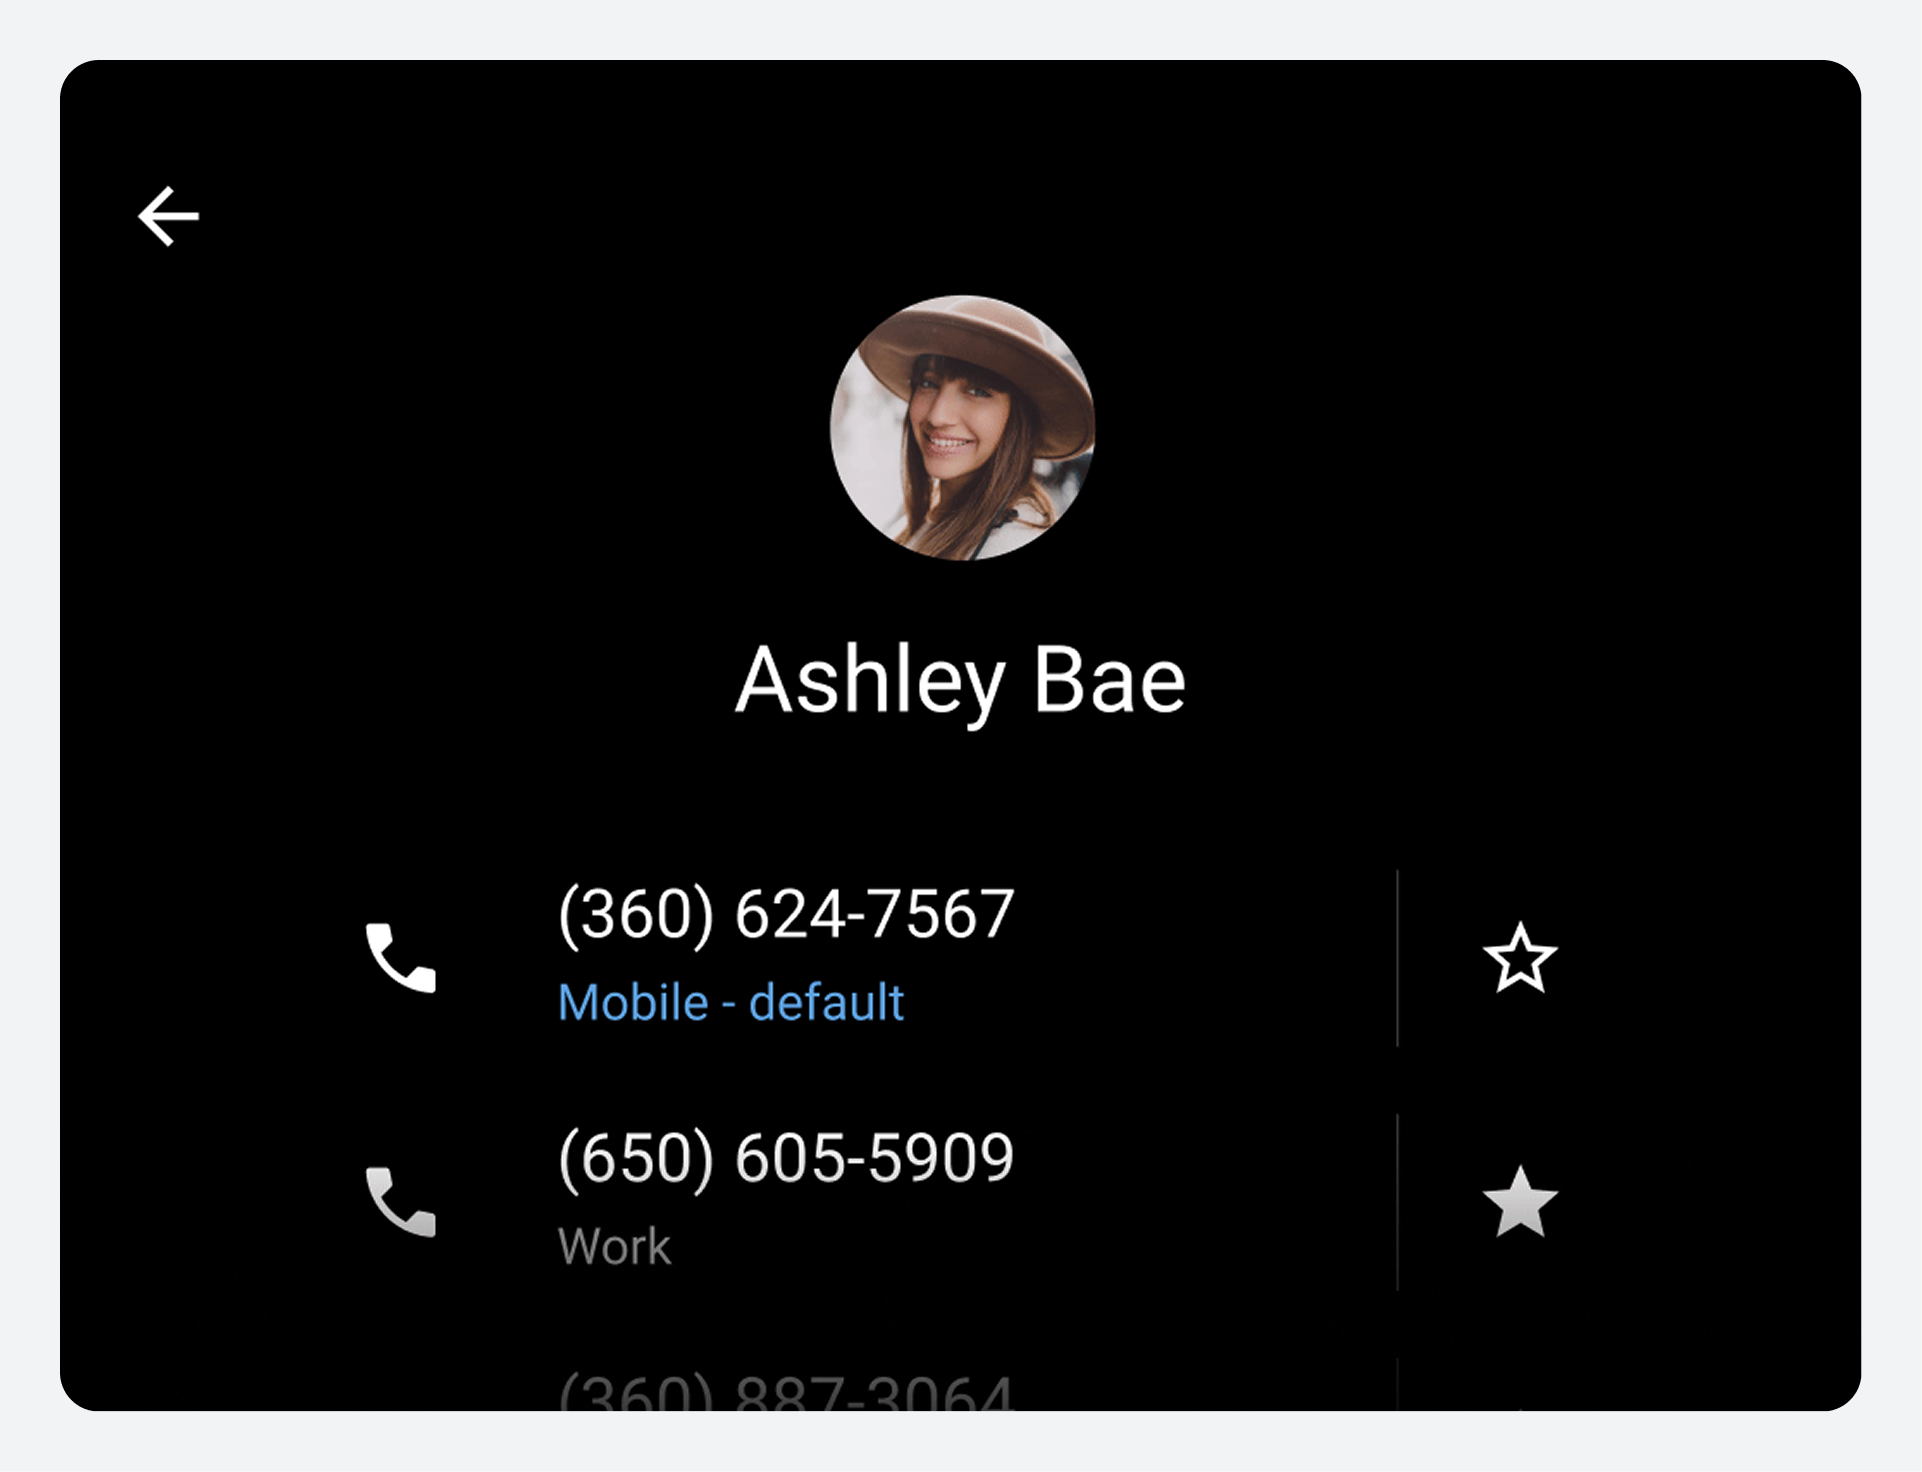

Place calls from contact's details
A user browsing Contacts or Recents can select a contact's details icon to see and place calls to any of the contact's available phone numbers.
The detail view of a contact displays all phone numbers for that contact, so the user can choose which one to call. When a user selects one of the listed phone numbers, Dialer places a call to that number and displays the in-call status screen to show ongoing call status and allow the user to manage the call.
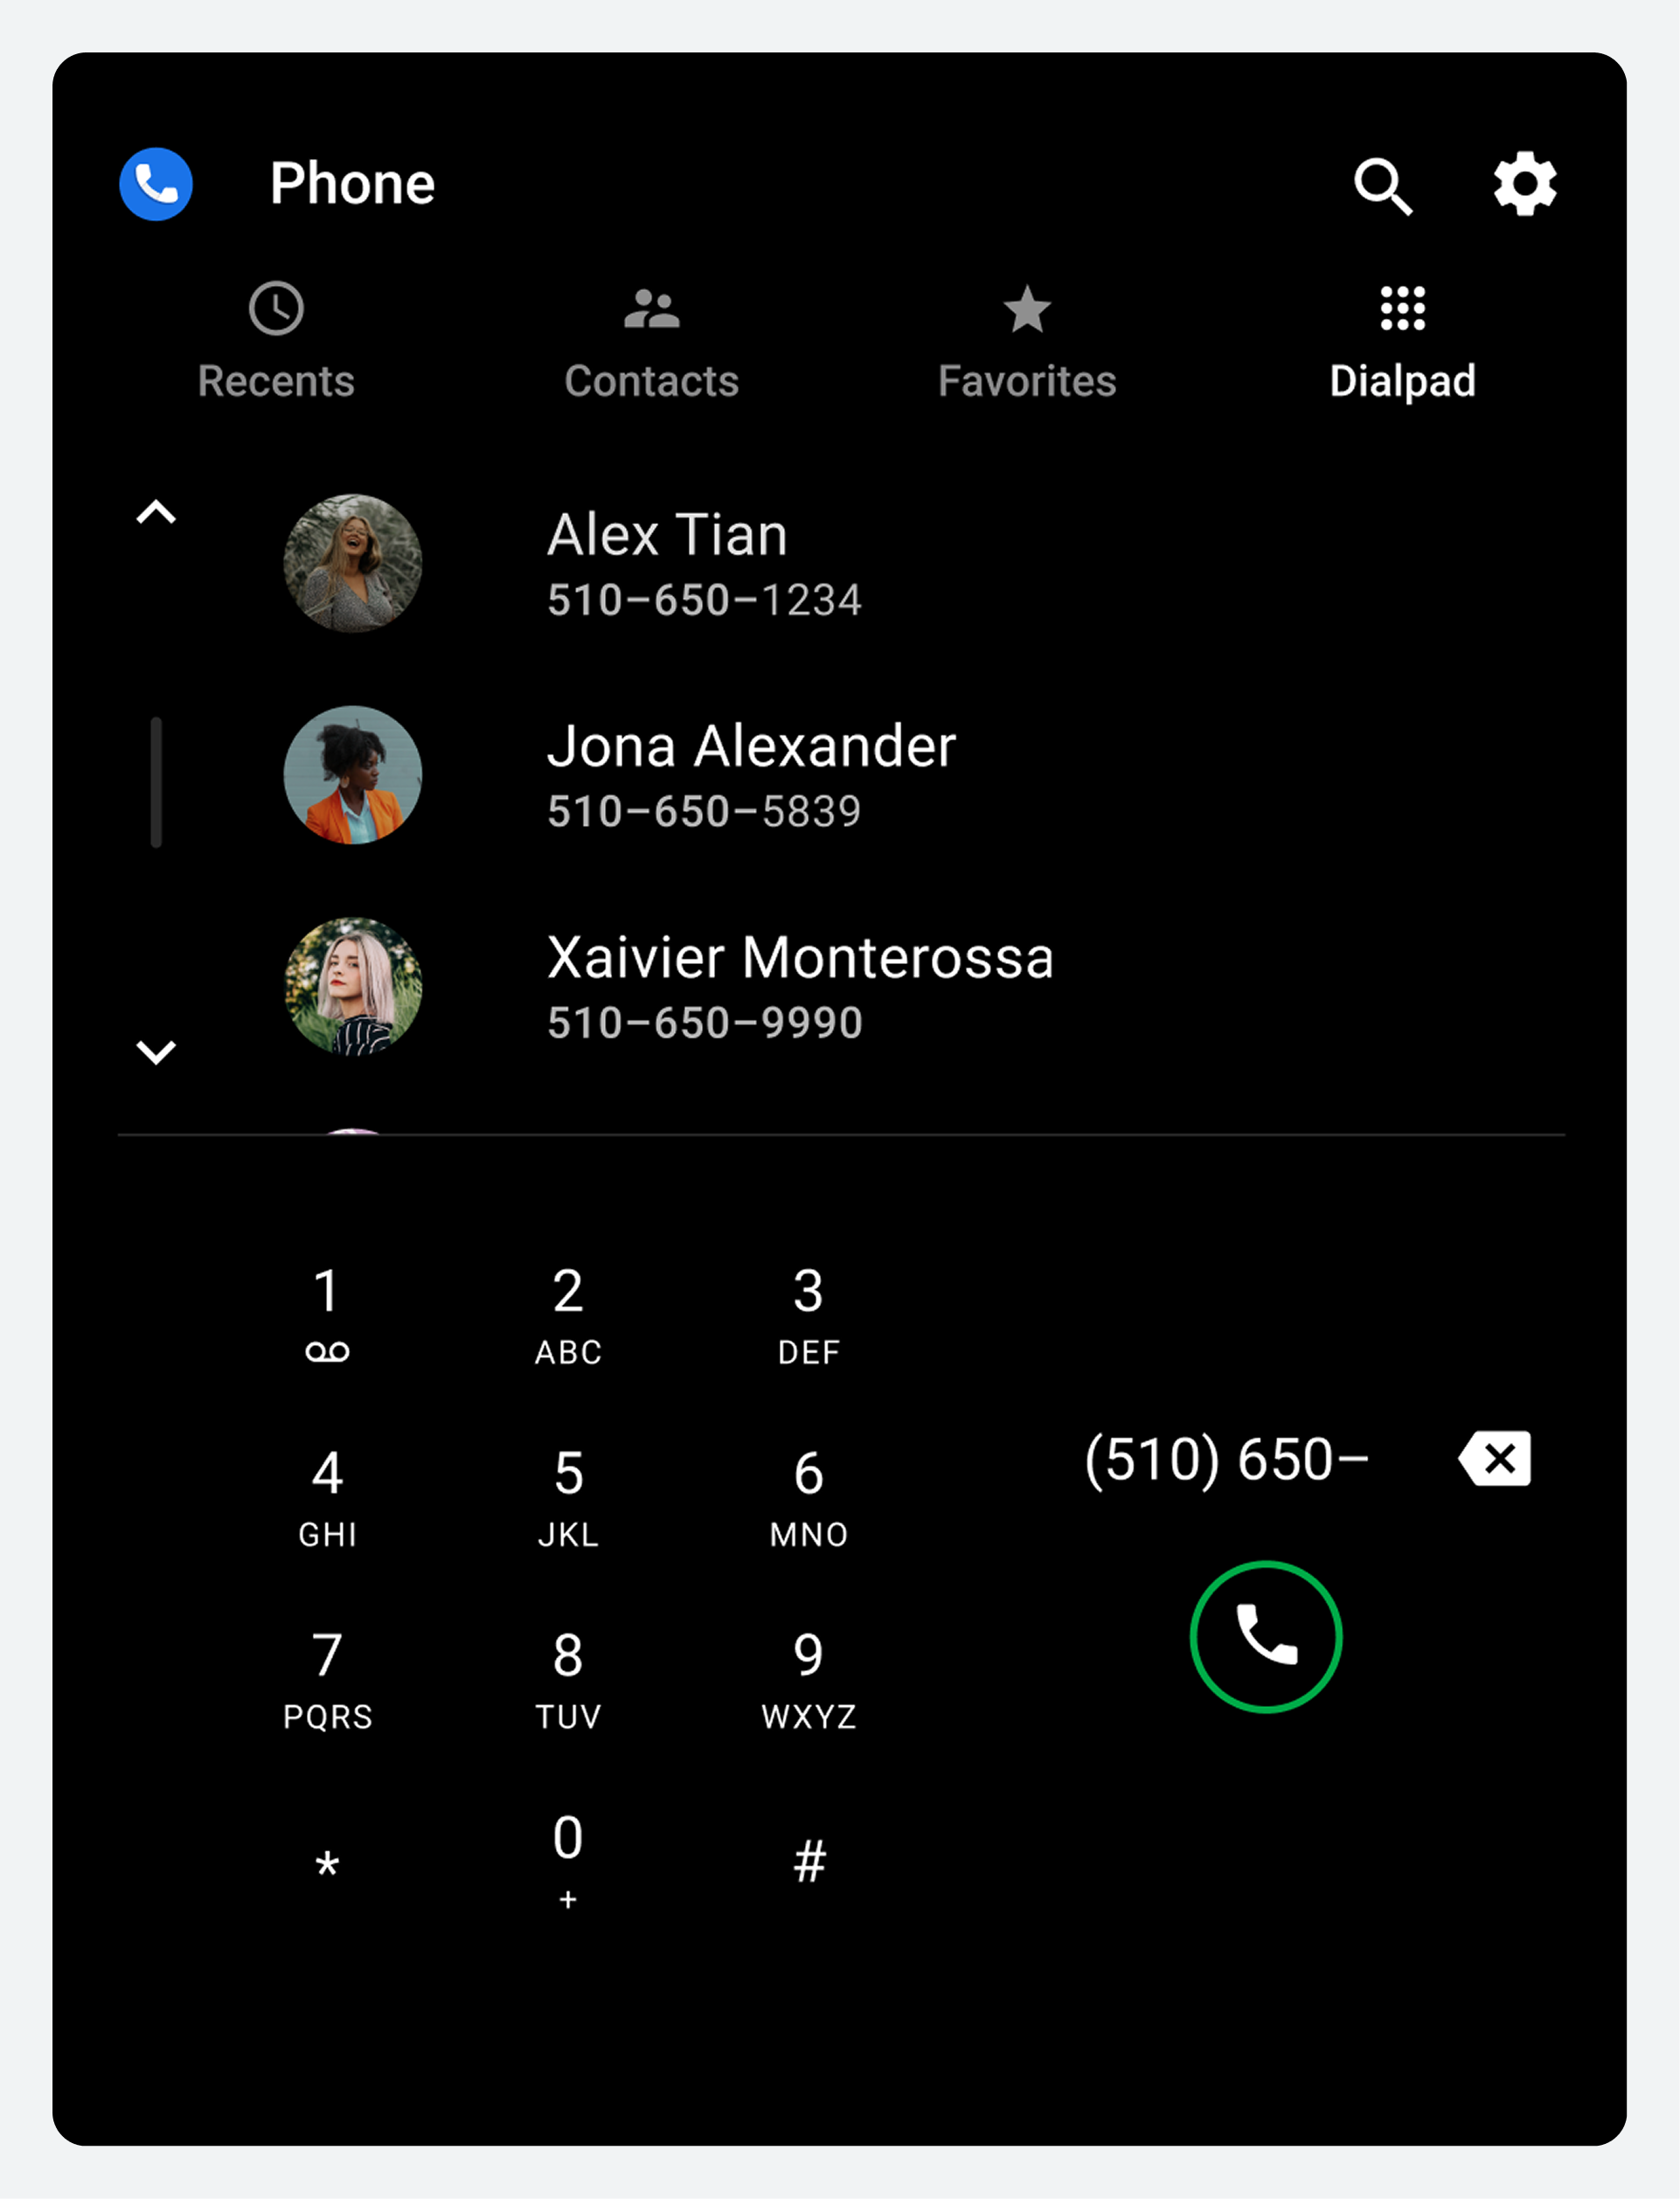
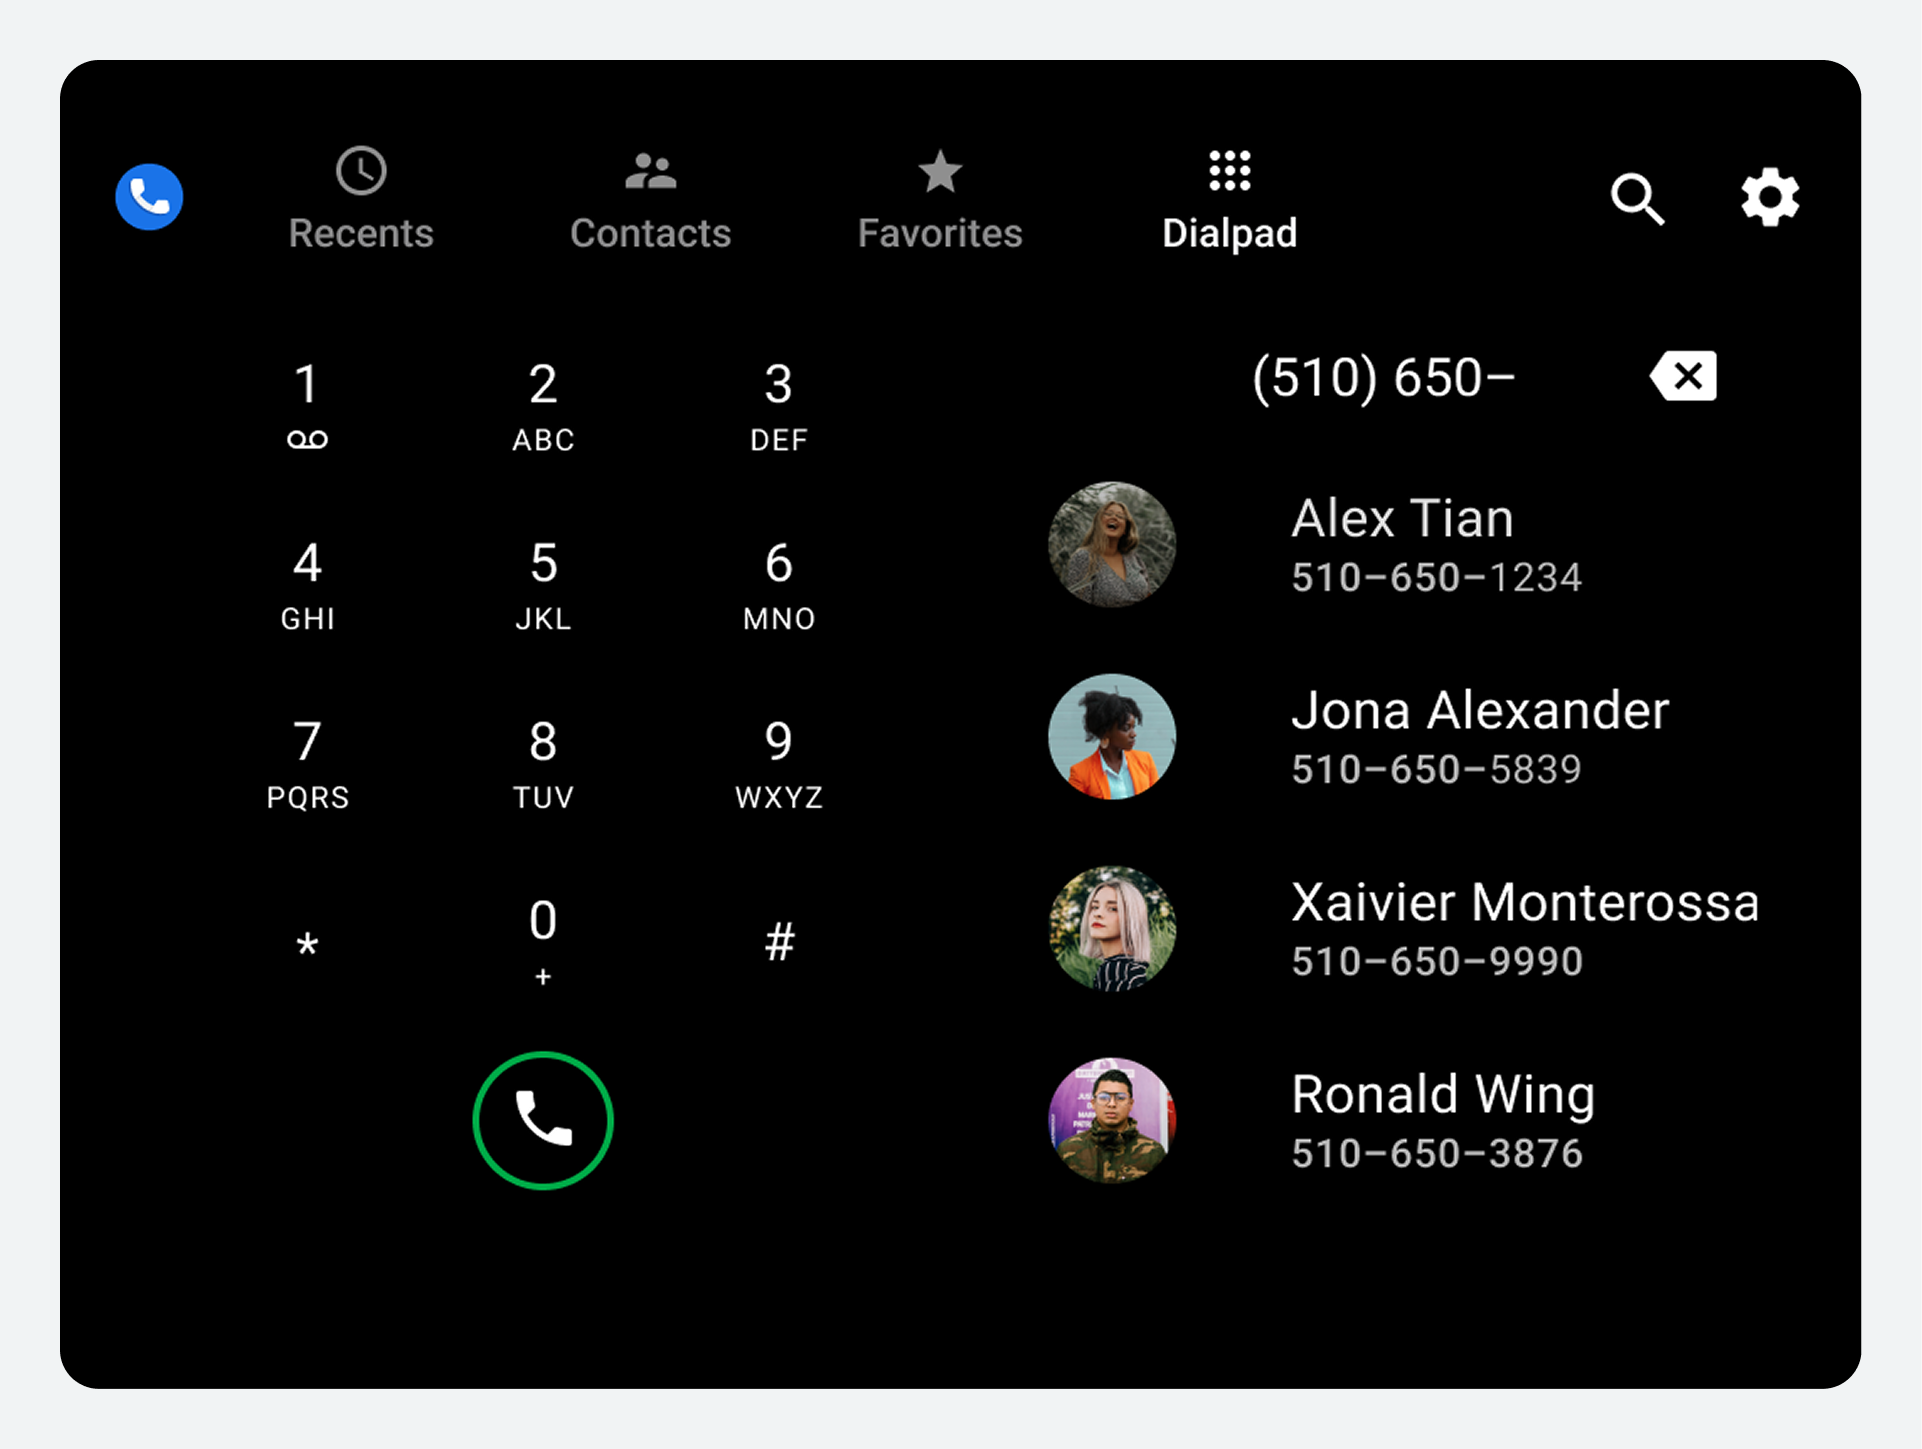
Place calls from the Dialpad
Users can select the Dialpad tab on the app bar to view the Dialpad. There, users can enter a phone number, and backspace as needed to make corrections. As users enter a partial number, Dialer continually updates and displays an alphabetical list of contacts whose numbers match so far. At any point, users can specify the call recipient in either of the following ways:
- Scroll the list and select a contact to place the call
- Complete the phone number from the keypad and select the call button to place the call
When Dialer places the call, it displays the in-call status screen to show call status and allow the user to manage the call.
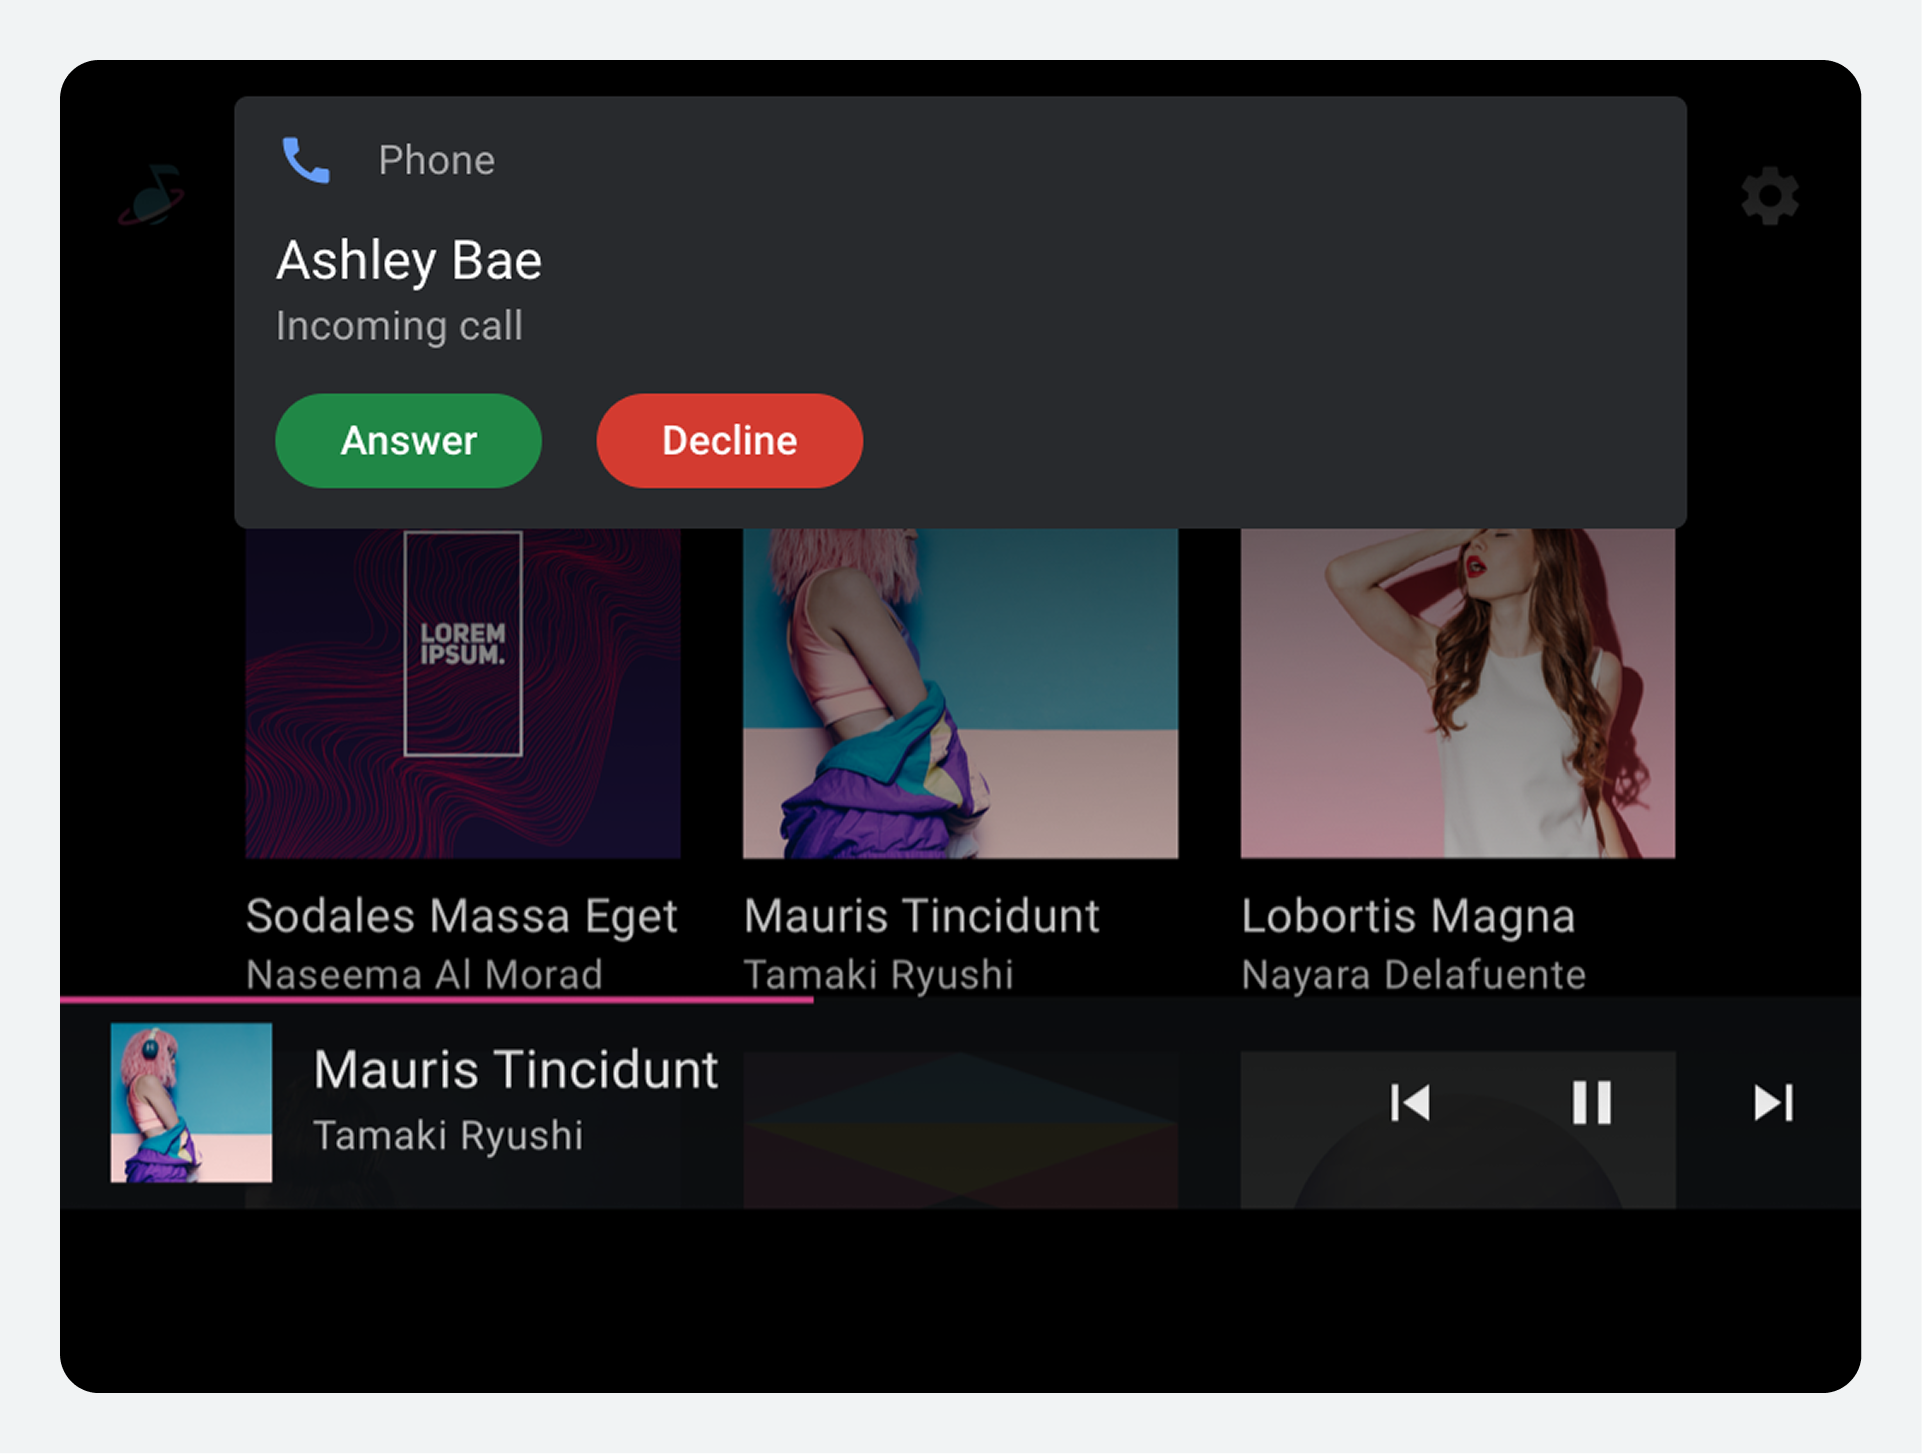
Receive calls
When Dialer detects an incoming call, it sends the user a notification with options to answer or decline the call.
Dialer also provides support for answering another call while already on a call. Users answering a call can switch between calls or merge the calls into a conference call.
Respond to a call
The notification for an incoming call displays the caller's name (if known) or number, along with buttons allowing the user to respond.
The call notification persists until the user:
- Answers the call
- Declines the call
- Misses the call because the caller stops calling
When the user selects the Answer button, Dialer connects to the call and displays the in-call status screen. The Decline button dismisses the notification, but users can still find info about the missed call in the Notification Center or Recents.
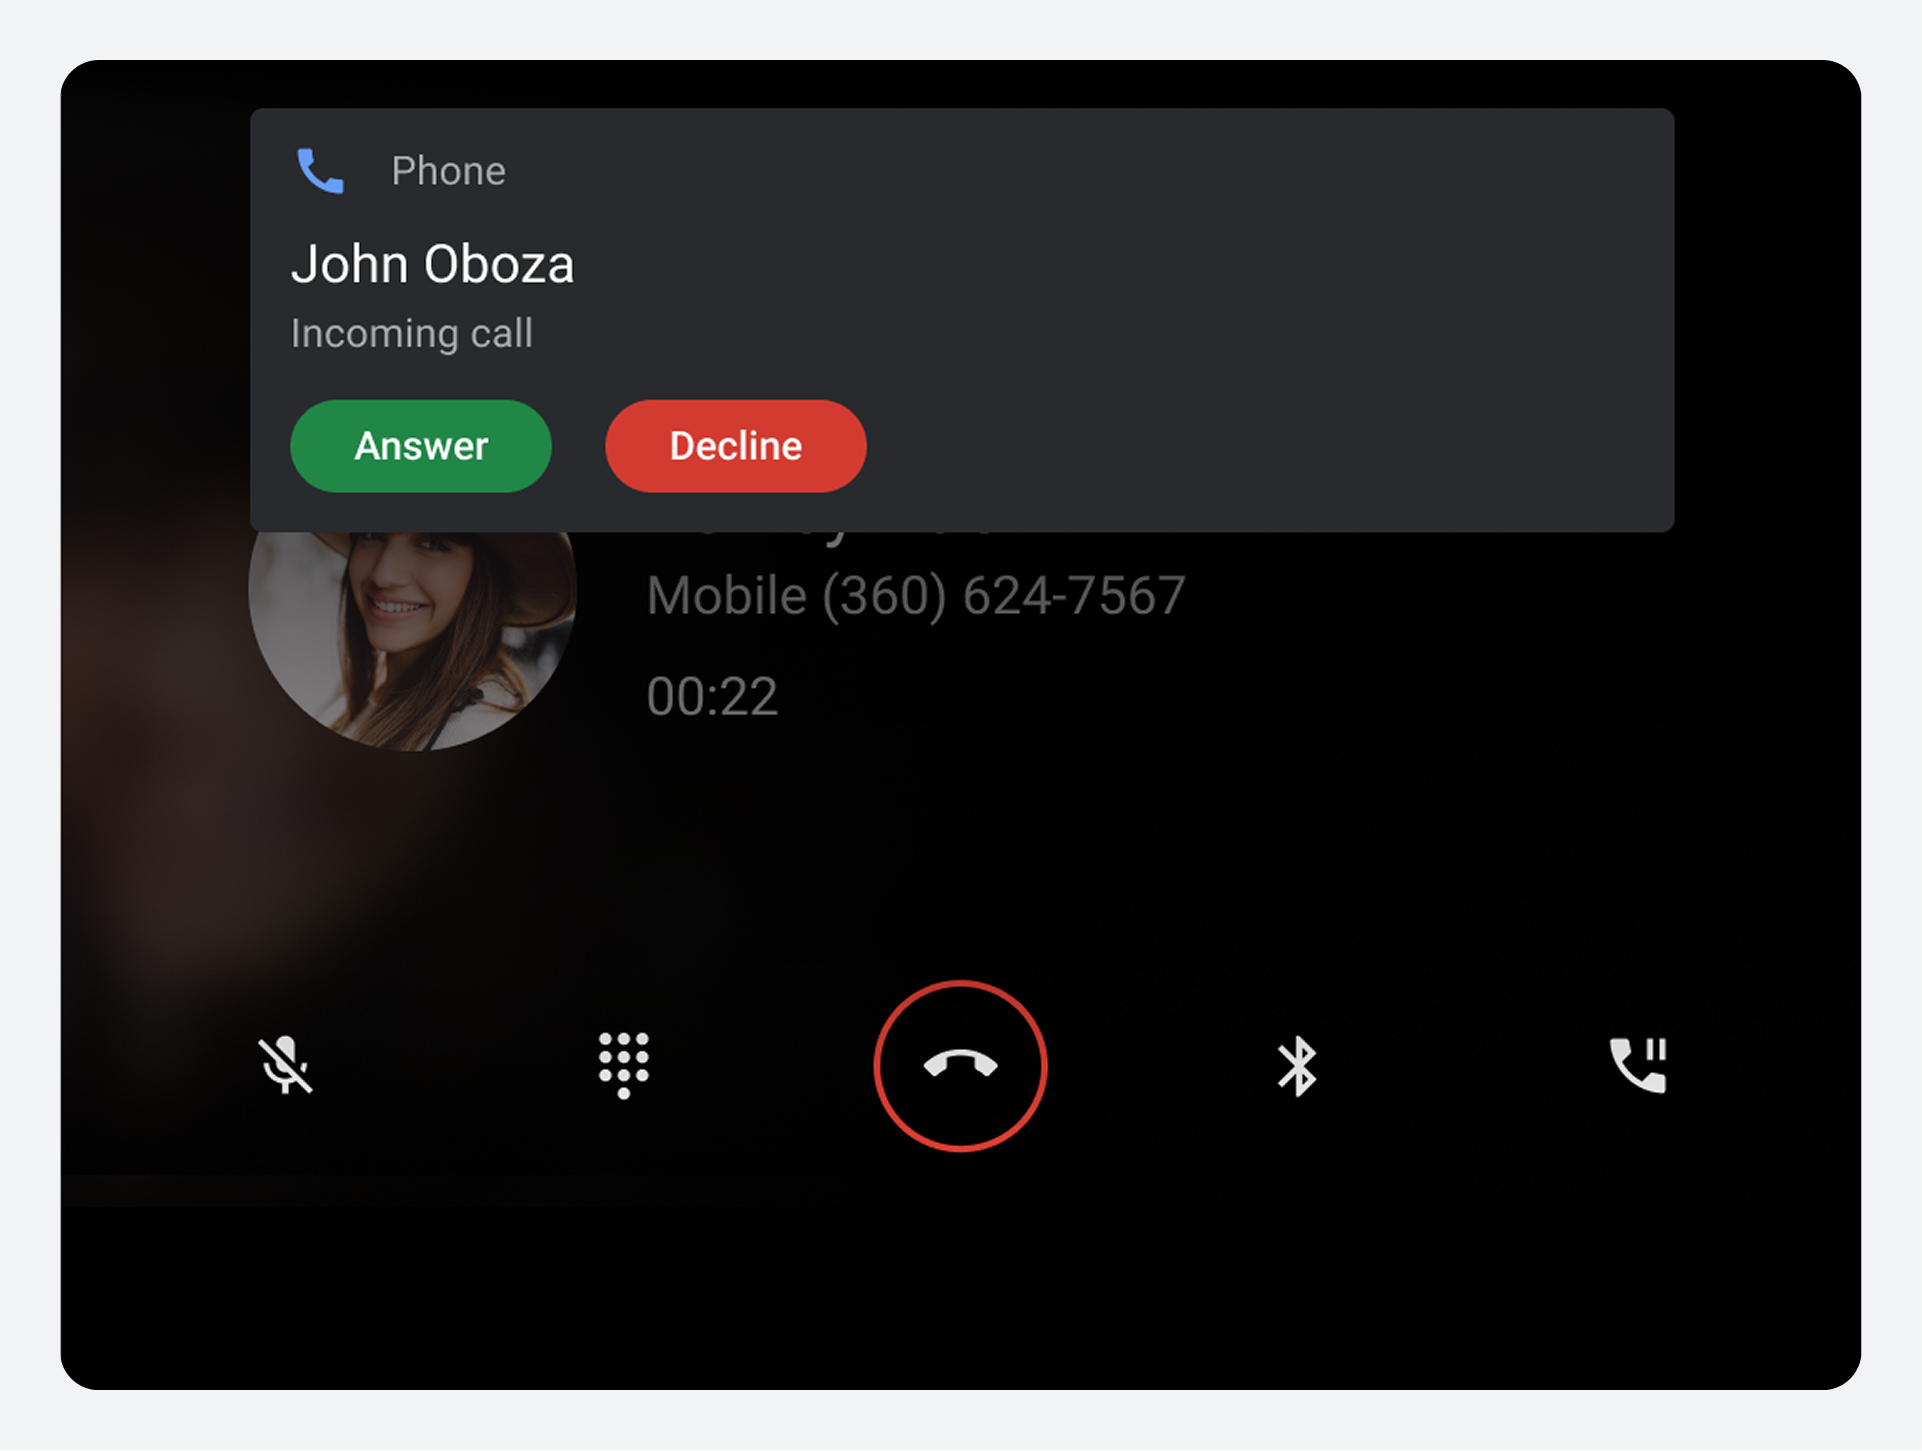
Answer a call during another call
While already on a call, a user can receive a notification of another incoming call.
If the user answers the incoming call, Dialer takes the following actions:
- Places the current call on hold
- Connects to the incoming call
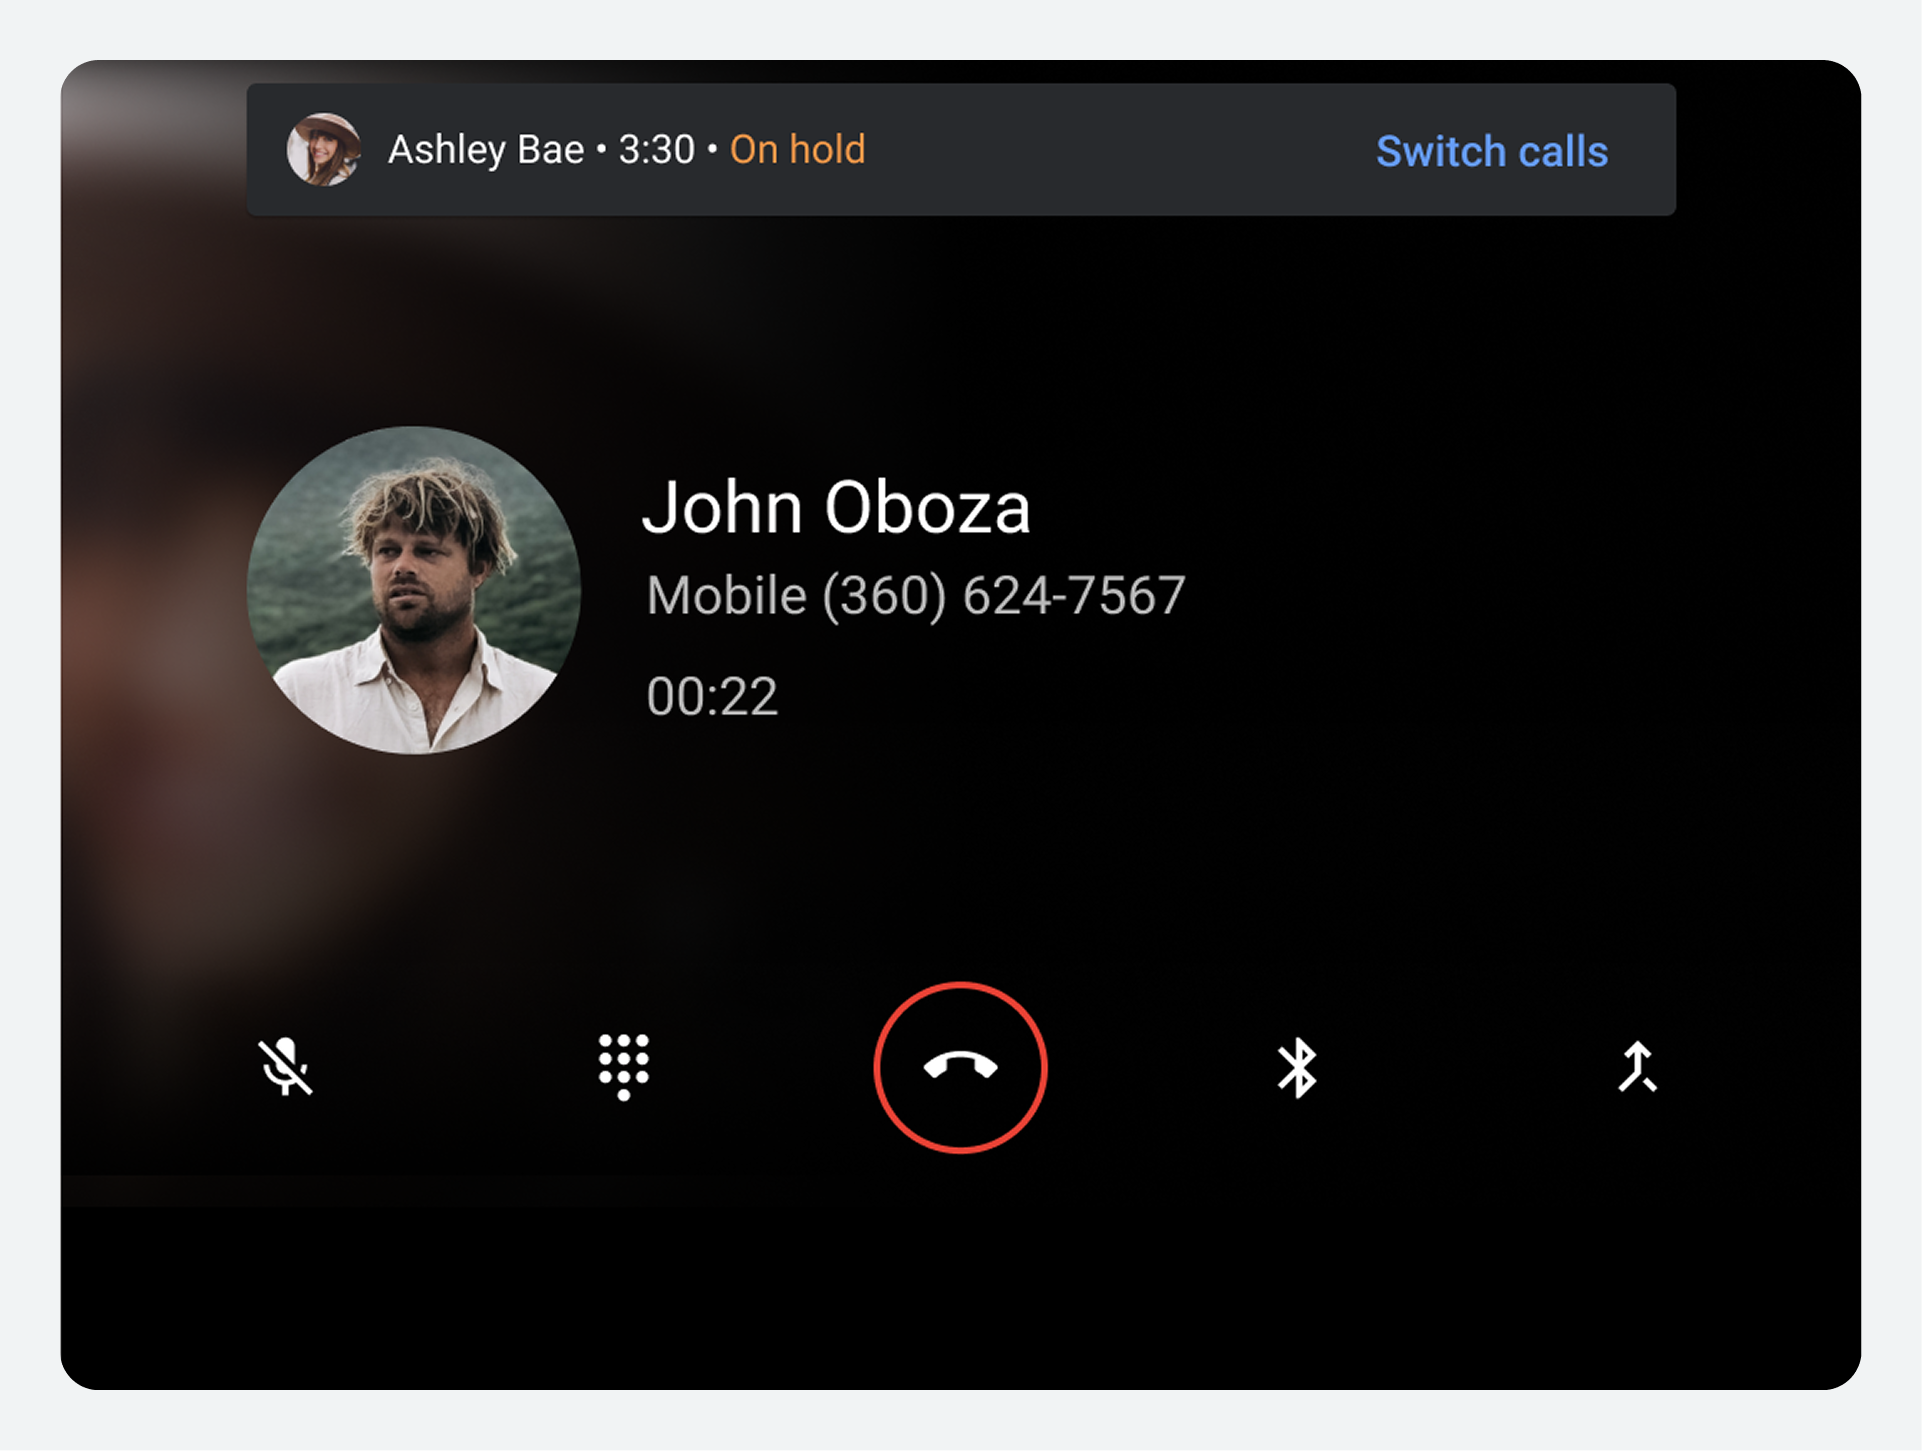
- Displays information about the new call in the main portion of the in-call status screen
- Displays information about the held call at the top of the screen
When there is an active call and an on-hold call, a user can:
- Switch between calls using the switch button at the top of the screen
- Merge the active and on-hold calls to create a conference call if one doesn't already exist
- Add the active call to an existing conference call that's on hold
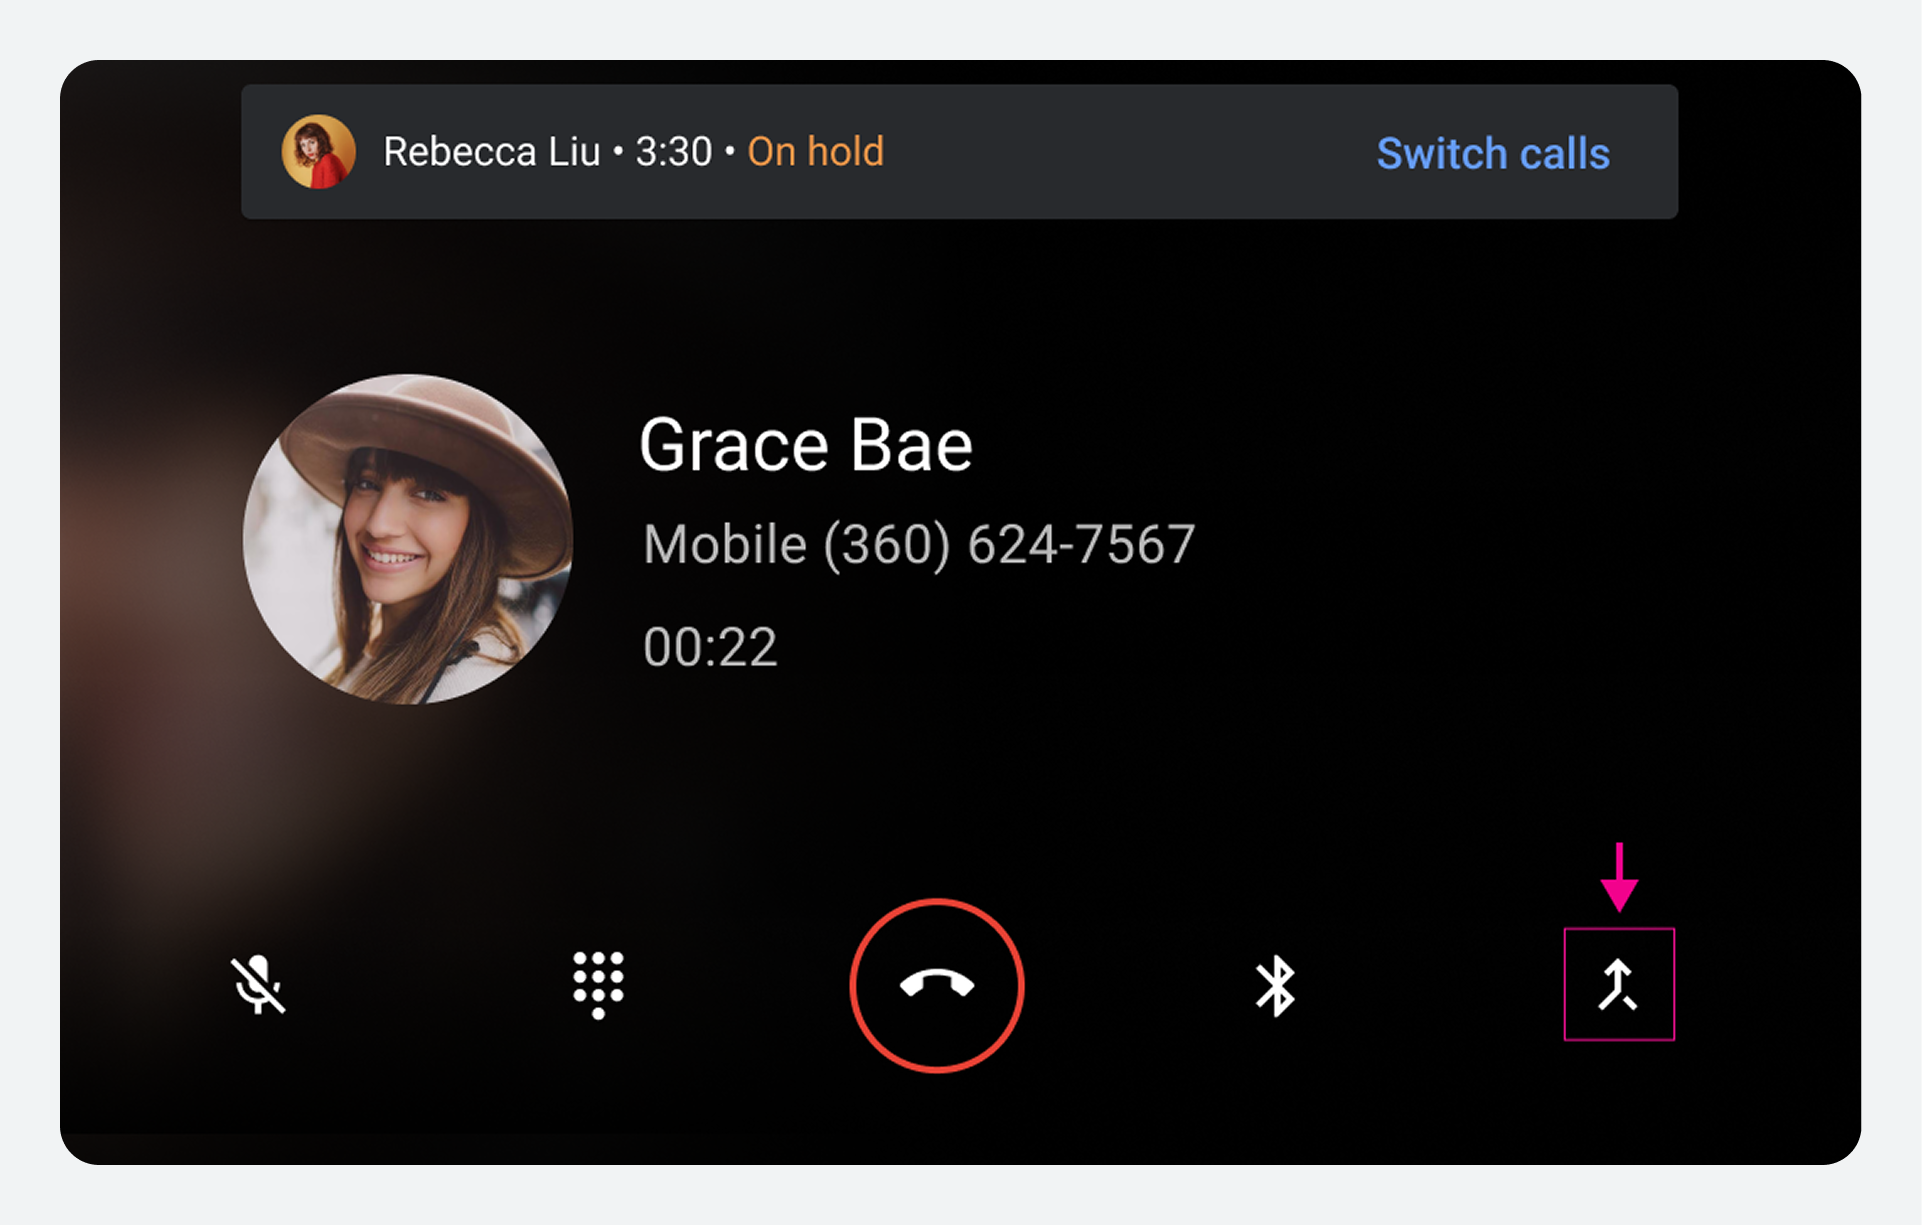
Merge calls into a conference call
When a user receives and answers a call while on a call, the original call is placed on hold. The Pause/hold button on the in-call control bar is replaced by a merge call button, giving the user the option to combine both calls into a single conference call.
Selecting the merge call button combines the calls.
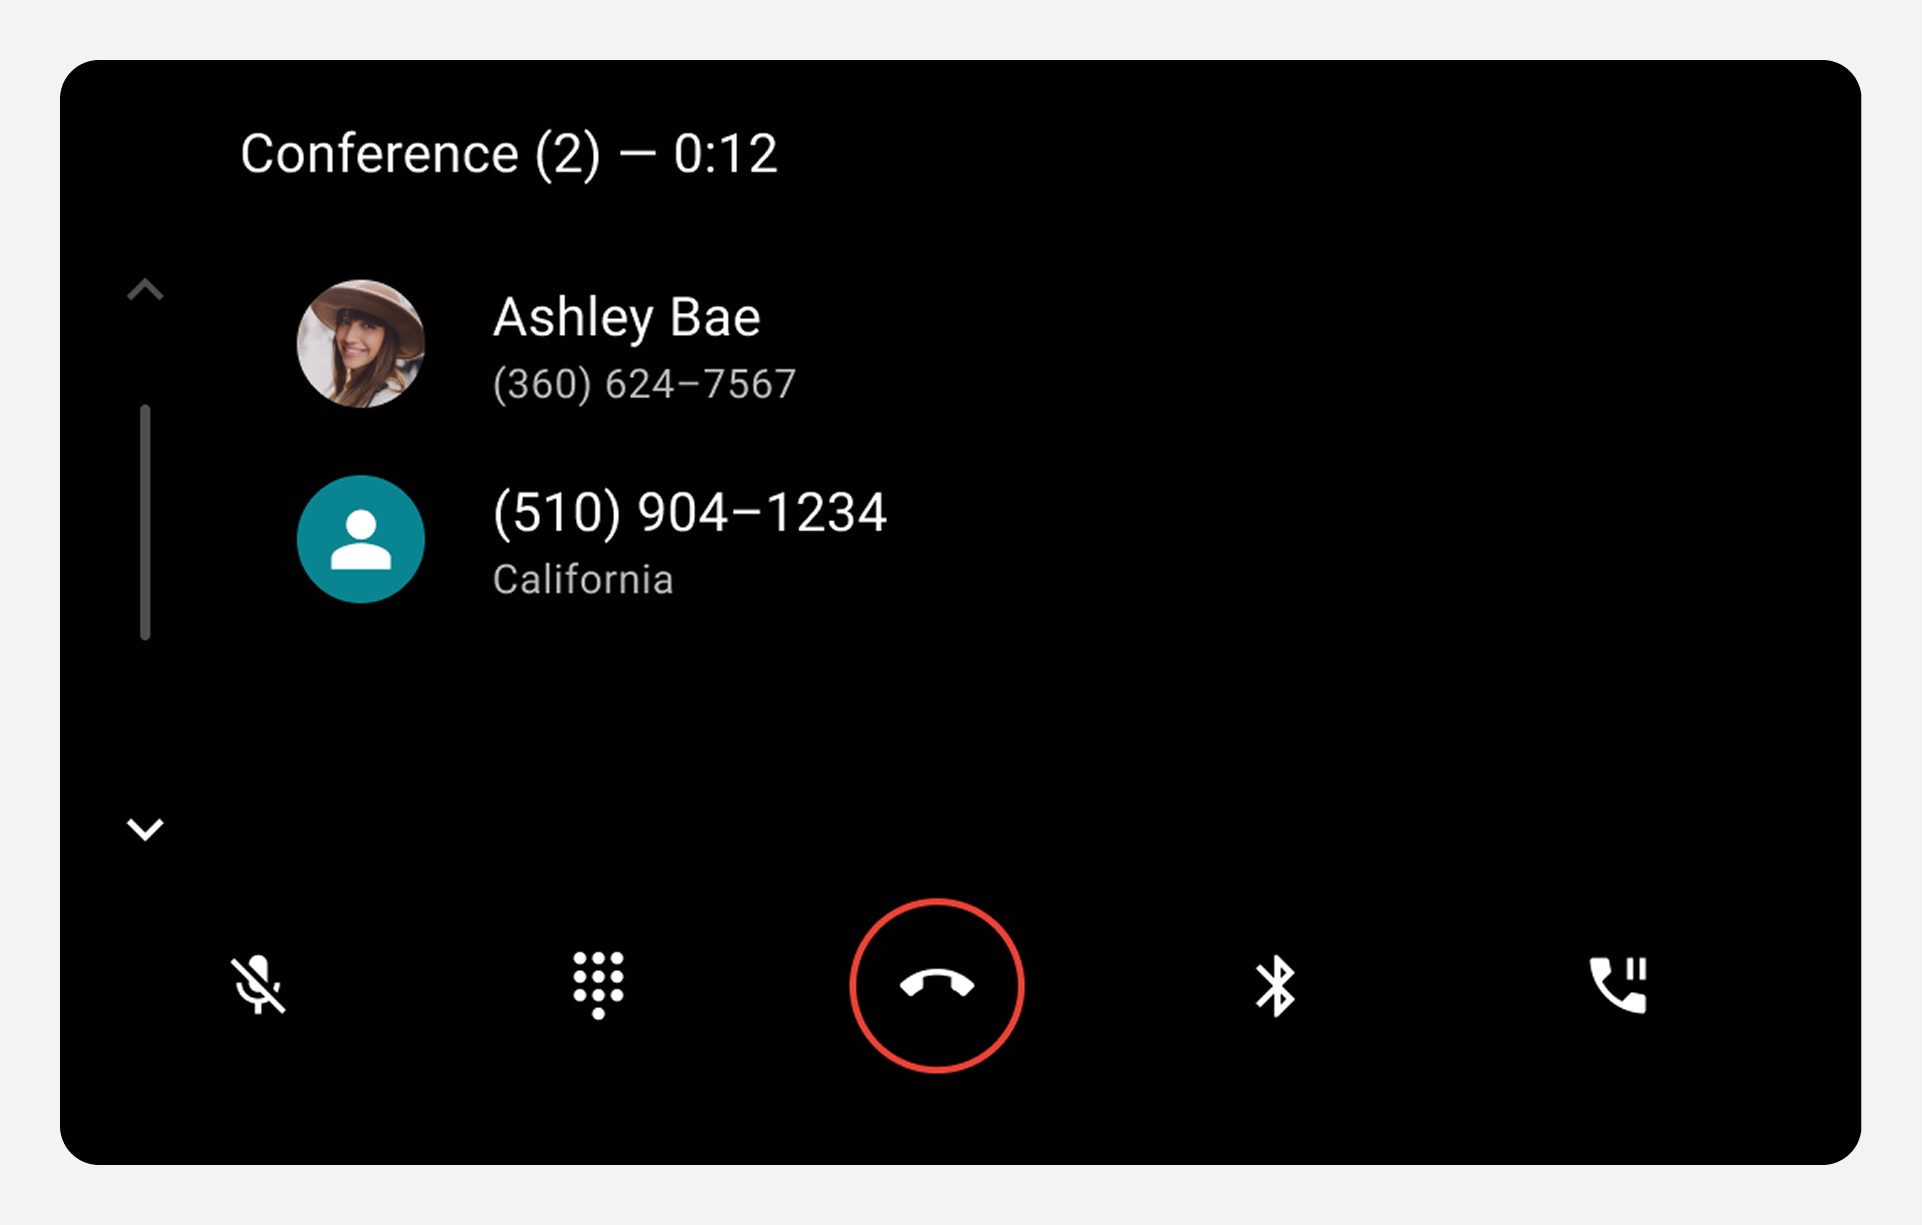
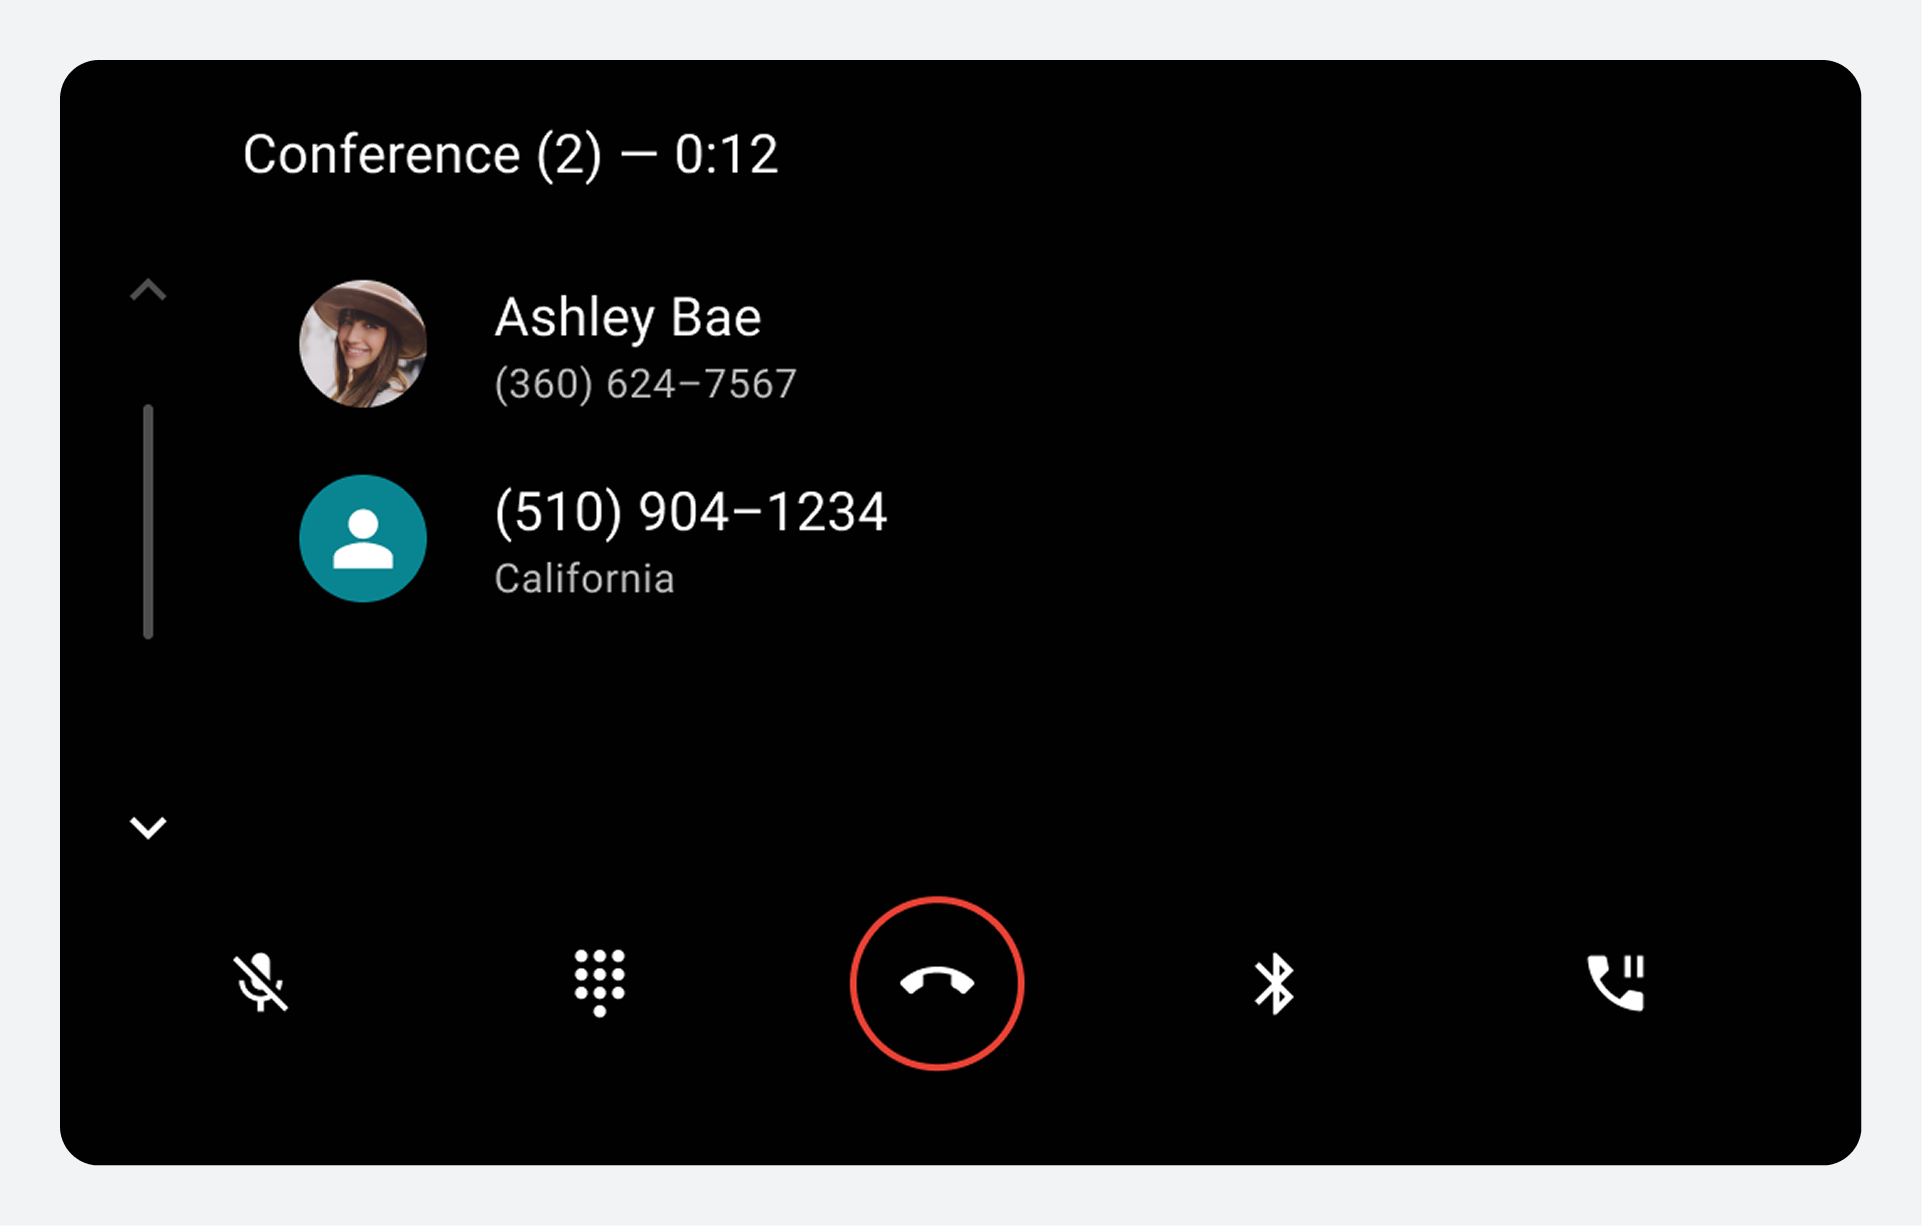
In a conference call, the in-call status screen displays the avatar, name (if known), and phone number for each caller. A status bar at the top of the screen shows the number of callers added to the conference call and the call duration.
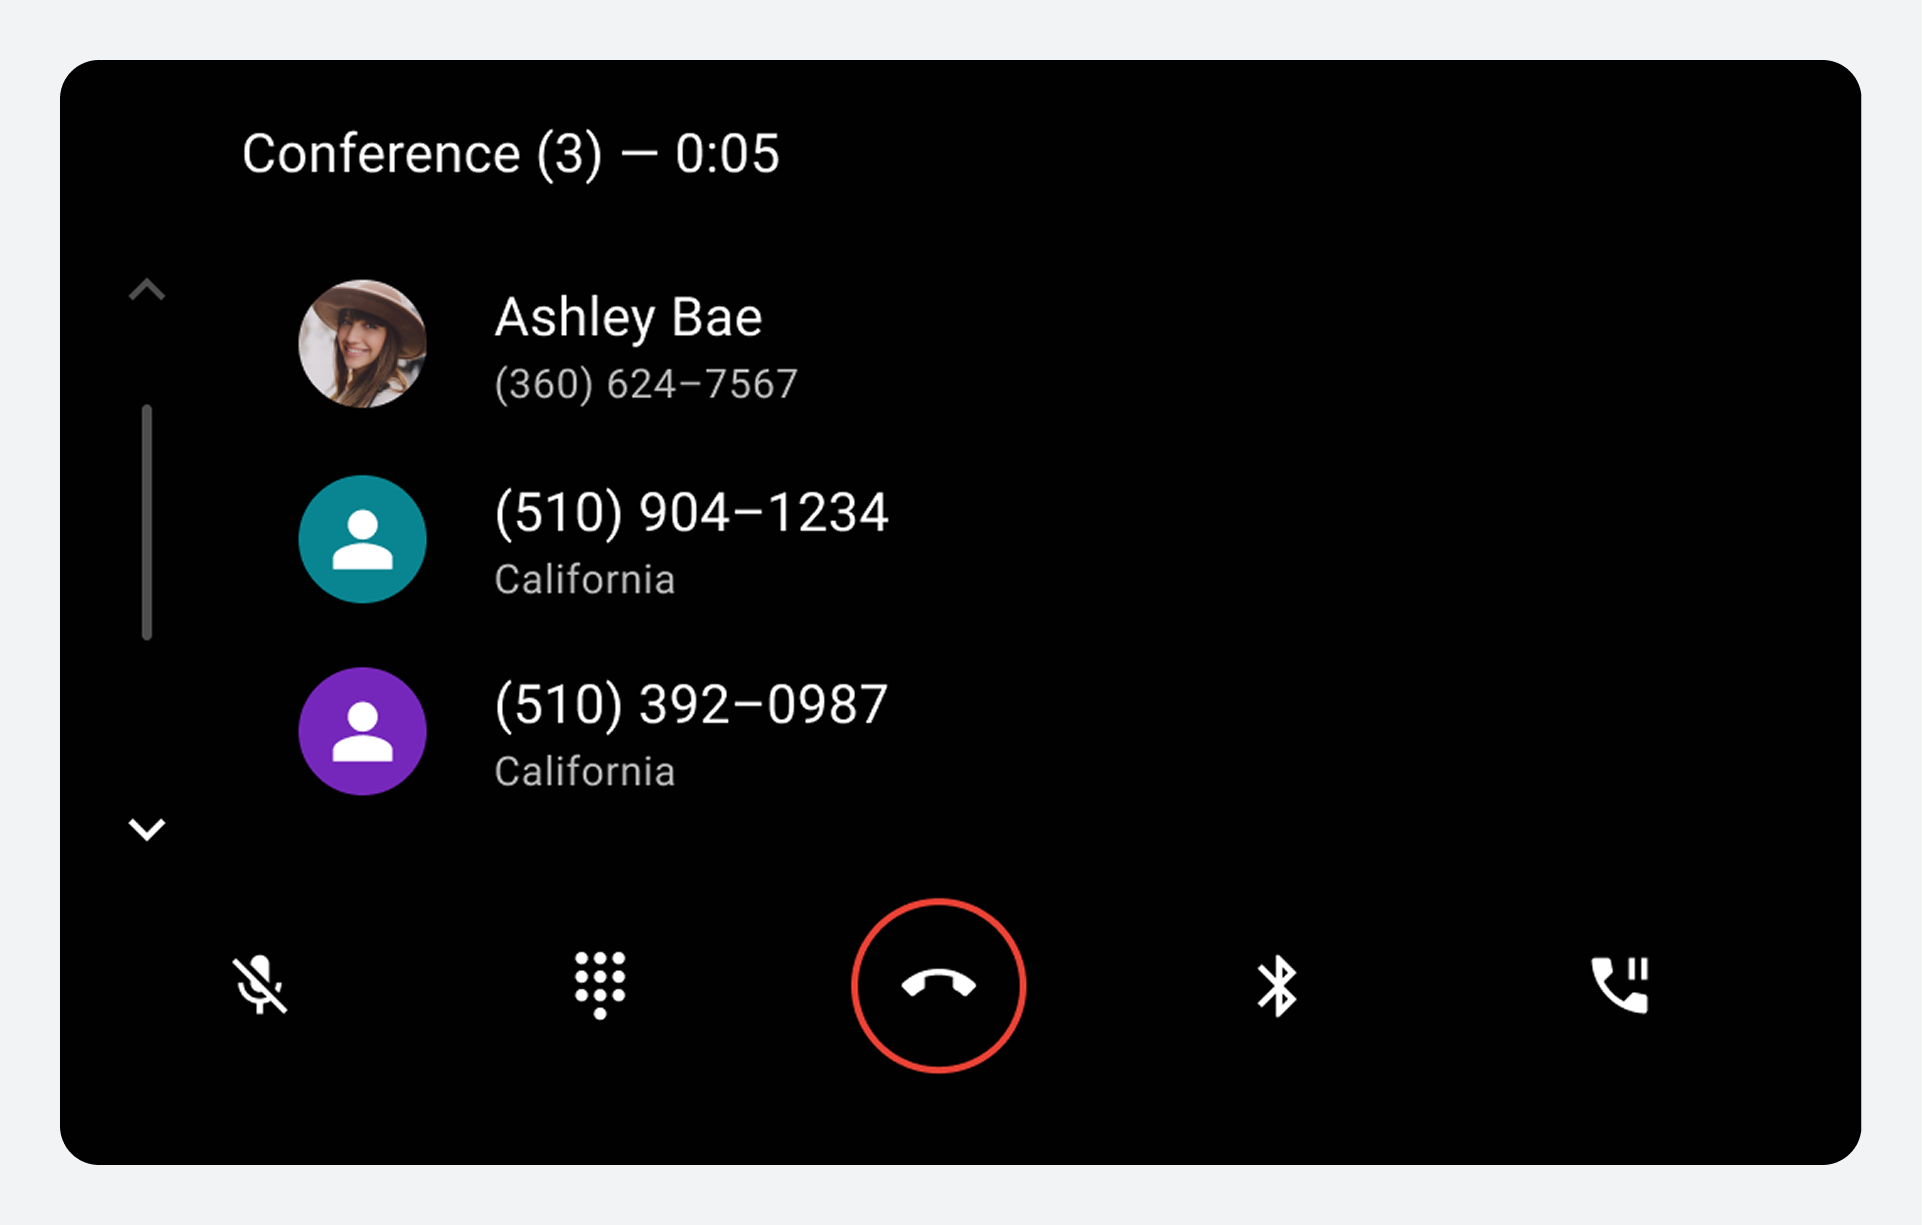
If a user receives and answers a call when already on a conference call, the conference call is placed on hold. The user can select the merge call button to combine the calls. The in-call status screen then displays a scrollable list of the callers.
When the user selects the End call button, the conference call is ended for all parties.
Manage calls
When users answer or place calls, Dialer displays an in-call status screen and control bar.
The status screen displays call information and the control bar provides options for managing and ending both placed and received calls. For received calls, the status screen and control bar allow the user to switch between two calls or to merge received calls into conference call.
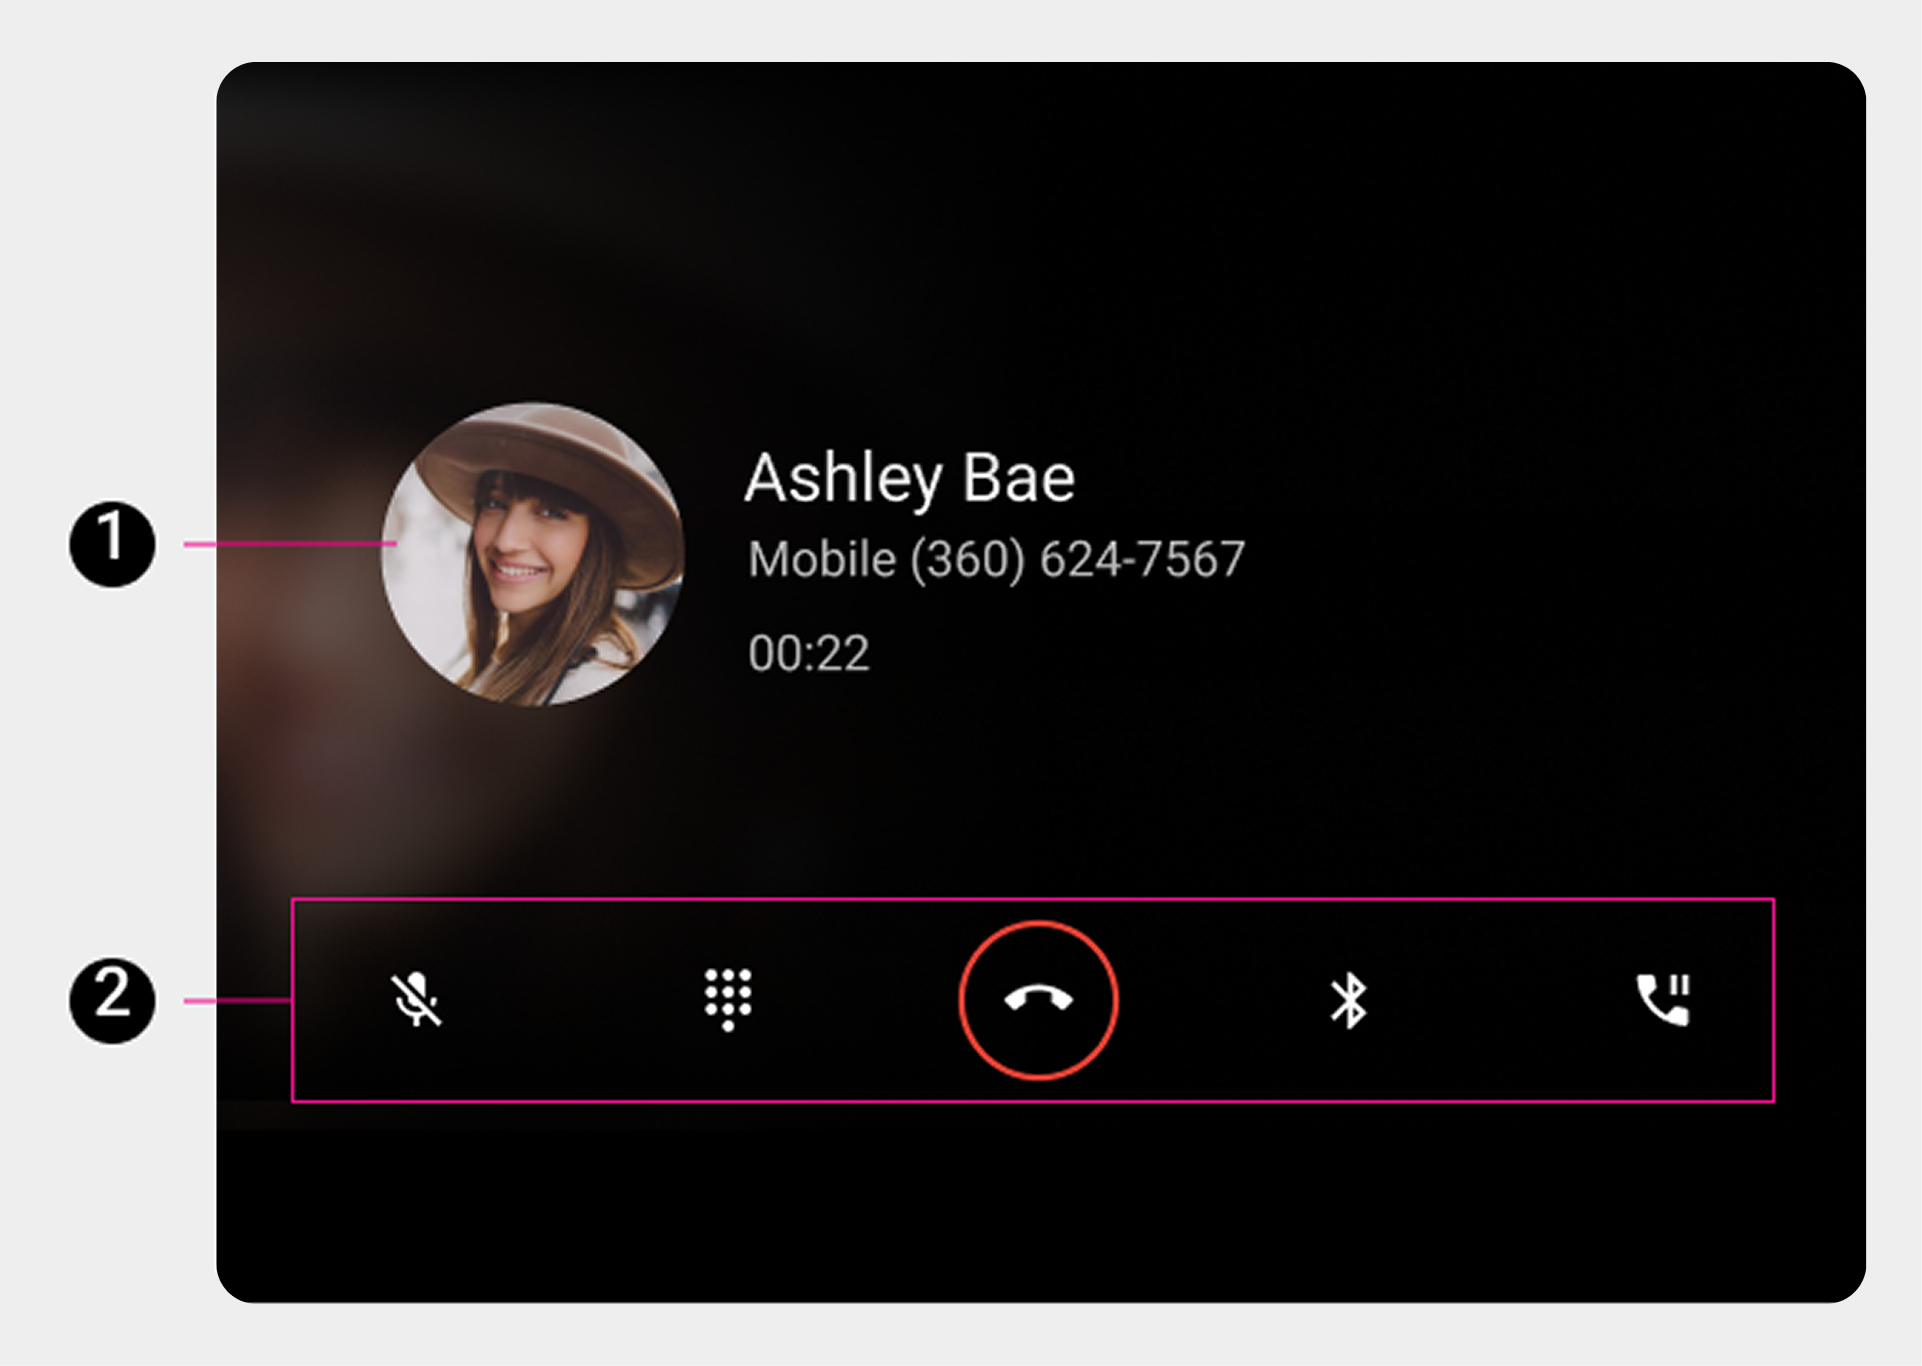
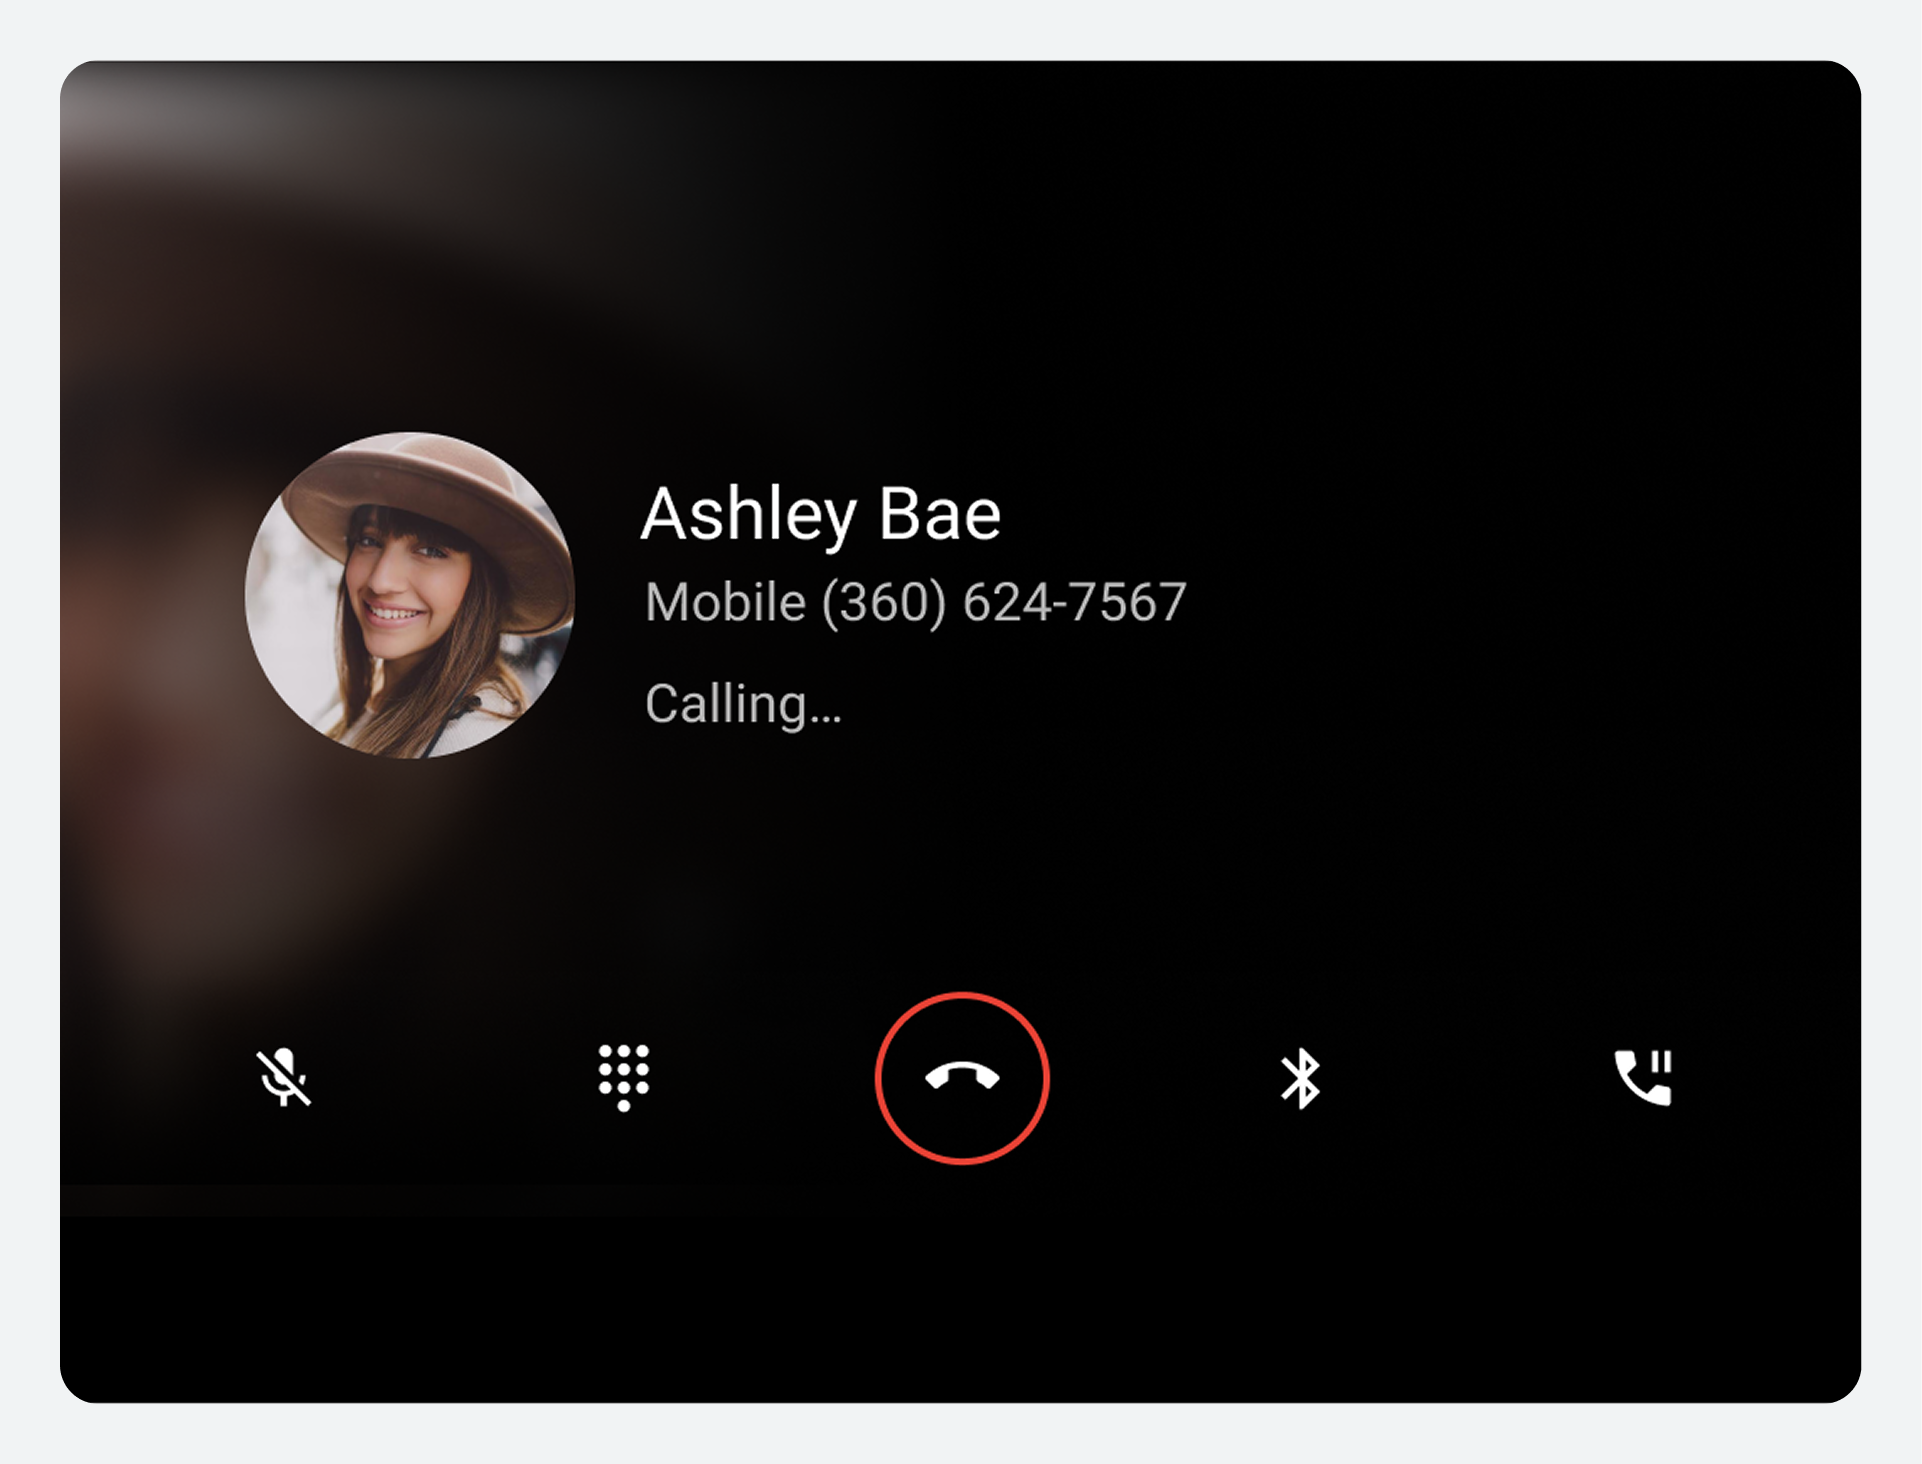
In-call status screen
After a user answers or places a call, Dialer displays an in-call status screen for the duration of the call. This screen includes the following elements:
- Contact information (either specific or general, depending on whether the contact is known or unknown)
- Call status (connection state or call duration)
- An in-call control bar that allows the user to manage or end the call
Contact information
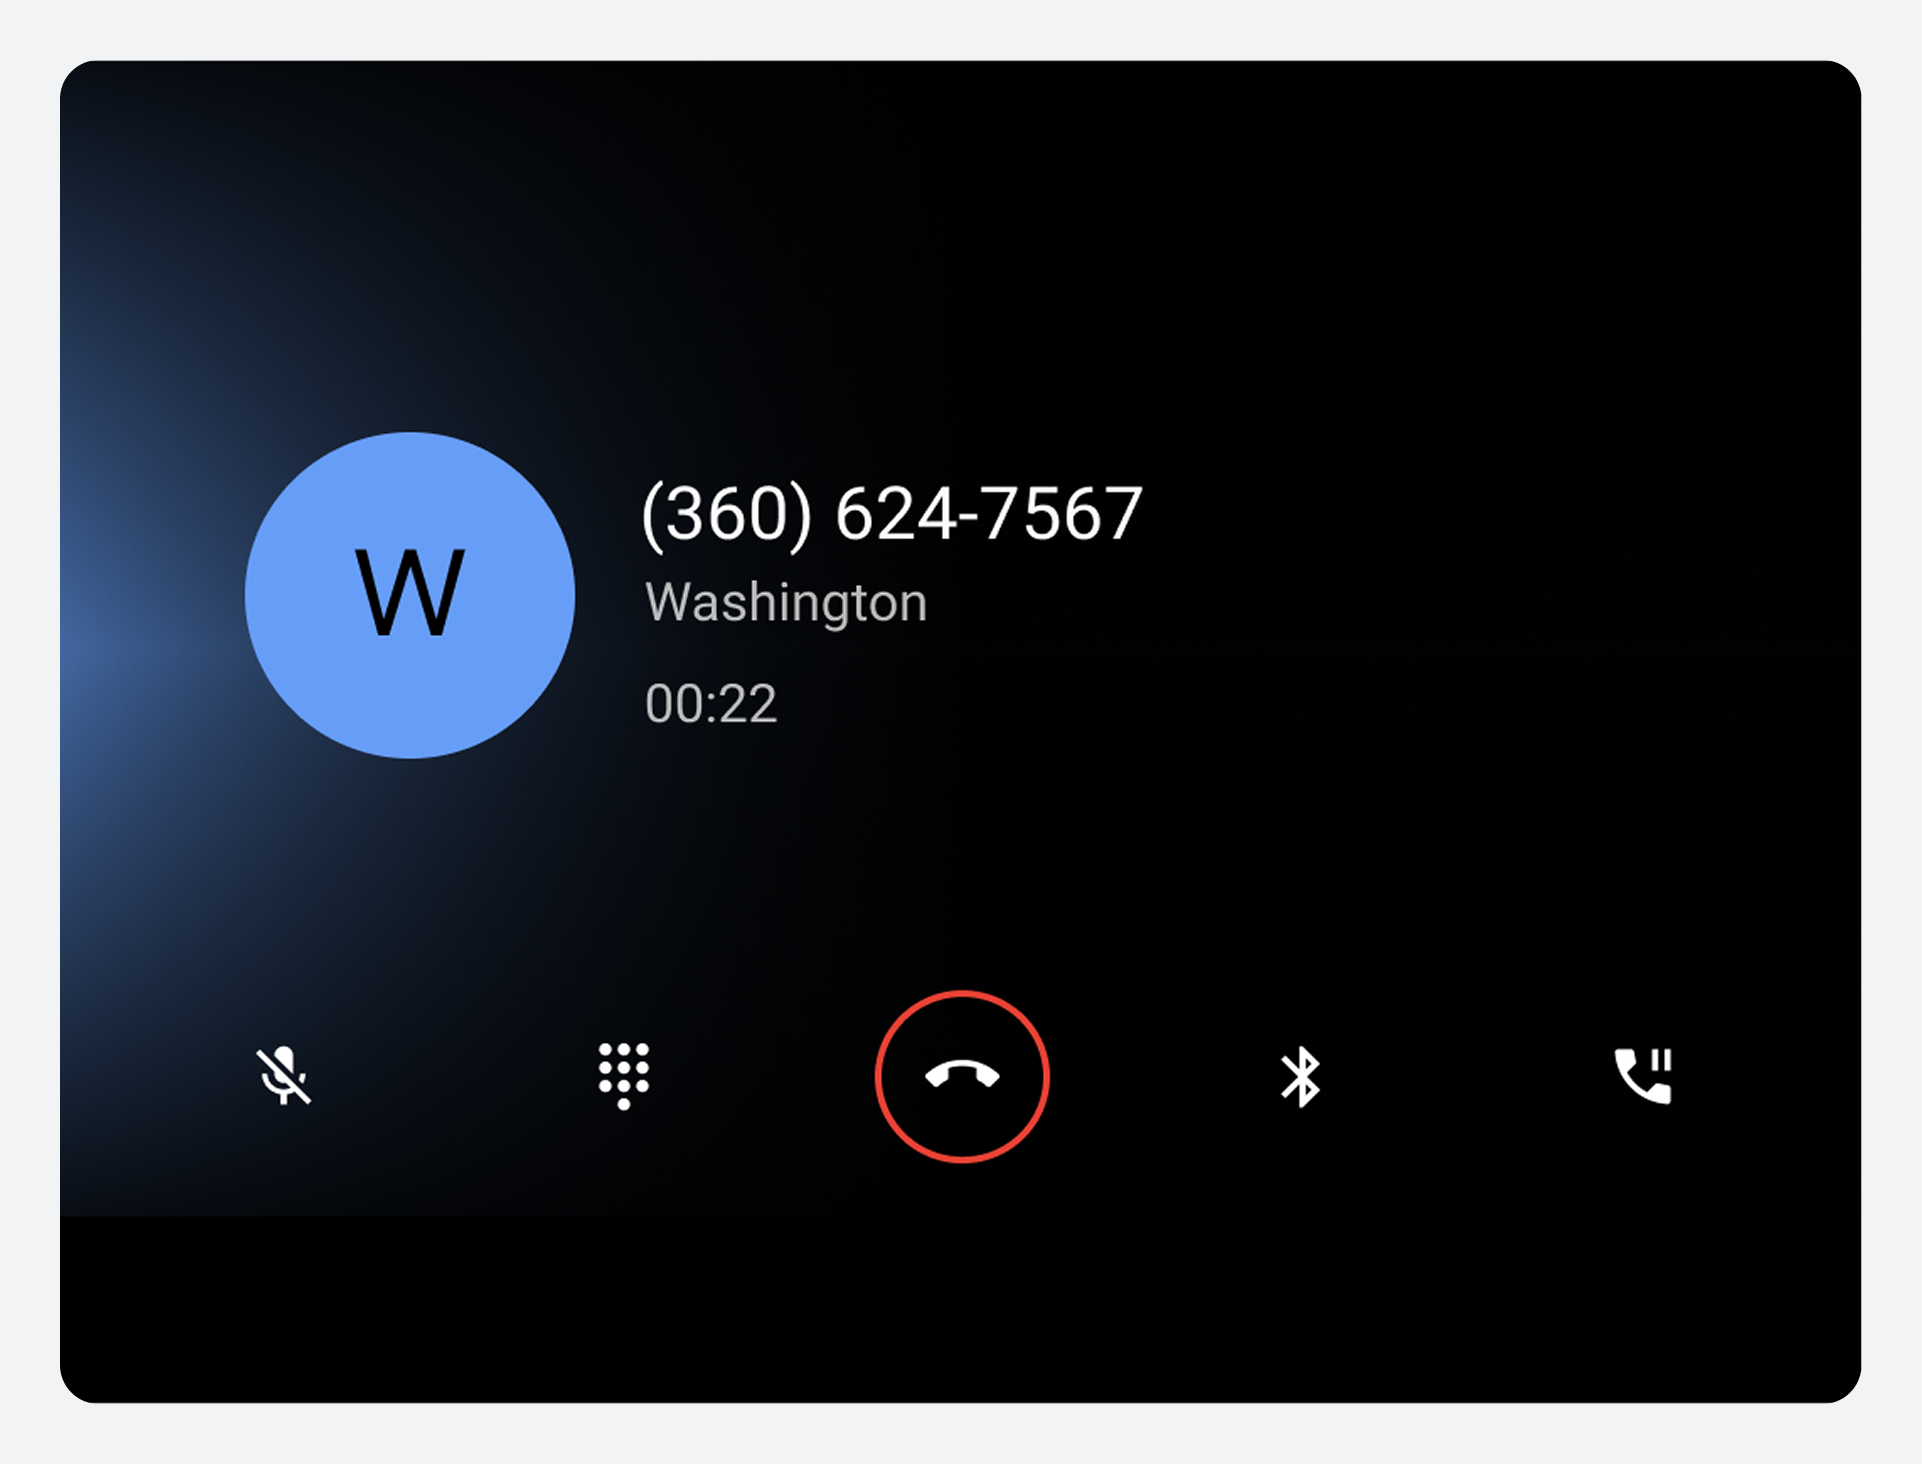
The contact information displayed in the in-call status screen differs based on whether Dialer recognizes the contact.

Call status
Below the contact information, users can see information about the call's status. Possible status messages include the following:
| Status message | Description |
|---|---|
Calling |
The user is placing a call, and the call hasn't been answered yet |
Ringing |
The user is receiving a call and must select either the Answer or Decline button (displayed on the in-call screen) Note: This status and set of buttons appear on the status screen only if the user touches the incoming-call notification without selecting its Answer or Decline button |
| 00:10 (or some other quantity of hours, minutes, and seconds) | The user has been connected to an ongoing call for the period of time indicated |
Conference call status screen
During a conference call, the in-call status screen displays the avatar, name (if known), and phone number for each caller. The status bar at the top of the screen shows the number of callers added to the conference call and the call duration.
The in-call status screen and call management options remain visible until the call is ended.
Control bar options
The in-call control bar allows users to manage calls. It provides controls for actions a user might want to take during the call, including ending the call.
The following table describes each control bar option:
| Call-out number | Control bar element | What it does |
|---|---|---|
1 |
Mute or unmute |
Allows users to mute or unmute themselves during a call |
| 2 | Dialpad | Provides access to the dialpad during a call, for actions such as choosing from numbered menu options |
| 3 | End call | Ends the call |
4 |
Audio source |
Allows users to choose whether to hear the call on the car's speakers or using the phone's standard audio output |
5 |
Pause or hold or Merge |
Permits users to suspend an ongoing call without ending the call Allows users to combine calls to form a conference call |
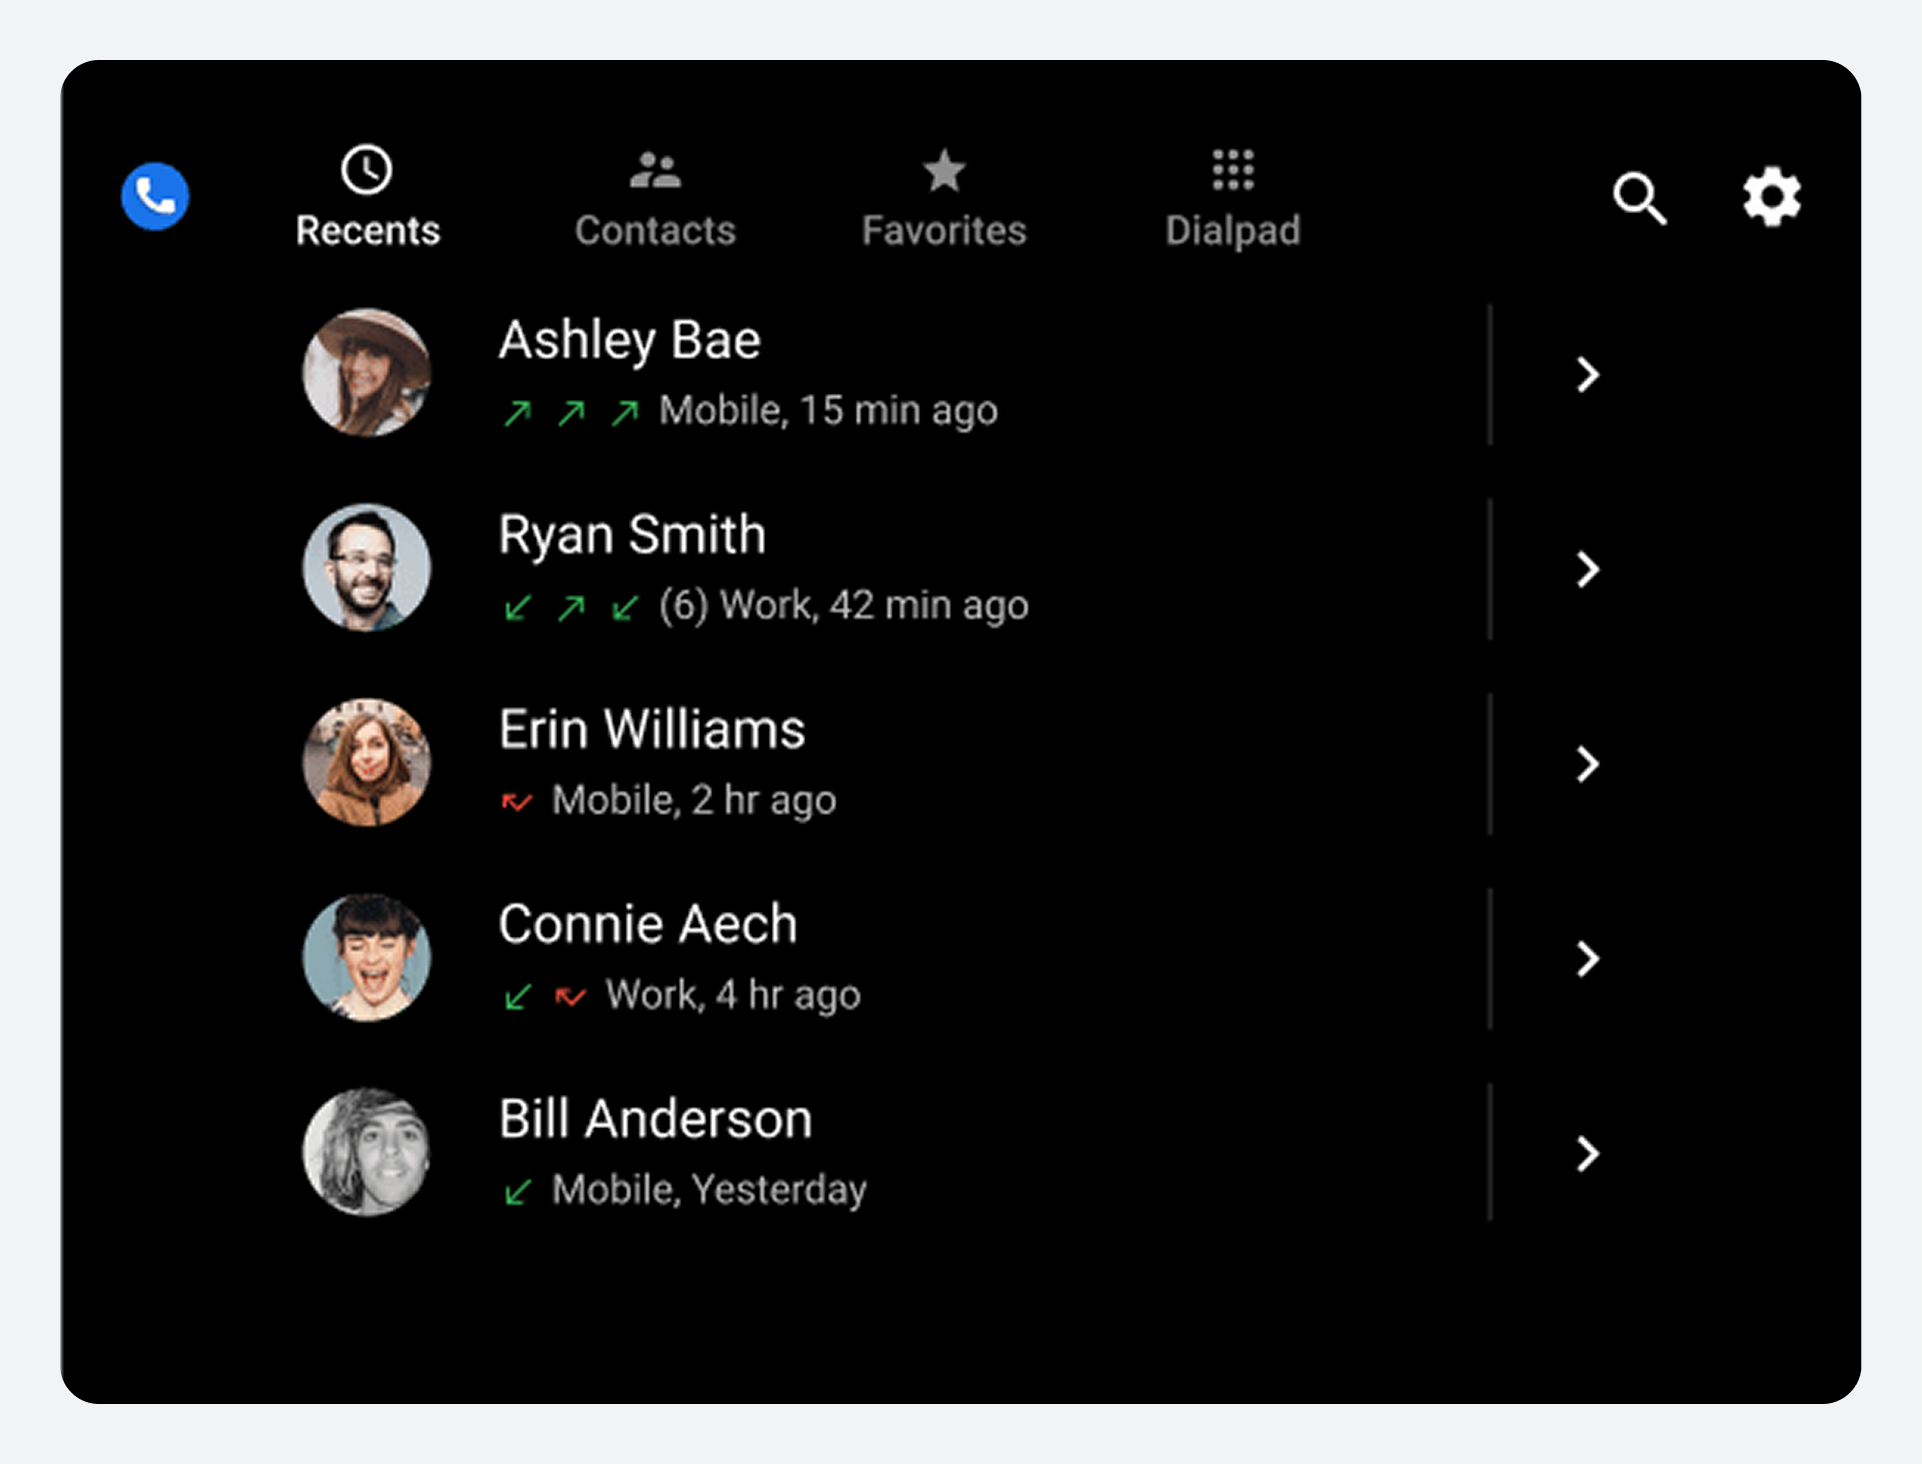
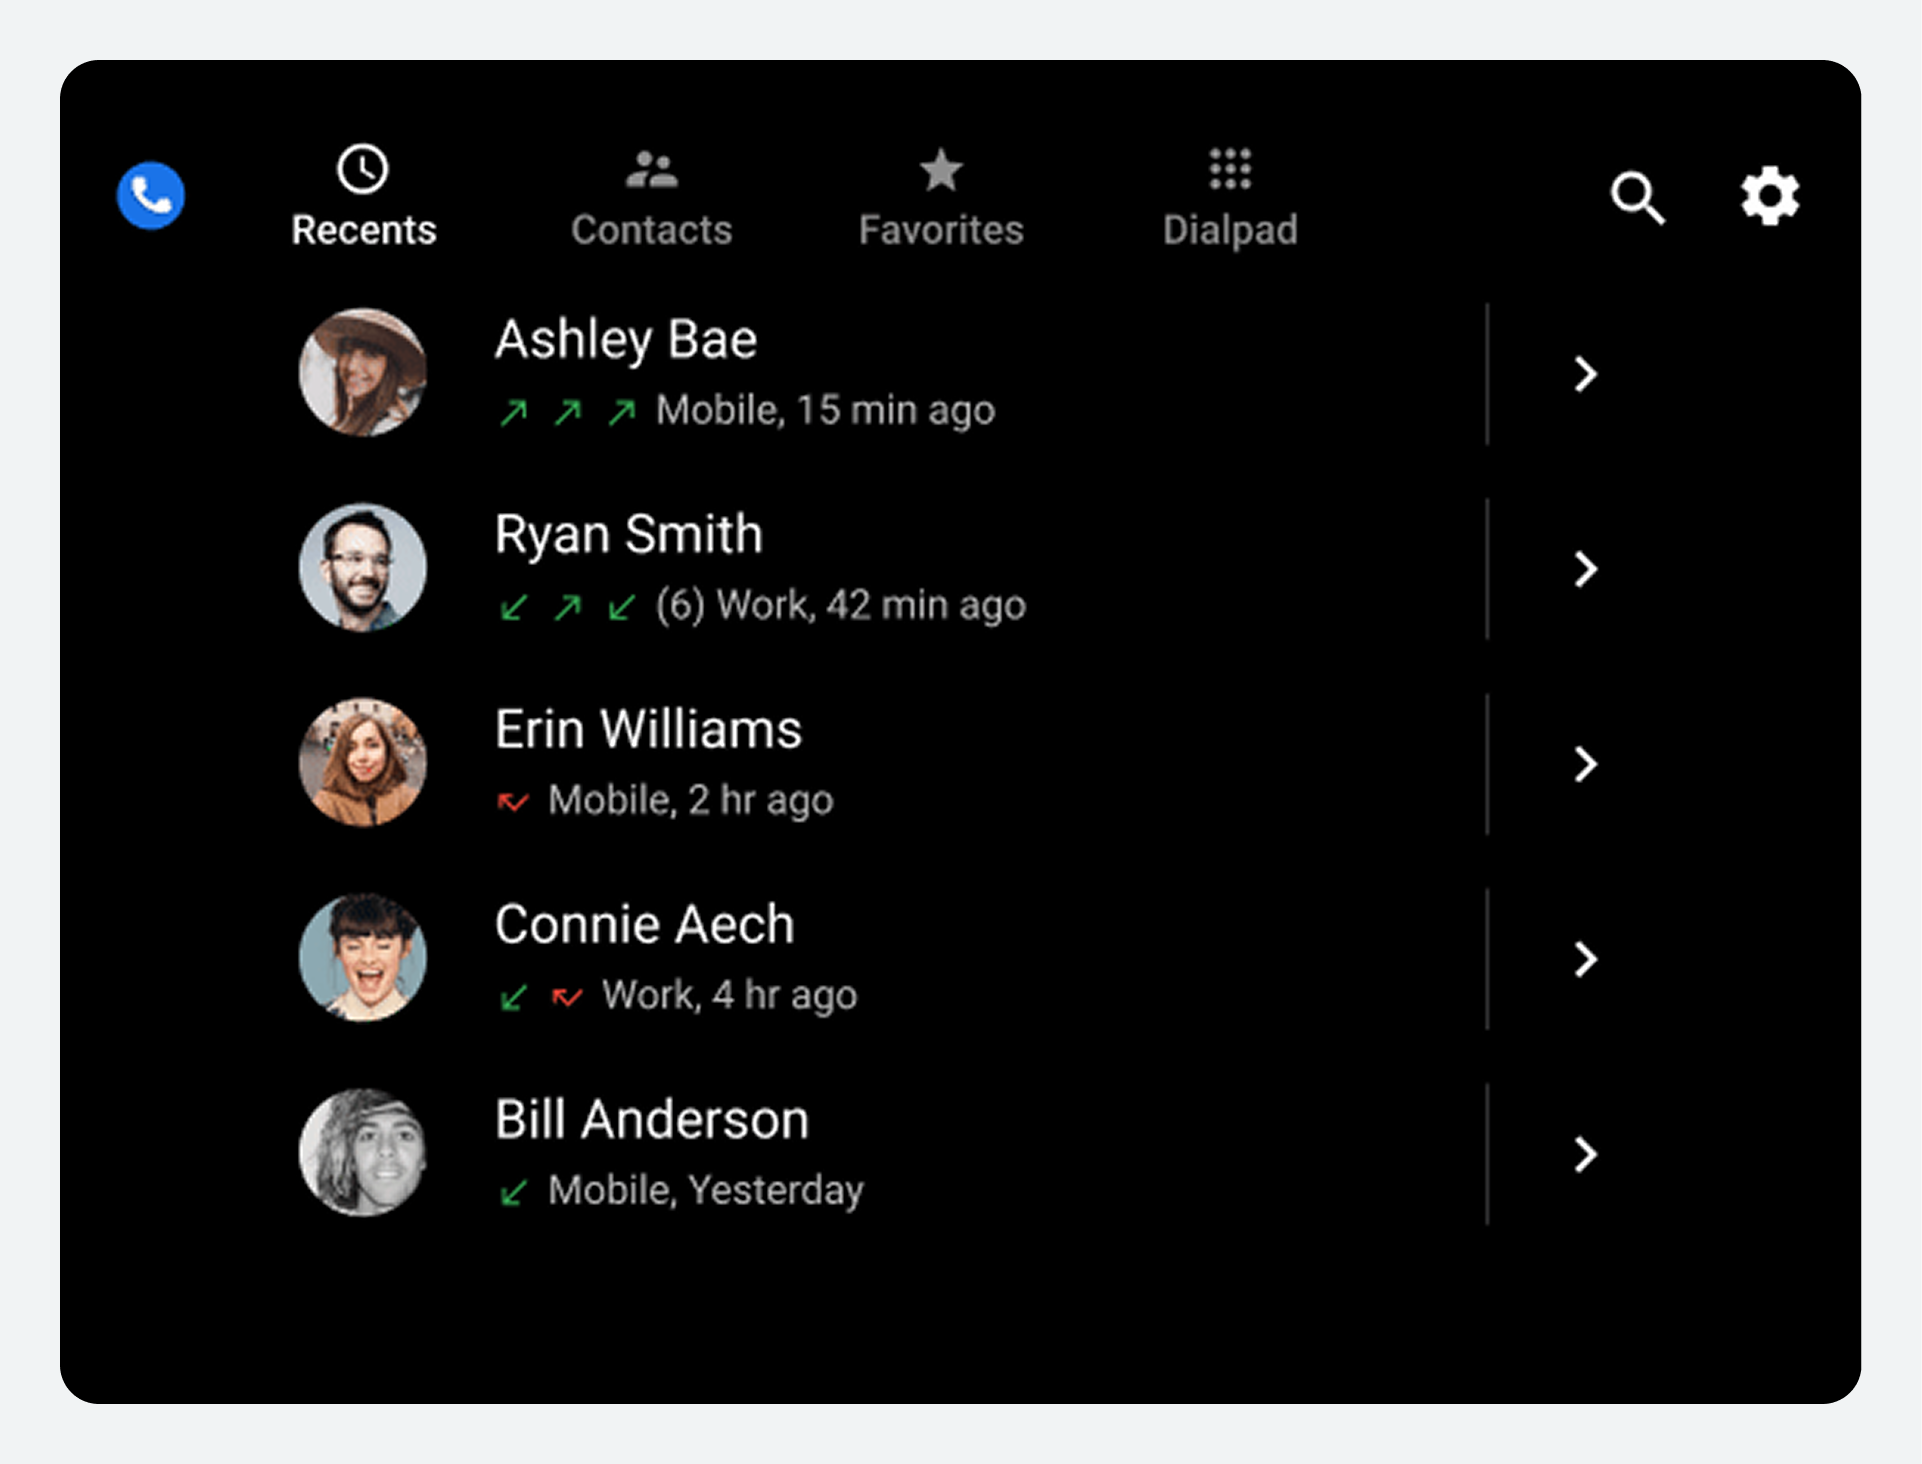
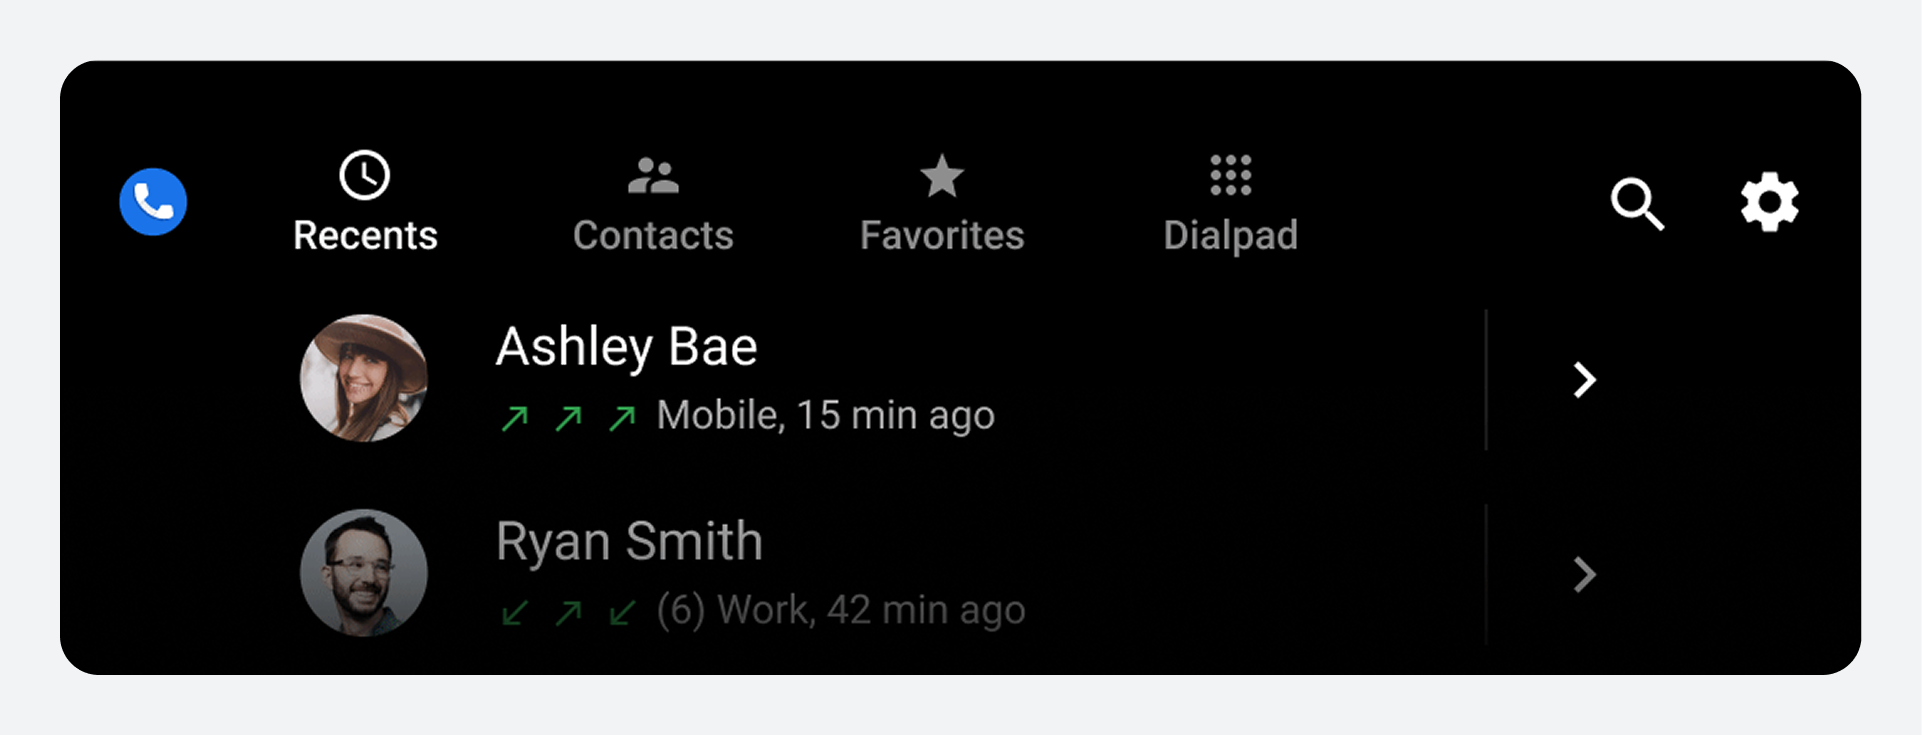
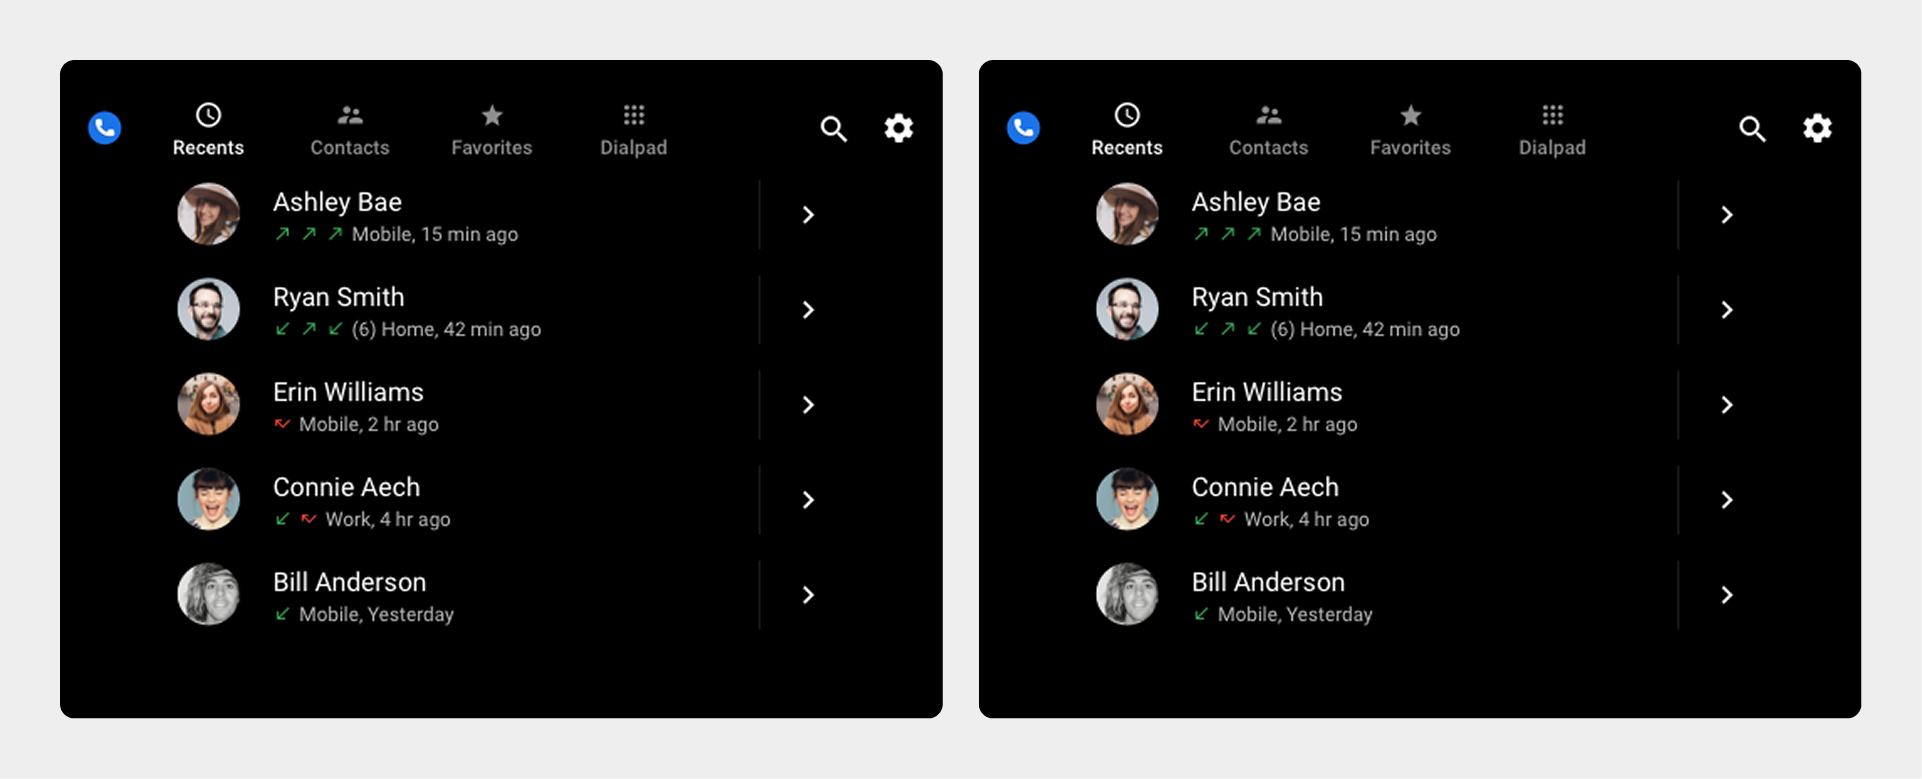
View recent calls
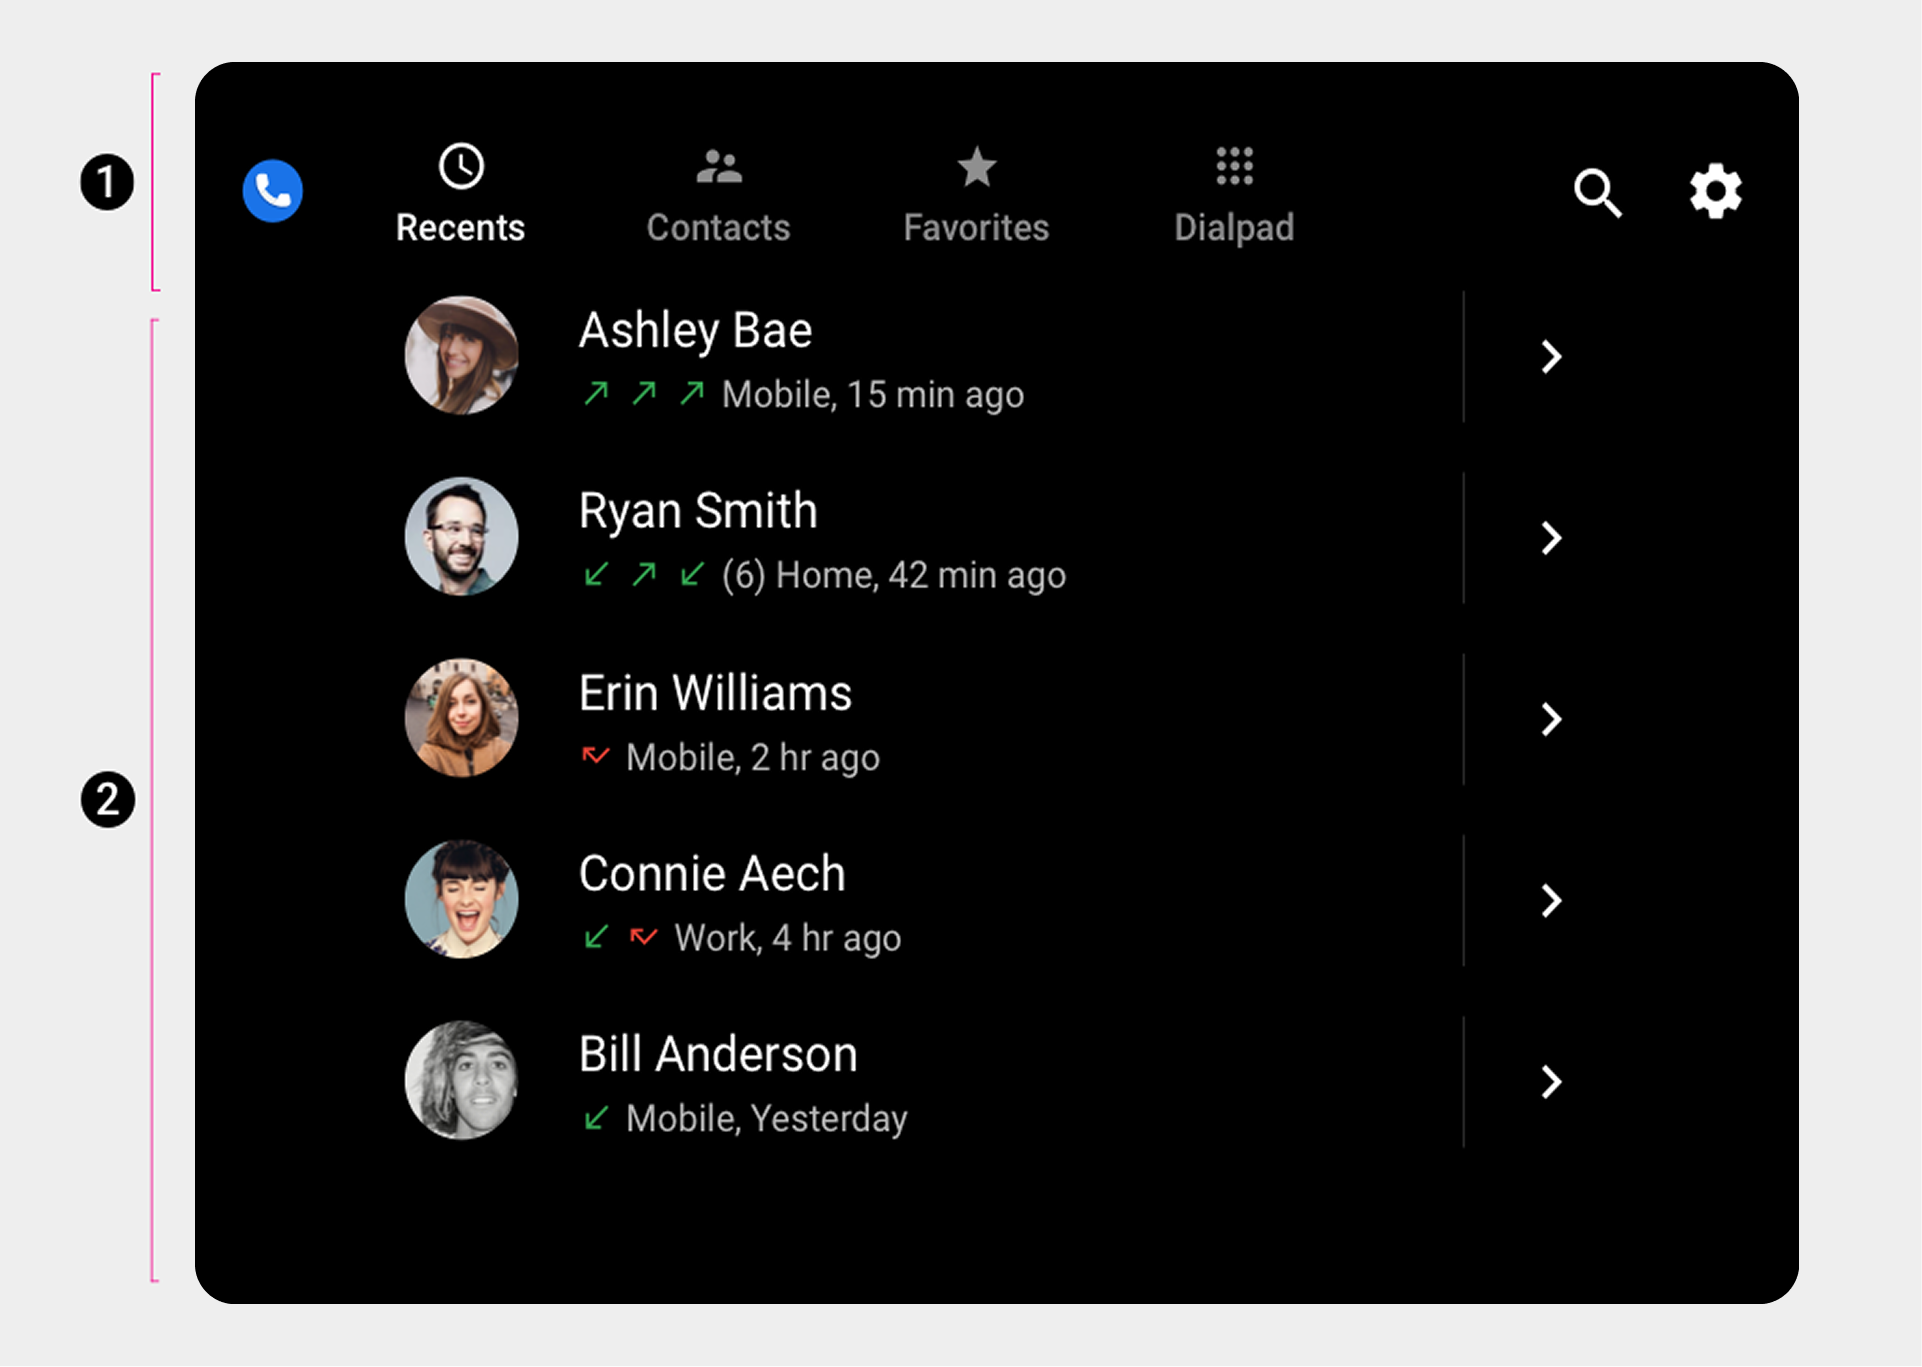
The Recents view lists recent contacts in chronological order, with details of their call activities.
Users can scroll vertically through the list to view the types of call activity and the time elapsed since each contact's most recent activity.
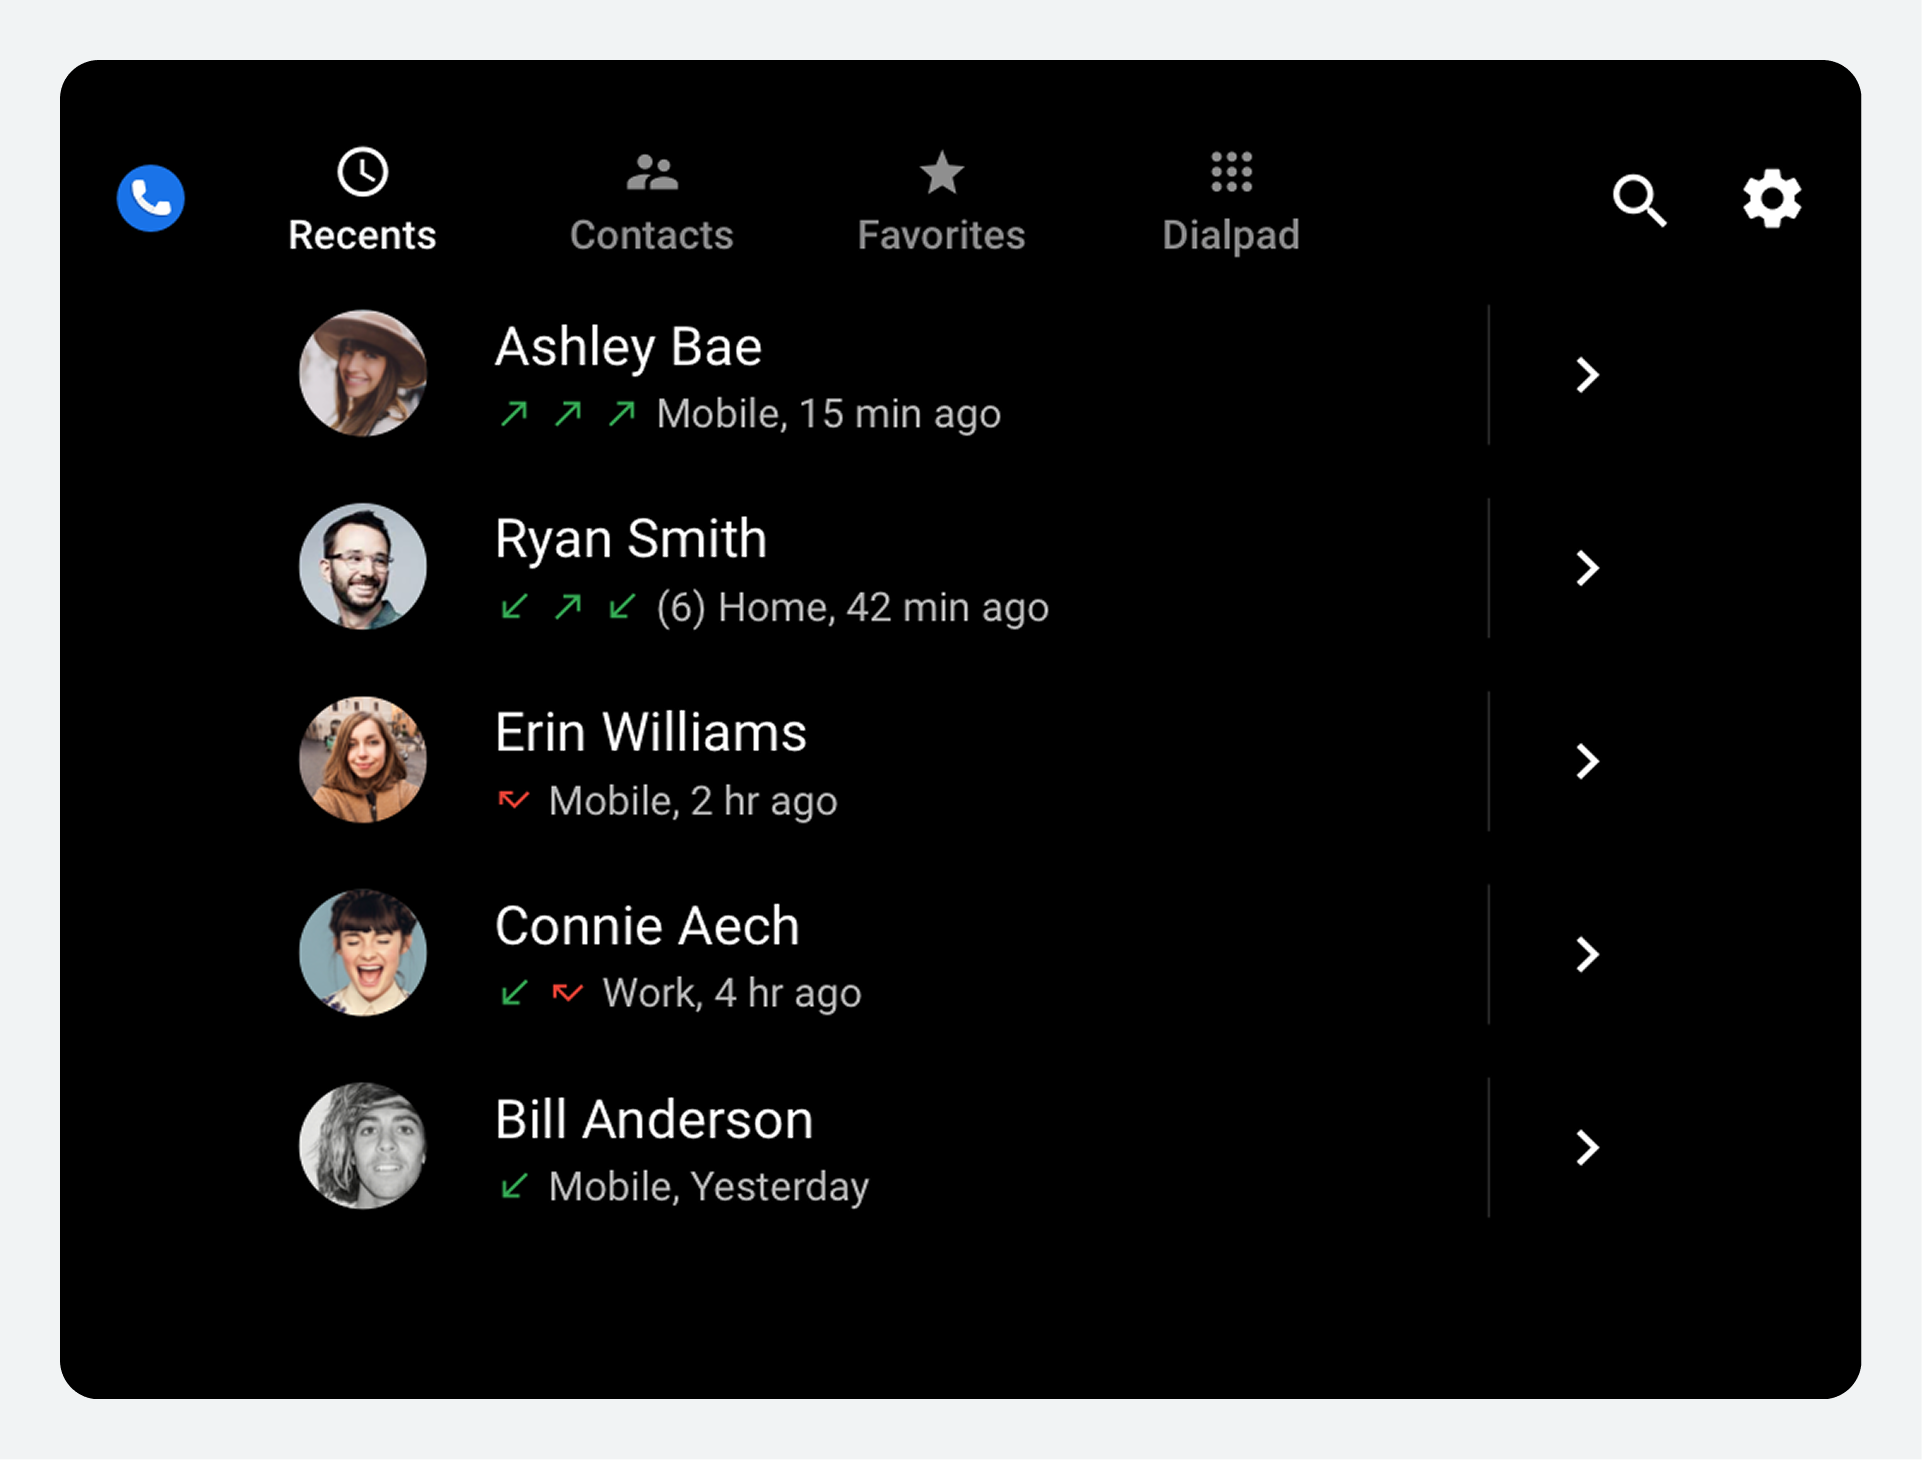
Details displayed in the Recents view include:
- Calls placed to a contact (green upward arrow)
- Calls received from a contact (green downward arrow)
- Missed calls (red arrow)
- Time elapsed since most recent call activity
- Total number of recent activities (in parentheses), if greater than 3
Users can select a contact in the list to place a call to the contact's preferred number. They can also select a contact's details icon on the right-hand side of the screen to see more information about the contact, such as a list of all the contact's phone numbers.
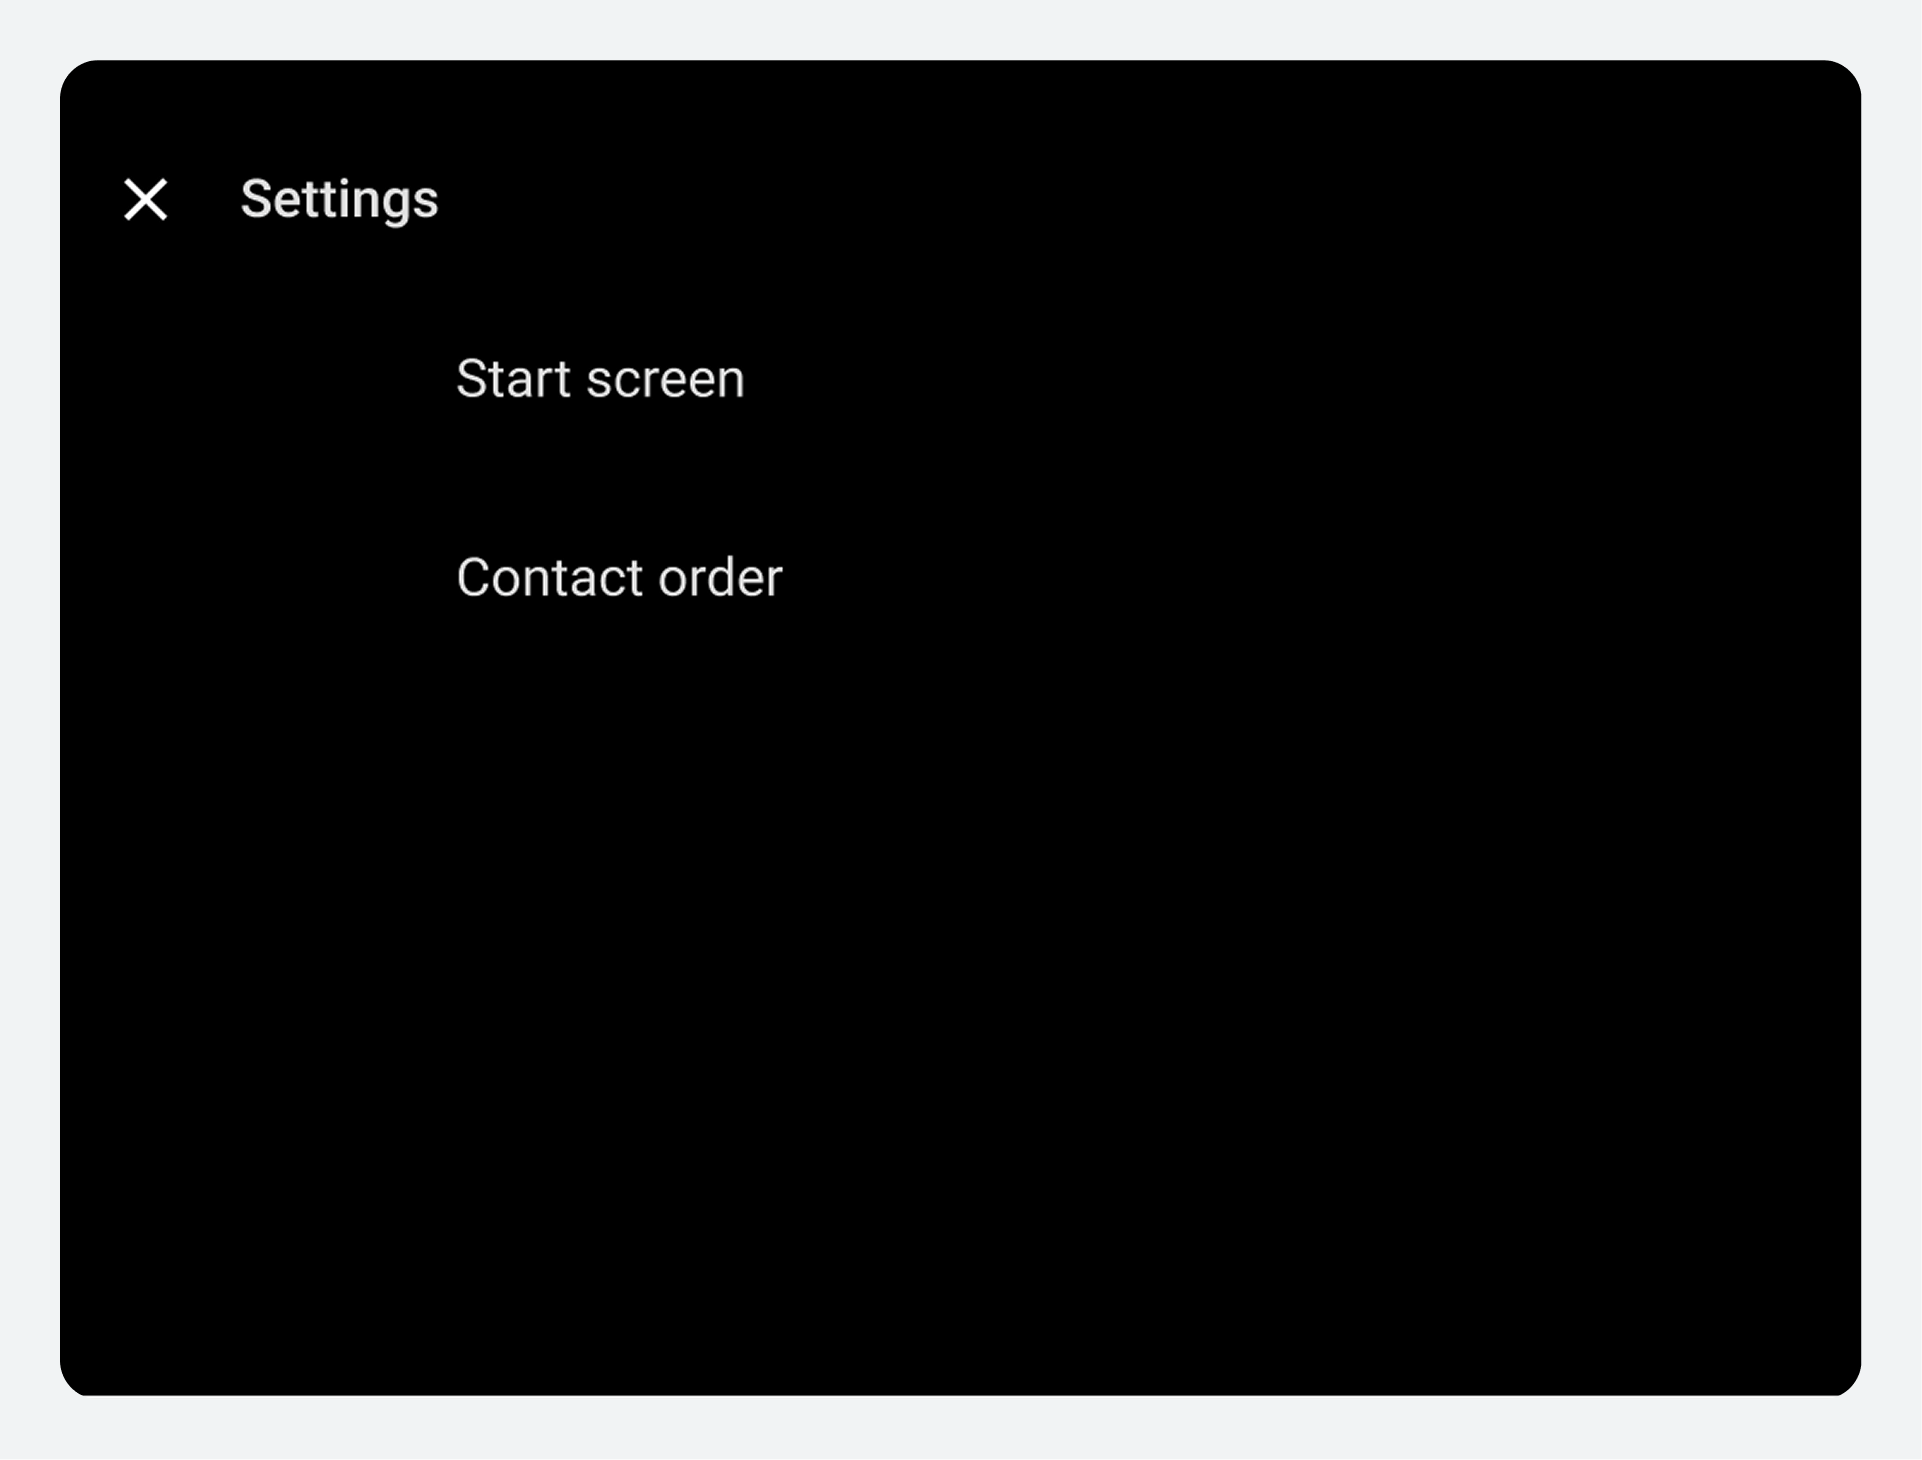
Adjust settings
In the Settings overlay, users can choose their Dialer start screen and how their contacts are ordered.
Users access the Settings overlay from the Settings app control in the app bar (the gear icon). In addition to providing menu options for adjusting settings, the Settings overlay includes a back button to return users to their previous location in Dialer.
Choose a start screen
When a user selects Start screen from the Settings overlay, a dialog presents the following options:
- Recents
- Contacts
- Favorites
- Dialpad
The next time the user starts Dialer, it displays the selected start screen.
Specify list order for contacts
In the Contacts view, contacts are displayed in alphabetical order by first or last name. When a user selects Contact order from the Settings overlay, a dialog lets them choose which they prefer.
